Coming off on lead is the moment every new leader dreads. The good news is that a lead fall is something you can learn to take well, and then practise in small steps until it stops being the scary bit.
Here is how to fall safely when climbing, in short. Keep the rope in front of your legs, tell your belayer when a fall might be coming, and when you go, let go cleanly. Shout “falling”, look down, breathe out, keep your legs bent and your hands off the gear, and meet the wall with your feet.
We will break each of those down, then lay out a practice plan you can take to the wall.
Watch it first
The pick is a three minute film from REI, and of the videos we graded, it is the one that covers the whole job in one go. Where the rope goes, what to shout, how to take the fall itself, and how to start practising. It is short and clear, and its main points line up with the BMC’s own advice on taking a lead fall.
REI is an American outdoor retailer. The video ends by pointing you to REI’s own climbing classes, and its description links to the shop. Nothing in the teaching names a product or a brand, so the sales angle does not shape the advice.
Rope position is from 0:28, the calls from 1:16, and taking the fall from 1:47, with a short practice plan at the end from 2:31. Because it moves fast, this guide slows each part down, and builds a fuller practice plan with the help of two other good videos.
Are you ready to practise lead falls?
This guide is about falling on a rope, on lead, on bolts at a sport crag or on a climbing wall. Falling onto trad gear brings its own question, whether the gear will hold, and falling off a boulder onto mats is a different technique again. Neither is what this covers.
Before you practise lead falls, you want three things in place.
- You are leading already. Clipping smoothly and keeping the rope tidy, on routes well inside your grade. The Insiders, whose practice plan we use below, make that mileage their first step (0:47), before any falls at all.
- A belayer who has been taught to lead belay, and who you trust. It is the first point in The Insiders’ closing advice (12:56), and the BMC says to choose a belayer you have complete confidence in.
- A partner check before every climb. The BMC and Petzl both say to check each other before you leave the ground. That means harnesses, the tie-in knot, the belay device, and a knot in the end of the rope. If your harness is new, our guide to choosing a climbing harness covers the fit check.
Read this before you practise
This article and the video are not a substitute for proper instruction. Learn to lead, and to take your first lead falls, with a qualified instructor or on your climbing wall’s lead course. Use this guide to understand what you are being taught, and to practise it afterwards.
Never fall with the rope behind your leg. It can flip you upside down.
Only practise where there is nothing to hit. Steep or slightly overhanging, several bolts off the ground, with no ledges, roofs or big volumes below you.
Keep the falls small. You can always go a little bigger next time.
Where should the rope be when you fall?
This is the one that matters most. As the video says at 0:28, you want the rope to run straight down to your last quickdraw without any part of your body in the way.
Keep the rope between you and the rock. If it gets behind your leg or ankle and you fall, the video explains at 0:38, it will flip you upside down and you lose control.
Trevor Massiah of Rock and Sun, a qualified mountaineering instructor, puts the order simply in his rope awareness video (1:32). The rock, then the rope, then your legs. Fall the wrong way round, he says at 0:29, and you go upside down, with a serious risk to your head, neck or back.
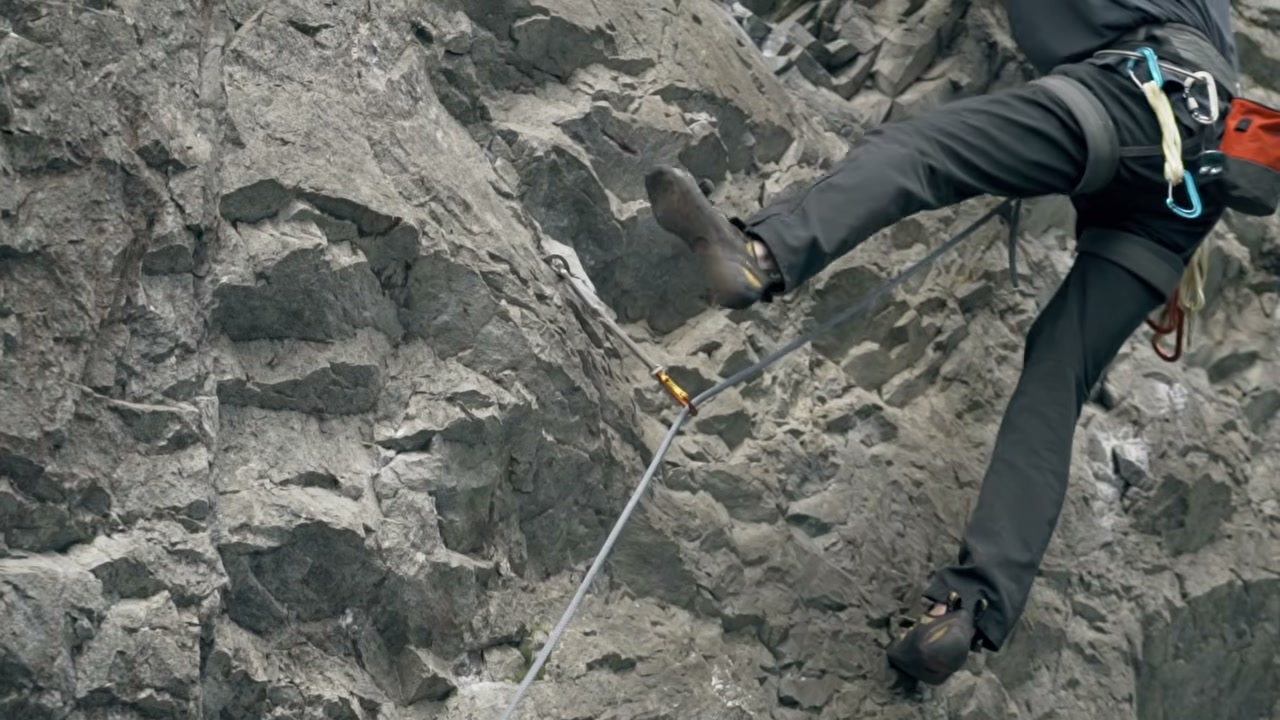
Sometimes it is obvious, like when the rope is wrapped right round your leg (0:48). It is much harder to spot when you are traversing and the rope creeps across to one side (0:54). So, as the video puts it at 0:58, think about where you would go if you fell right now, and make sure the rope is not in the way.
The quick check is your toes. If the rope is running over the top of your toes, it is in a good place (1:09).
If it has got behind your leg, take the time to reset it, or step round it so it is back in front of you (1:02).
What happens when you step past a bolt?
This is the moment Trevor Massiah’s video concentrates on (2:46), and it is the one to watch for it, because he makes some of the mistakes on purpose so you can see them (1:05). His rule, summed up from 5:16, depends on where your foot is going.
- If your foot is going just above the bolt below you, push the rope aside with the side of your foot, so it runs along the edge of your foot (1:52).
- If your foot is going past the bolt, out to one side, step round the outside of the rope, so it stays between you and the rock (2:22).
The trap, at 3:46, is that a foot placement can look fine, and then the rope ends up behind your leg as soon as you move your body up. So keep half an eye on where the bolt below you is, all the time (3:00). Once you have clipped the next bolt above you, a rope behind your leg is not such a problem, because you are not necessarily going to go upside down, though it can still give you a rope burn (2:35).
What should you say to your belayer?
From 1:16, the video gives two calls that help your belayer see a fall coming. As it says, that can mean a shorter fall or a softer catch.
- “Watch me.” Say it when you are moving through a hard section or starting to feel sketchy (1:24). Your belayer keeps a close eye on how much slack they are giving you and gets ready for a possible fall.
- “Falling!” Shout it as you come off, if you have the composure (1:33). Your belayer locks off the rope and gets ready for the catch.
The video adds, fairly, that screaming and swearing have a similar effect, if a less dignified one (1:43).
If you are going to practise falls, agree it before you leave the ground. The Insiders’ first instruction for practice falls is to make sure your belayer knows the plan (1:53).
How to fall safely when climbing, step by step
The video breaks the fall itself into three parts at 1:48. Coming off the wall, falling, and landing.
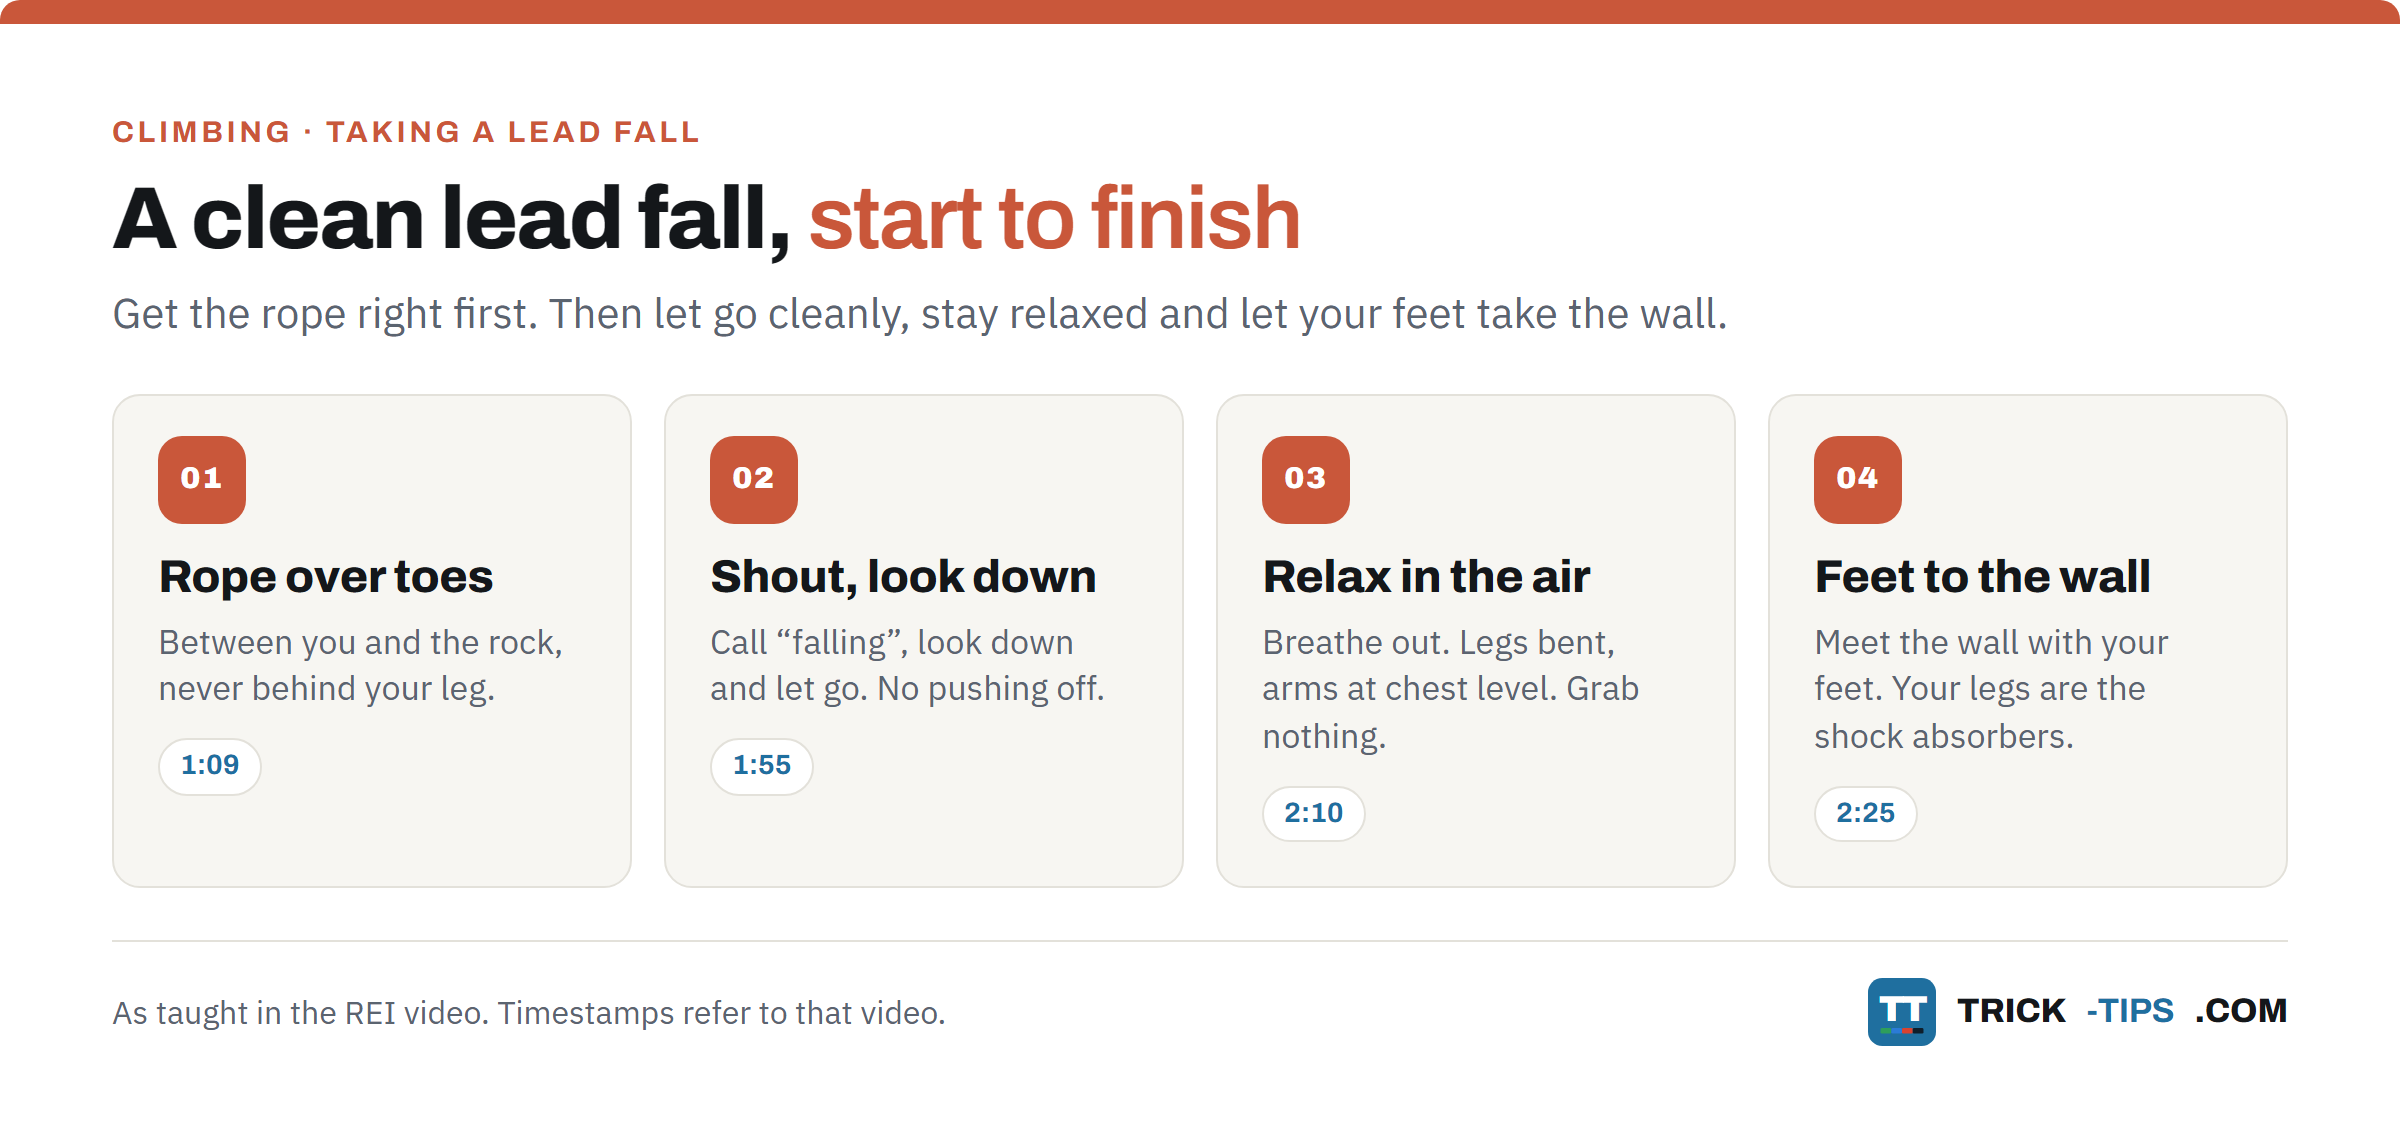
- Coming off. As you feel yourself peeling off, shout “falling” and look down, so you can see what is coming (1:55).
- Do not push off. Unless you can see a ledge or something else you need to clear, let go rather than jumping out. Push off and you swing back in and smack the wall harder (2:02).
- Relax in the air. Breathe out to relax your body, and yelling counts too (2:10). Keep your legs bent and your arms at chest level with your elbows bent, ready for the landing (2:15).
- Grab nothing. Do not grab a quickdraw or anything else to stop yourself, because you could seriously hurt yourself (2:19).
- Land soft. Meet the wall with your feet and let your legs act like shock absorbers (2:25).
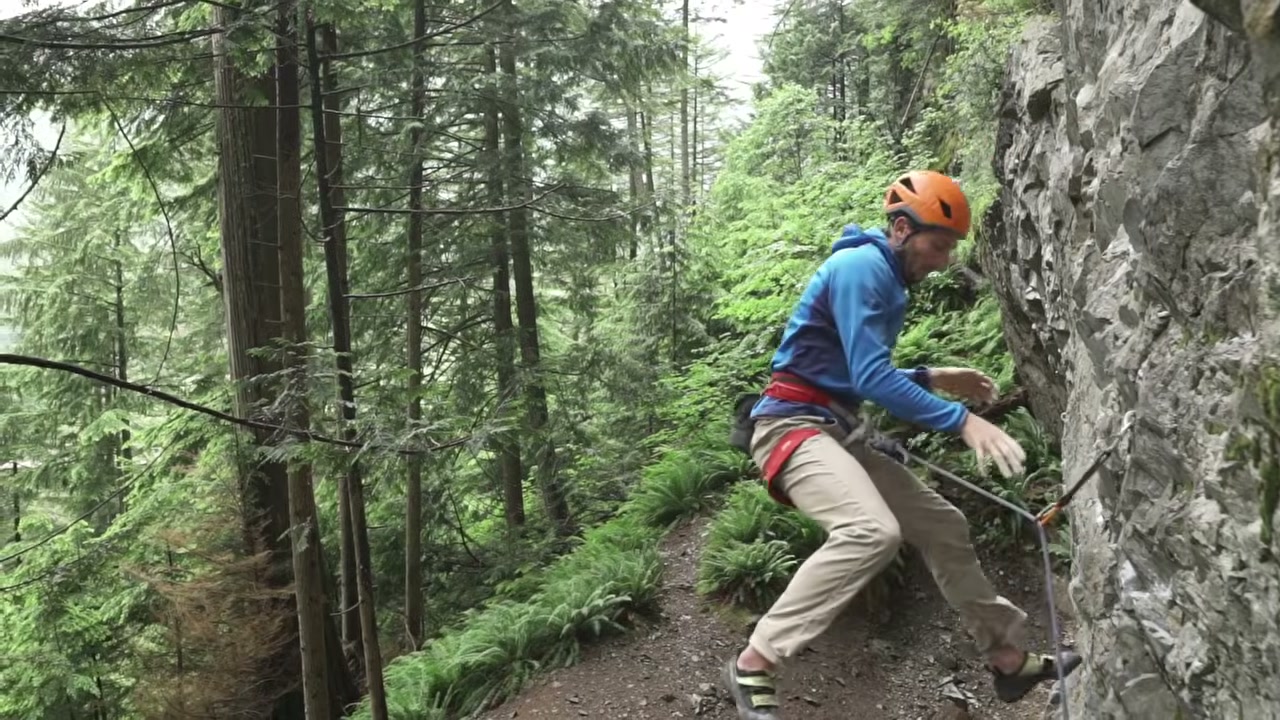
The BMC’s advice on lead falls says the same in fewer words. Think like a cat, land on your feet with your legs bent and the rope running free, and train yourself not to grab the quickdraw.
In short, let go cleanly, stay relaxed with your legs bent, and let your feet take the wall.
Common mistakes when you fall on lead
The rope behind your leg. The big one. It flips you upside down (REI, 0:38). As Trevor Massiah says at 0:41, a feet-first fall might cost you a sprained ankle, but a head-first one puts your head, neck and back at risk.
Jumping out from the wall. You swing back in harder (REI, 2:02). The Insiders give the same warning at 3:35. Lean back a little, catch yourself with your feet, and do not jump back too hard.
Grabbing the gear or the rope. A quickdraw can hurt you (REI, 2:19). On top rope, The Insiders warn at 2:23 that grabbing the rope high up can leave you with burns on your hands as it slides, and if you must hold something, hold your knot.
Too big, too soon. Start with small falls and build up slowly (The Insiders, 2:37). Their closing advice, at 13:07, is to keep the falls controlled and skip the really big ones.
How do you practise lead falls?
As the video says at the very start, everybody falls once they start pushing their grade, and with practice falling becomes a natural part of climbing (0:07).
REI’s plan, from 2:31, is short. Fall on top rope first. Then go to a steep or slightly overhanging crag, climb up several bolts so there is plenty of rope in the system, take a few short falls at the bolt, then climb a couple of feet above it and fall again.
The Insiders stretch that into a fuller plan in their video on the fear of falling. Here it is, built from both. Move on to the next step only when the one before feels comfortable, as they say at 1:35.
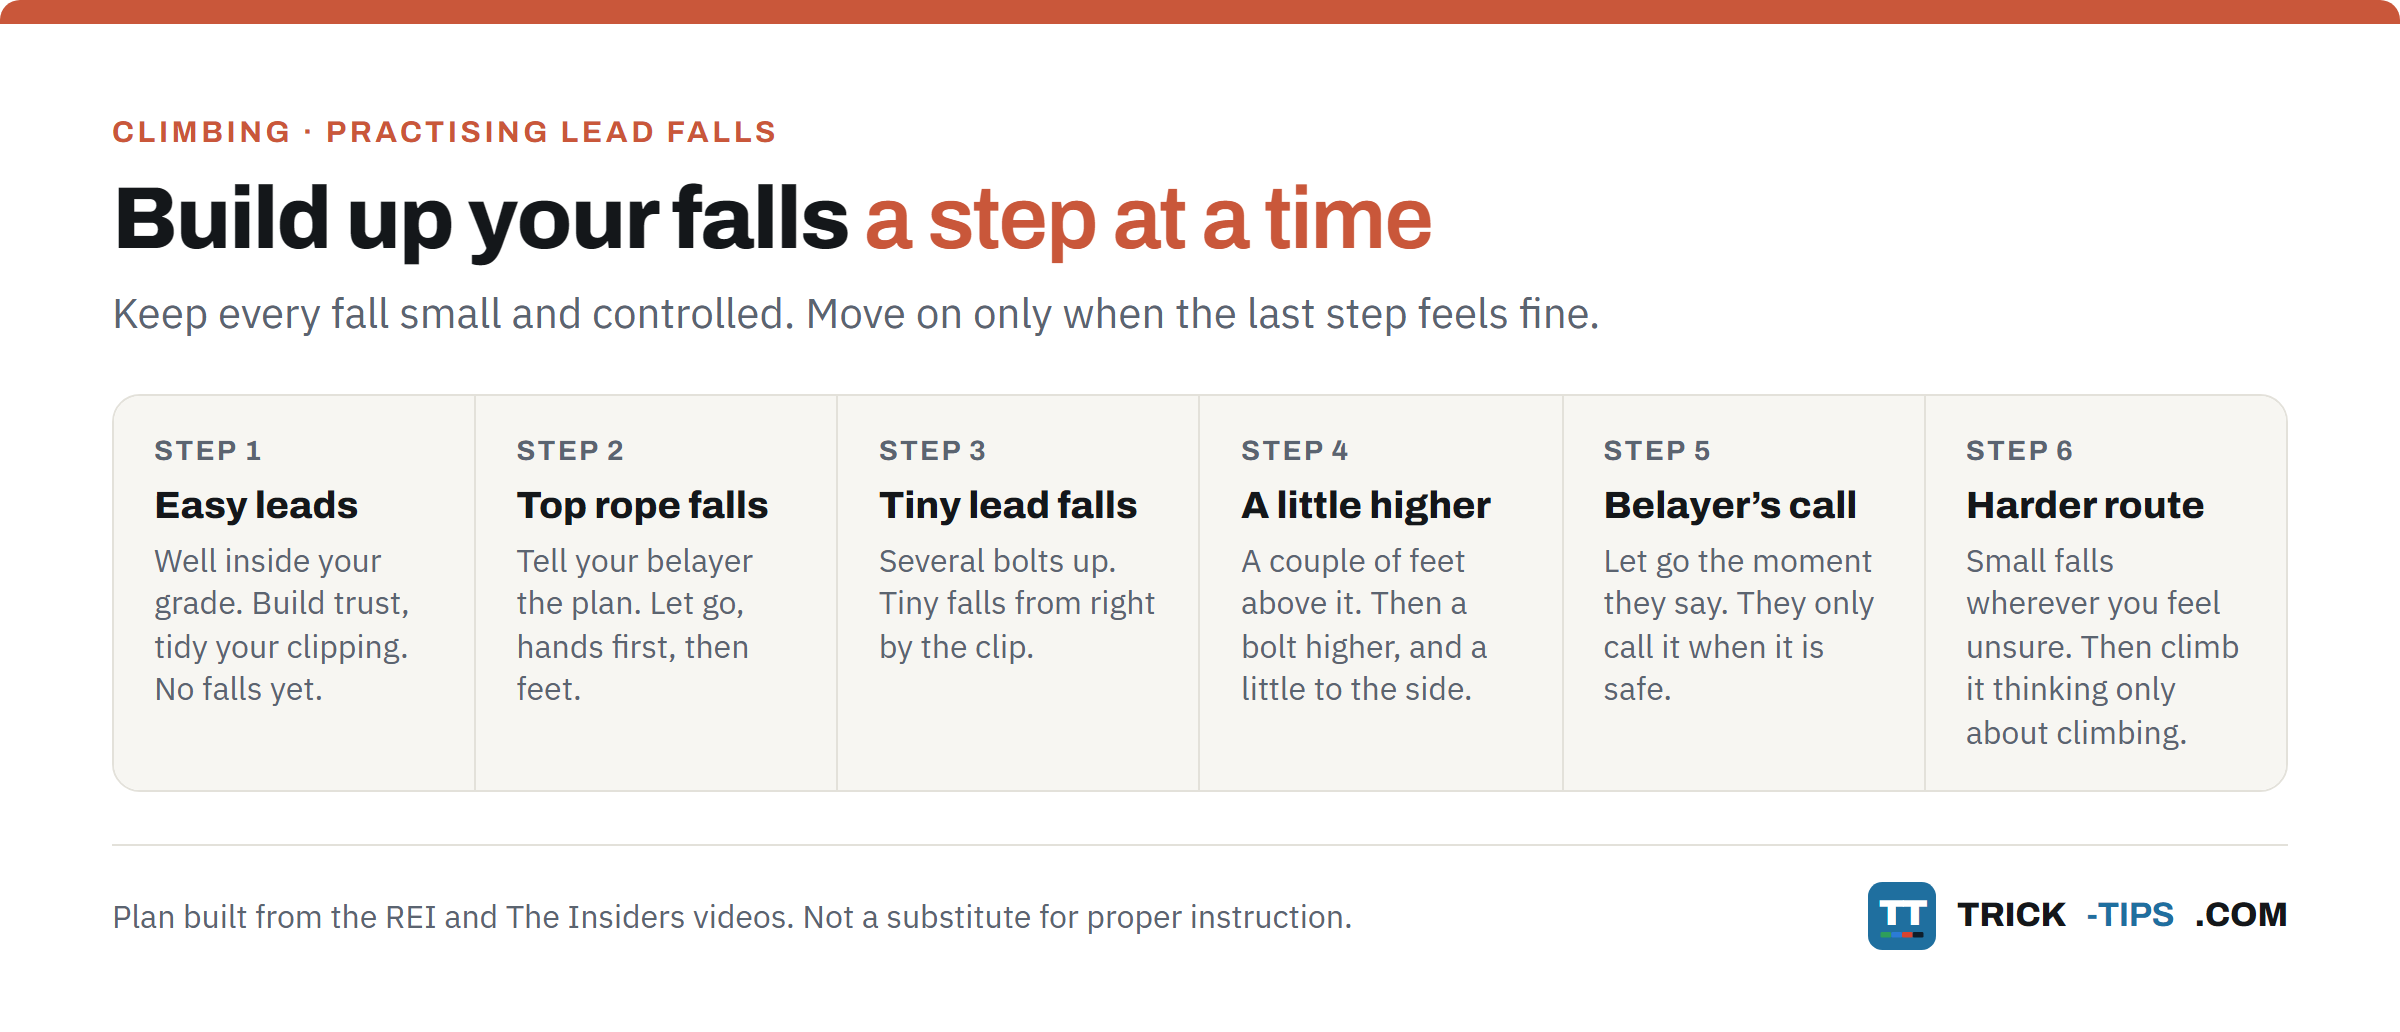
- Lead easy routes first. Routes well inside your grade, climbed relaxed, to build trust in your belayer and get your clipping tidy (The Insiders, 0:47).
- Top rope falls. Tell your belayer the plan, climb high enough that you are well clear of the ground, find a stable position, then let go and lean back (1:53). Let go with your hands first and then your feet, so you do not drop in too close to the wall (2:16).
- Tiny lead falls. An easy route, several bolts up. The Insiders suggest at least the fourth quickdraw (3:21). Take your first falls from right by the quickdraw (REI, 2:44, and The Insiders, 3:27).
- A little higher. Climb a couple of feet above the quickdraw and fall again (REI, 2:46). When that feels fine, move up a quickdraw and repeat, and practise a few falls slightly to the side of it, because that is where people tend to get scared (The Insiders, 3:44 and 3:58).
- Let your belayer call it. Your belayer says when to fall, and you let go straight away, without thinking about it (The Insiders, 4:53). They should only call it when it is safe, never when your foot is behind the rope or you are too close to the ground (5:52).
- Take practice falls on a harder route. On a route that scares you, stop wherever you feel unsure and take a small fall right there, so you know what to expect from that spot (The Insiders, 7:22). Then climb it again thinking only about the climbing (11:12).
Step 5 is the one that works on your head. The Insiders point out at 6:42 that climbers who are scared of falling often take a quick look down just before a hard move. In their minds they are already falling, and very often they then do. Letting your belayer call the fall trains out that little moment of doubt.
Their last piece of advice, at 13:13, is to be kind to yourself. Take it slowly, and if you feel emotionally drained, call it a day.
What does your belayer do?
The other half of a safe fall is the catch, and that is your belayer’s job.
A good belayer gives a soft catch, so you come to a stop gradually instead of being slammed into the wall. The BMC describes a belayer stepping forward as you fall, so you drop down rather than swing hard into the rock, and says it takes experience to get right. Hard Is Easy adds, at 16:34, that a soft belay matters most low down, where there is less rope out to stretch and absorb the fall.
Catching falls is a skill for your belayer to learn in person. Your side of the deal is the rope, the calls and a clean fall.
Beyond the video
A few things the videos do not spell out, each checked against more than one source.
You fall further than you think. From above your last clip, you fall back down to it and then at least the same distance again below it. Hard Is Easy’s example at 11:26 is a climber five metres above a bolt, which is a ten metre fall before anything else is counted. Slack in the system and rope stretch then add more, and the BMC warns that with those you may end up twice as far below your last protection as you were above it. That is why a fall close to the ground or a ledge is the dangerous kind. Our guide to understanding forces in climbing explains fall factors, if you want the maths.
Think about a helmet when you lead outside. The BMC treats it as your call, but its guidance says most head injuries in UK climbing come from climbers falling, not from falling stones. It singles out routes with laybacks and undercuts, where a slip can tip you over backwards, as the time to wear one even if you normally do not. American Alpine Club accident reports tell the same story, with leaders flipped upside down by the rope behind a leg, and one 2015 report concluding that a helmet would likely have made the climber’s head injury less severe. Our post on the BMC helmet guide covers the BMC’s helmet campaign.
Check what is below you, not just the angle. The BMC’s advice is to practise at a venue where you will not hit anything, and Movement, a chain of climbing walls, says the same, telling climbers to look for roofs, volumes, ledges and any risk of a ground fall, and to pick another route if there is one.
Other good videos on falling
- Rock and Sun, How to avoid falling upside down. Six minutes from Trevor Massiah on keeping the rope in front of your legs at the crag. Rock and Sun is a climbing holiday company, and there is no sales pitch in the video.
- The Insiders, 6 steps to overcome your fear of falling. Fourteen minutes, with every step of the practice plan above shown on the wall. It opens at 0:34 with its own disclaimer that it is not a safety instruction, and the same goes for this guide.
- Hard Is Easy, Falling physics that every climber needs to know. Twenty minutes on forces and rope stretch, including why a big fall high up can be softer than a short fall caught hard (from 11:22).
Where this fits
Learning to fall is what lets you try harder moves on lead. As The Insiders say near the end, practising falls is what builds the confidence to take the risk on hard moves (12:13).
- Ropes explains why you only ever lead on a dynamic rope, never a static one.
- Belay devices covers the kit your belayer catches you with.
- And once falling is less scary, flagging is a good first movement skill for the harder moves you will start to try.
Frequently Asked Questions
How do you fall safely when lead climbing?
Keep the rope in front of your legs, ideally running over your toes, and tell your belayer when a fall might be coming. As you come off, shout “falling”, look down, and let go rather than pushing out from the wall. Breathe out, keep your legs bent and your hands at chest level, grab nothing, and meet the wall with your feet.
Should you push off the wall when you fall?
No, unless you need to clear a ledge or something else below you. If you push off, you swing back in and hit the wall harder. Let go, lean back a little, and catch yourself on the wall with your feet.
What happens if the rope is behind your leg when you fall?
It can flip you upside down, which puts your head, neck and back at risk. Check that the rope runs over the top of your toes, and if it has gone behind your leg, reset it or step round it before you carry on. Take extra care when you traverse or step past a bolt, because that is when the rope creeps round.
How far do you fall on lead?
Further than you think. You fall back to your last clip and at least the same distance below it, so five metres above a bolt is a ten metre fall before slack and rope stretch are added. The BMC warns that with those you may end up twice as far below your last protection as you were above it.
How do I get over my fear of falling when climbing?
Practise falling, in small steps, with a belayer you trust. Start on top rope, then take tiny lead falls from right by a quickdraw several bolts up, and build up slowly. The Insiders’ plan then has your belayer call the moment to fall, which trains out the moment of doubt before a hard move.
Do I need to practise falls on top rope first?
Yes. Both the REI video and The Insiders start with top rope falls, so you get used to the feeling before you fall on lead. You should also be leading easy routes confidently already, having learned to lead with a qualified instructor or on a climbing wall’s lead course.
In short
Falling safely on lead comes down to three things. The rope in front of your legs, a call to your belayer, and a clean, relaxed fall with your feet meeting the wall.
If you are already leading comfortably, start at the bottom of the plan next session. Top rope falls first, then a few tiny lead falls from right by a quickdraw a few bolts up, with a belayer you trust and the rope over your toes. When that feels boring, go a little higher.
Ask any questions in the comments below.