So you can belay on a top rope, and now your partner wants to lead. Suddenly you are paying rope out instead of taking it in, and the rope is either tight just as they reach to clip or lying in loops at your feet.
Here is how to lead belay, in short. You stand close to the wall and one step to the side of the first clip, pay out rope as your climber moves up and clips, take a little back in after each high clip, and hold them if they fall. Most of the skill is in the slack and the catch. Then a slow lower with your brake hand on the rope the whole time.
Read this first
This guide and the video are not a substitute for proper instruction. Lead belaying is a life-safety skill. Learn it in person, from a qualified instructor or on a lead course at a climbing wall, and pass your wall’s lead belay check before you belay anyone unsupervised.
Your belay device’s instructions come first. Where anything here or in the video differs from what the maker of your device says, follow the maker. The video is clear about its own limits too. Belaying a leader, it says at 0:27, is only learned through repetition, and it takes excellent instruction to get right from the start.
Watch it first
The pick is the American Alpine Club‘s lead belaying film from its Universal Belay Standard, the AAC’s common standard for teaching belaying. In nine minutes it covers the setup, managing slack, compensating, catching falls and supporting a resting leader, with close-ups of the hands and real falls at a climbing wall.
It does not cover lowering, so that section below comes from Petzl, the BMC and the German Alpine Club. The close-ups use a Petzl GriGri, so we check the video’s hand position against Petzl’s own instructions too. The film was presented by the American Alpine Club and Adidas Outdoor, as the opening says (0:16), and nothing in it promotes a product.
The video is chaptered. Setup and positioning start at 1:28, managing slack at 2:39, the brake hand on an assisted braking device at 3:08, compensating at 4:12, catching falls at 5:04, supporting the leader at 6:18 and hoisting at 6:56.
Are you ready to lead belay?
Lead belaying builds on top-rope belaying, so get that solid first.
- A solid top-rope belay with your own device, brake hand never leaving the rope. That is the first rule the video comes back to at the end (8:10), and Petzl’s universal belay technique, which it says applies to tube devices and GriGris alike, is built on it.
- Your device’s instructions read and understood. Petzl’s belaying guides carry the same warning each time. These techniques need specific training, so work with a professional to confirm you can do them safely before trying them unsupervised.
- A harness that fits. Our guide to choosing a climbing harness has the fit check.
You do not have to lead yourself, but the video says at 6:04 that leaders pick this up more easily, because they know how a good belay feels. The other half of the job is your climber’s, and our guide to falling safely when climbing covers their side of the catch.
How to lead belay, starting with the setup
Most of the work happens before your climber leaves the ground.
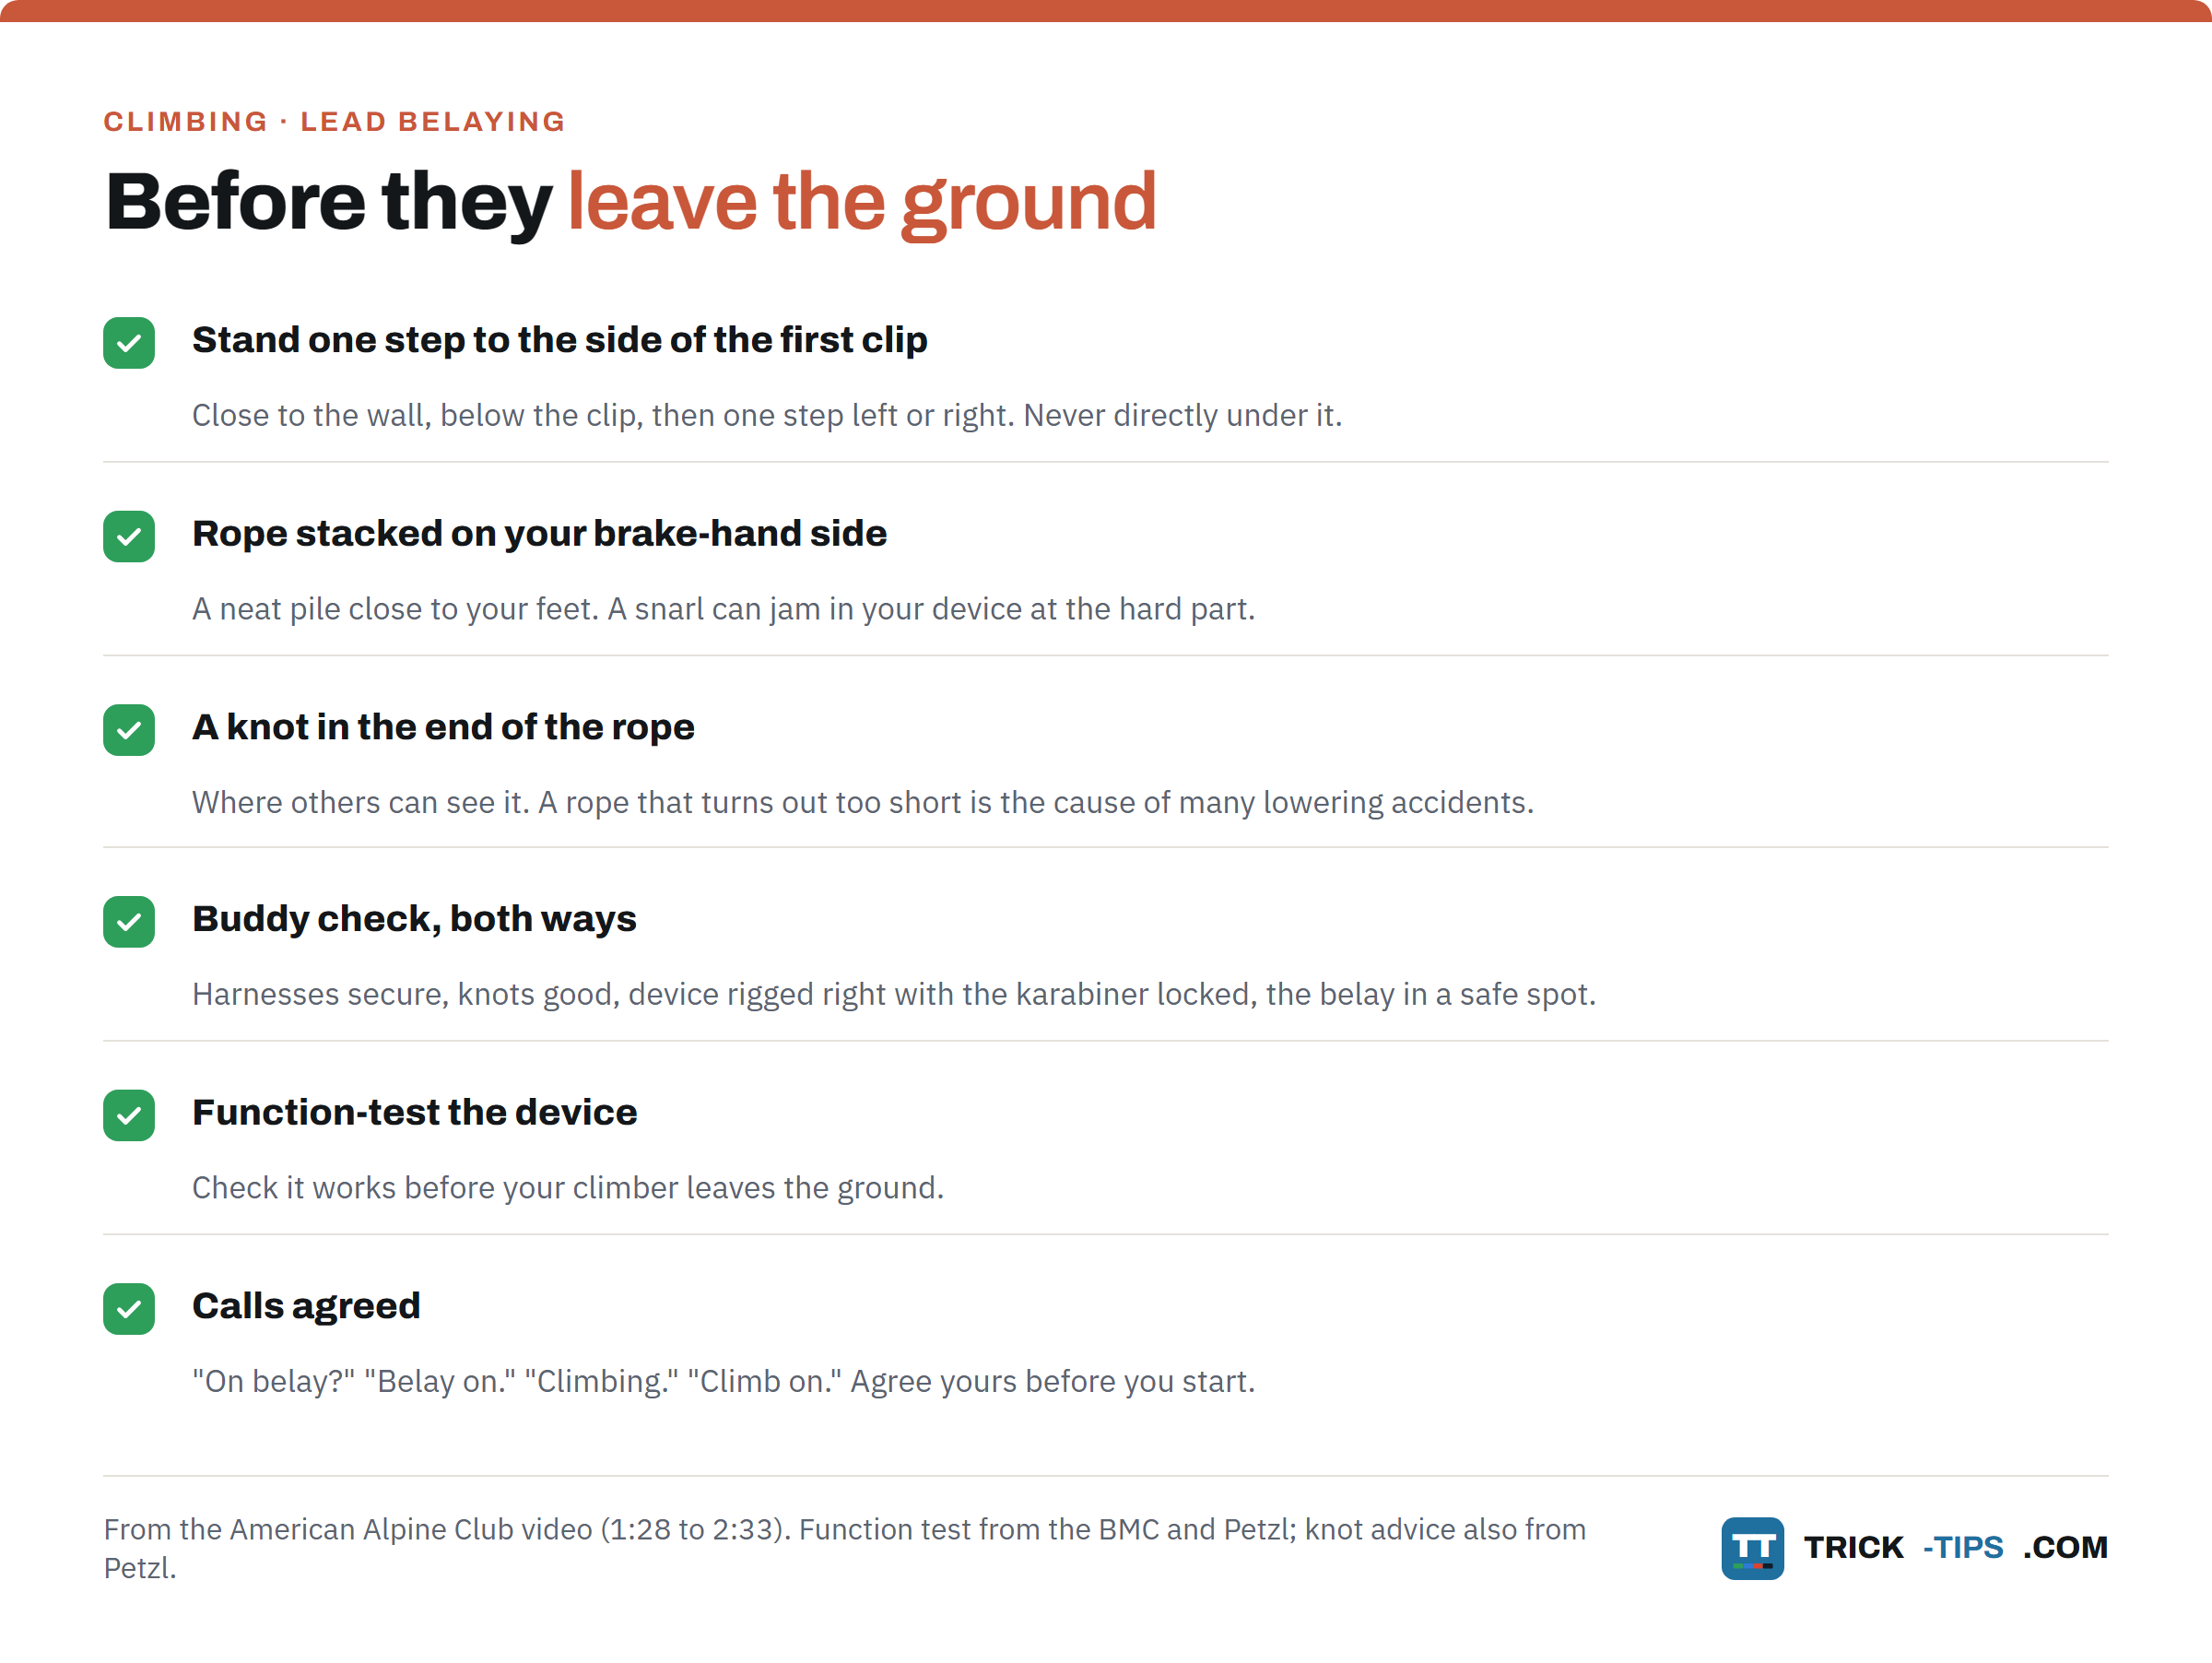
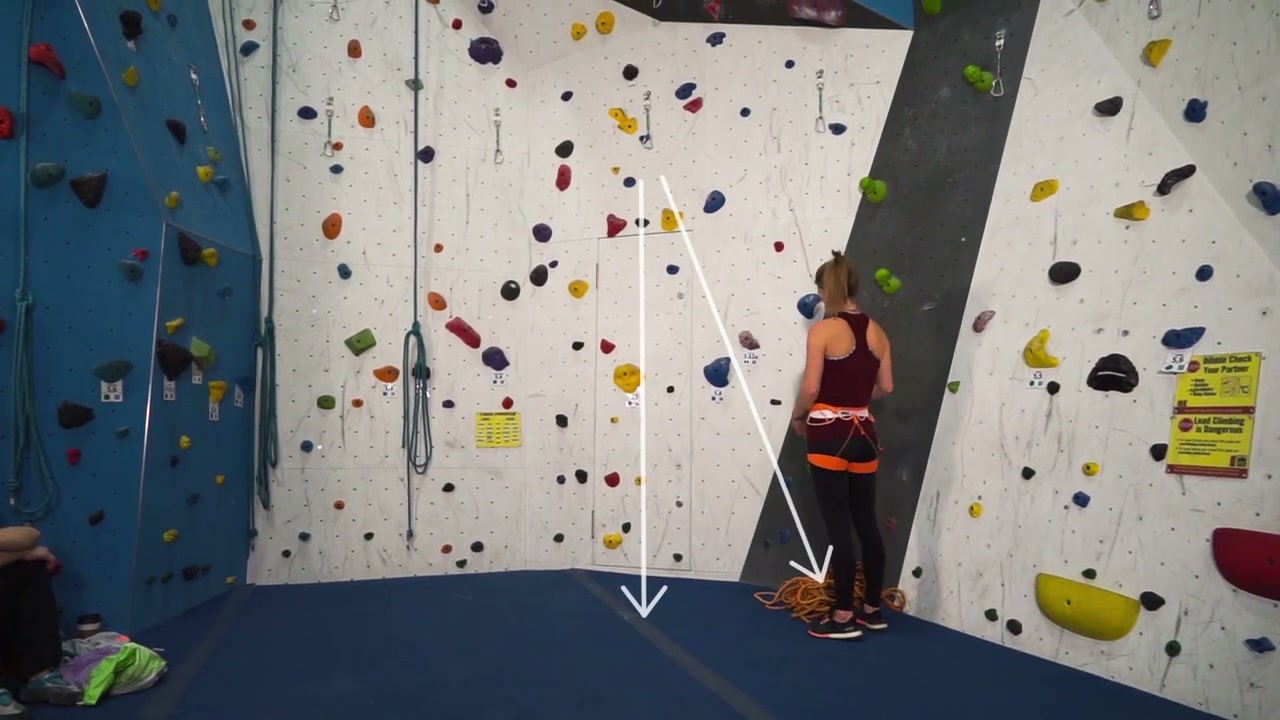
- Work out the fall line. Look at the first clip and the direction the rope will pull from it (1:28).
- Stand close to the wall, directly below that first clip, then take one step left or right (1:34). Right under it, a falling leader can land on you, and the video says plainly that this happens (1:40).
- Stack the rope in a neat pile on your brake-hand side, close to your feet (1:48). A snarl can jam in your device and stall your leader at the hard part (1:57).
- Tie a knot in the other end of the rope, where others can see it (2:03). Petzl’s advice is to always knot the end, because a rope that turns out too short is the cause of many lowering accidents.
- Hand the leader the top end and rig your device (2:08).
- Buddy check each other (2:14). Are the harnesses secure, do the knots look good, is the device rigged correctly with the karabiner locked, and is the belay in a safe spot? The BMC and Petzl both add a function test, to check the device works before your climber leaves the ground. Do it every time.
- Run through the calls (2:26). The video uses “On belay?”, “Belay on”, “Climbing” and “Climb on”. Whatever words you use, Petzl’s advice is to agree them in advance.
Petzl’s good practices also include checking that the weight difference between climber and belayer is not excessive, and the AAC notes that the more the leader outweighs the belayer, the harder the hoist (7:45).
Before the first clip, spot your climber. Petzl and VDiff Climbing both describe it, and Petzl is clear that spotting means guiding a fall so the climber lands well and does not flip over backwards, not catching them.
How much slack should you give on lead?
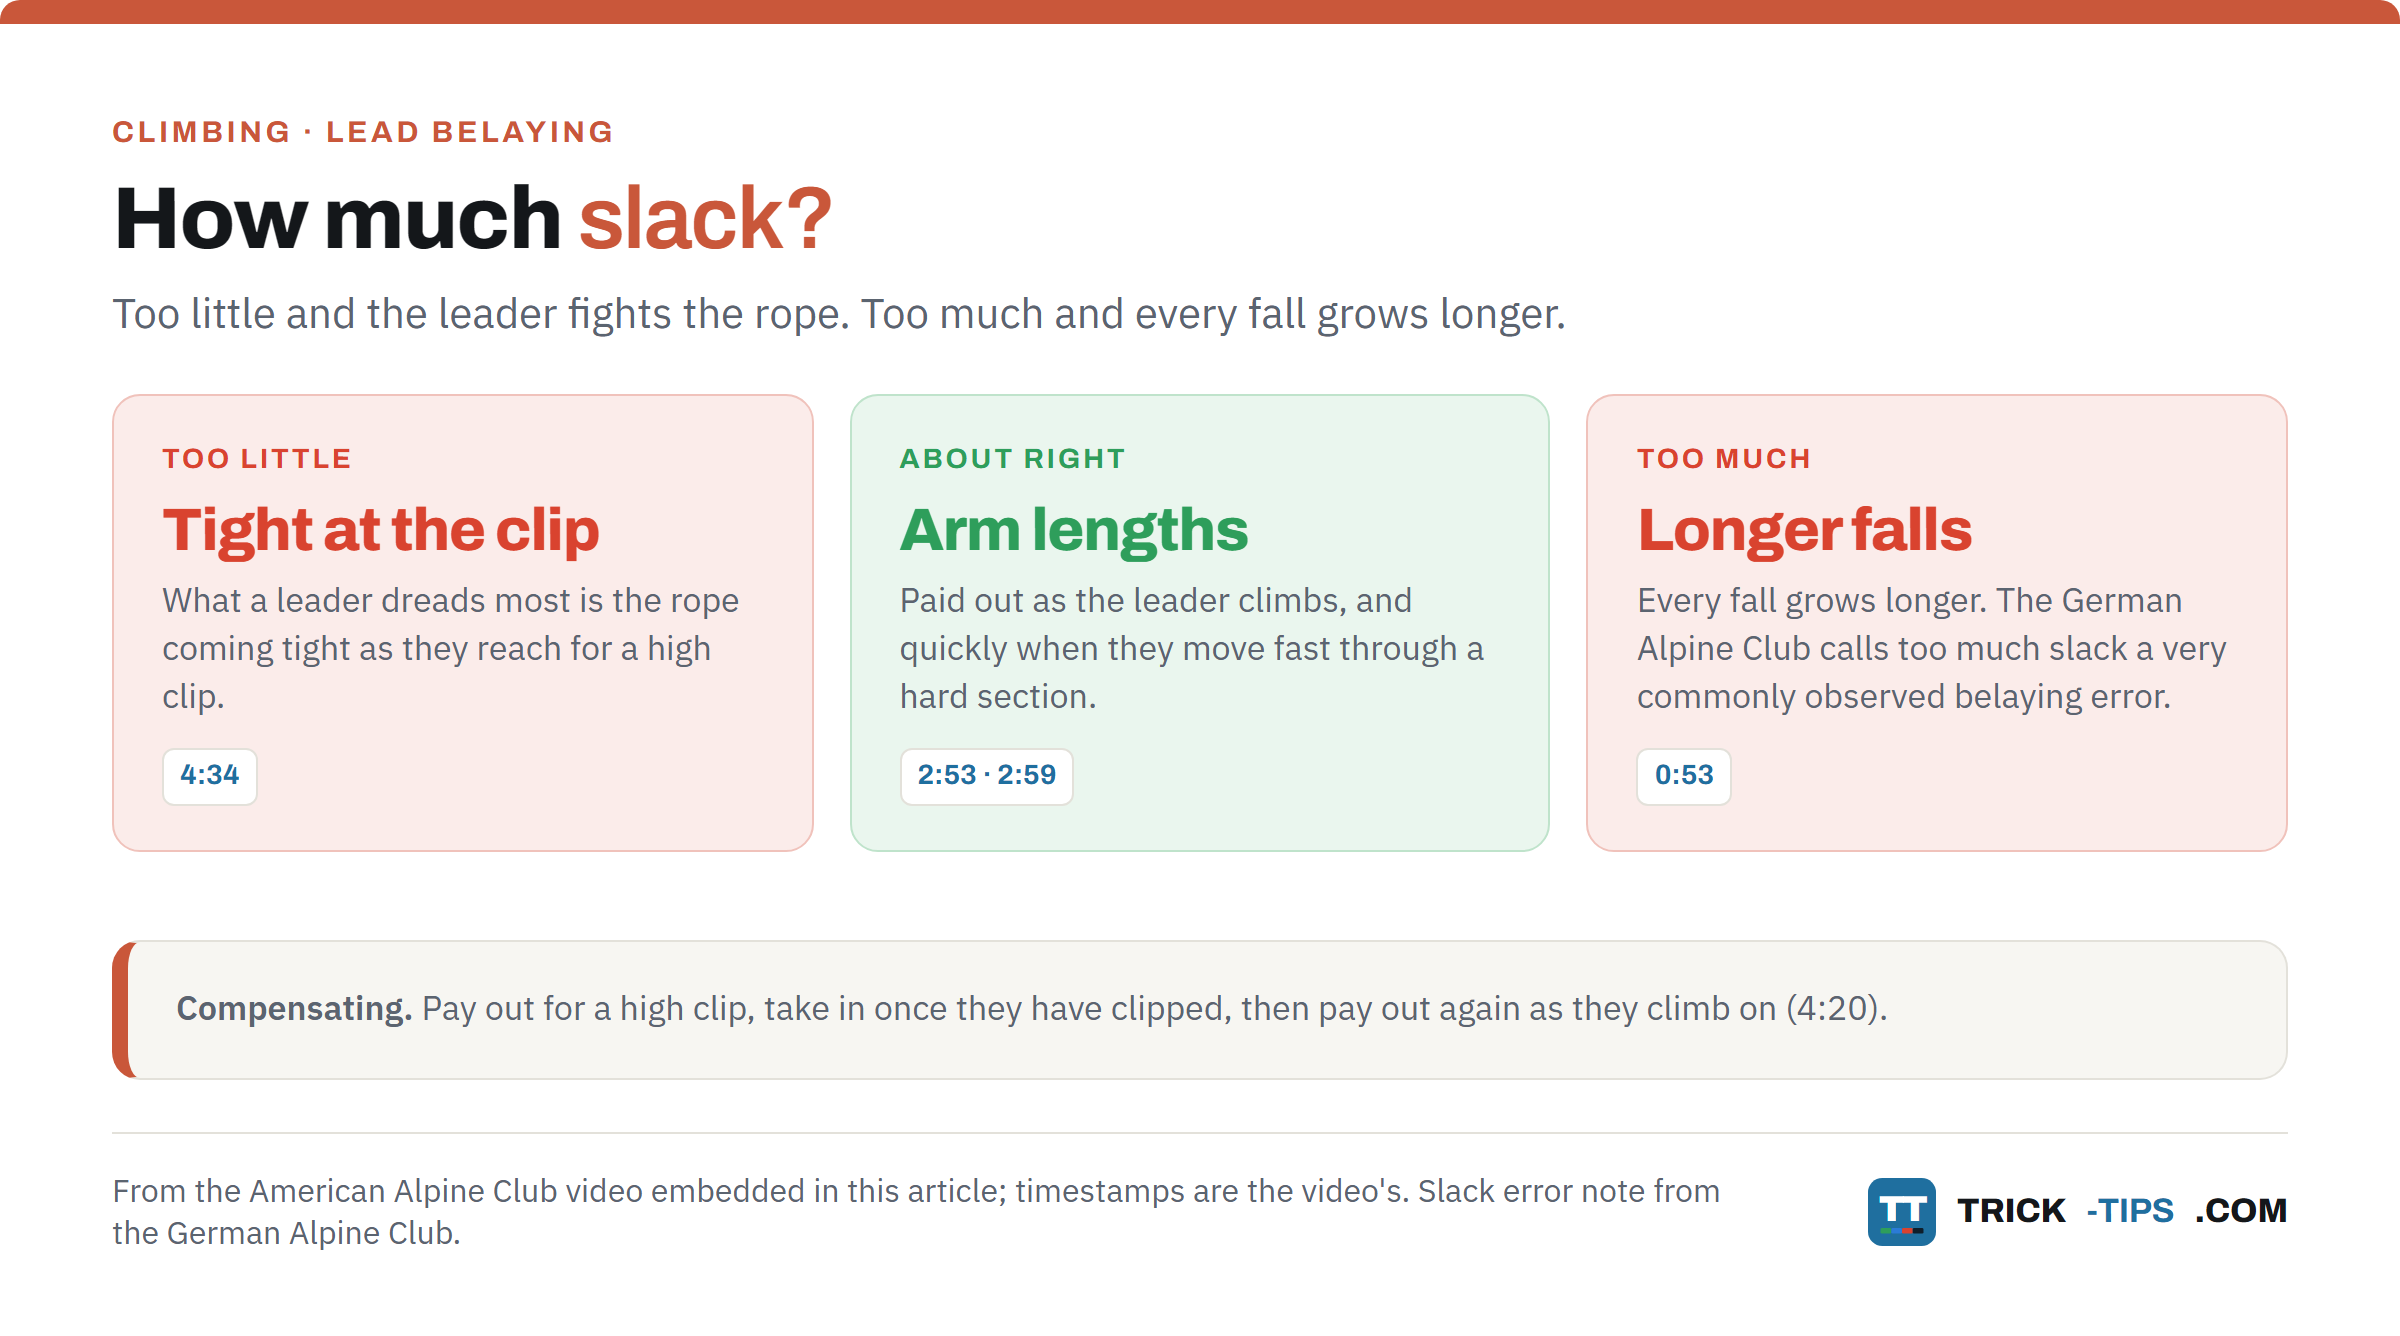
The video’s one-line answer comes at 0:53. Too little slack and the leader is fighting the rope. Too much and every fall grows longer.
- Pay out arm lengths of slack as your leader climbs (2:53).
- When they move fast, say through a hard section, anticipate it and pay out quickly (2:59).
- Stay close to the wall. Petzl says few situations need you more than two metres away, and suggests stepping in when your climber clips, then back again.
The other half of slack is taking it back in, which the video calls compensating (4:07). When your leader makes a long reach to clip, the rope runs up above their head, and for a moment they are on what is basically a short top rope (4:14). So you pay out for the high clip, take in once they have clipped, then pay out again as they climb on (4:20).
Get it wrong one way and you pull them off. What a leader dreads most, the video says at 4:34, is the rope coming tight as they reach for a high clip, which can trigger a fall with six feet (about two metres) of slack in the system. Toggling the rope just right takes vigilance, timing and practice (4:43).
Compensating also happens on a bigger scale, when your leader climbs back down from a clip to a rest and then climbs back up to their high point (4:52).
How do you pay out quickly with a GriGri?
Many climbers prefer an assisted braking device to a tube, the video says at 2:37, but they need precise, fine motor skills to use correctly. From 3:12 it shows how to give slack fast on one without the brake hand leaving the rope.
- Keep all four fingers wrapped round the rope. Your fingers and palm are your brake hand (3:12).
- Hook your index finger under the rolled edge of the device, with light tension to keep the device and karabiner lined up (3:19). That reduces the chance of the karabiner being loaded sideways (3:28).
- Push down on the metal of the cam with your thumb, not on the black handle (3:33 to 3:39).
Put together, you can pay out quickly and smoothly with your brake hand always on the rope (3:45). The thumb is there, the video says, to interfere with the cam’s range of motion (3:41), which is exactly why the next part matters.
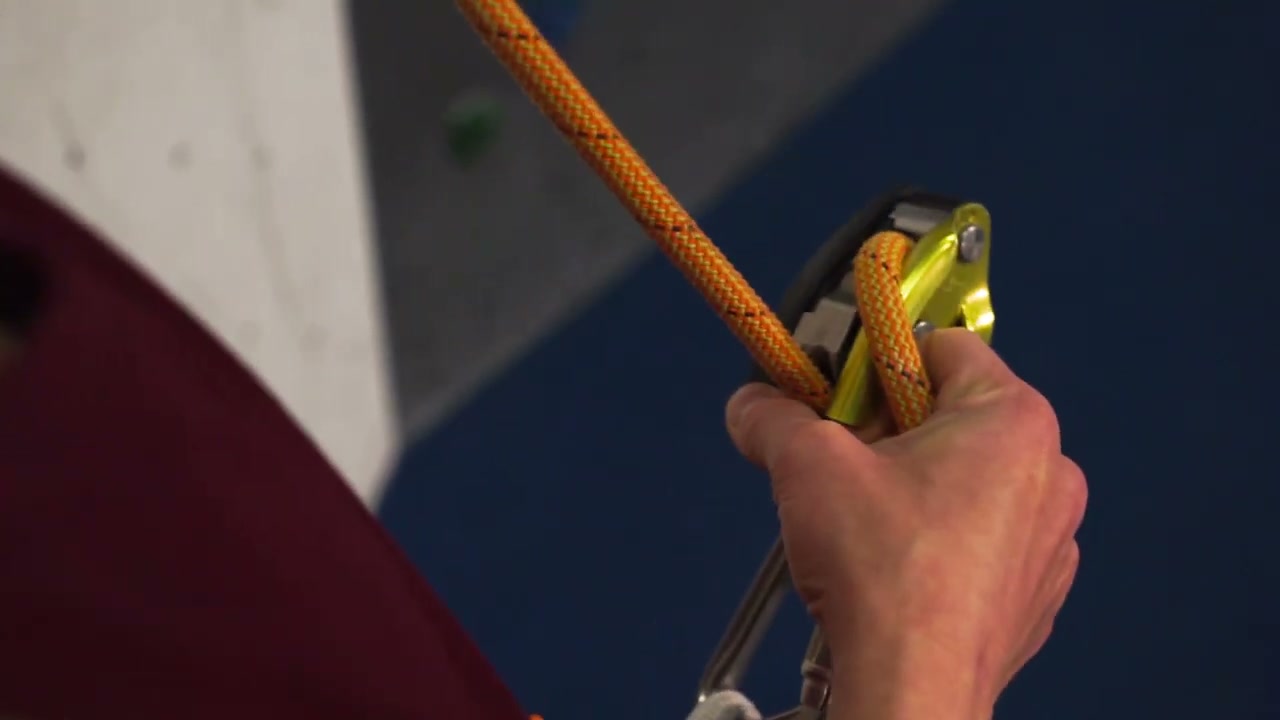
This is a quick-slack position, not your resting grip. Petzl’s instructions say it is for occasional, short-term use, and your hands must go straight back to the main belay position afterwards. Never keep your thumb pressed on the cam or grip the device with your whole hand, because if the climber falls while you are holding the cam, you risk clenching it, and that stops it braking. In the German Alpine Club’s 2024 indoor accident figures, the most common error behind ground falls was belayers operating their devices incorrectly, including keeping the device open while paying out.
So use the video’s grip for the moments it describes, a fast clip or a burst through a hard move (2:59), then go back to the normal position. On any other assisted braking device, follow its maker’s instructions.
With a tube device, keep sliding your brake hand down as you feed slack (3:52). The video says it is simpler than an assisted braking device but not quite as fast, and you lose the backup of the auto-locking action (3:58). Whatever the device, the video’s rule at 8:15 holds. Whenever your hand slides on the rope, the rope is in the braking position.
Common lead belaying mistakes
Standing directly under the first clip. A falling leader can land on you (1:40).
A messy rope pile. A snarl can jam in the device at the hard part (1:57).
The rope tight at a high clip. The thing leaders dread most, and it can pull them off (4:34).
Too much slack out. Every fall grows longer (0:53). The German Alpine Club calls too much slack a very commonly observed belaying error.
A thumb parked on the GriGri’s cam, or the brake hand off the rope. Both feature in the German Alpine Club’s accident figures, and Petzl’s instructions rule out both.
How do you catch a lead fall?
This is the part you most need to learn in person. Read it as what to expect from your lesson, not as the lesson.
The first job is to keep them off the ground and off ledges. The video calls that the crucial concern when catching a fall (5:03). To hold any fall, Petzl’s instruction is to grip the brake side of the rope firmly and pull it downward, which increases the friction in the device. Never grab the climber side. The BMC puts it as keeping your brake hand low, whatever device you use, and not letting go.
When there is room, ride the belay. If your leader is well up the route, with good protection close by, a ground fall is unlikely (5:15). Then it is often best to let your body absorb some of the force by giving a little in the direction of the pull, which gives a soft catch (5:23). Petzl’s tip for a dynamic belay is the same idea, a step or a small jump forward as the climber falls, and Climbing magazine describes a slight jump as the rope comes tight.
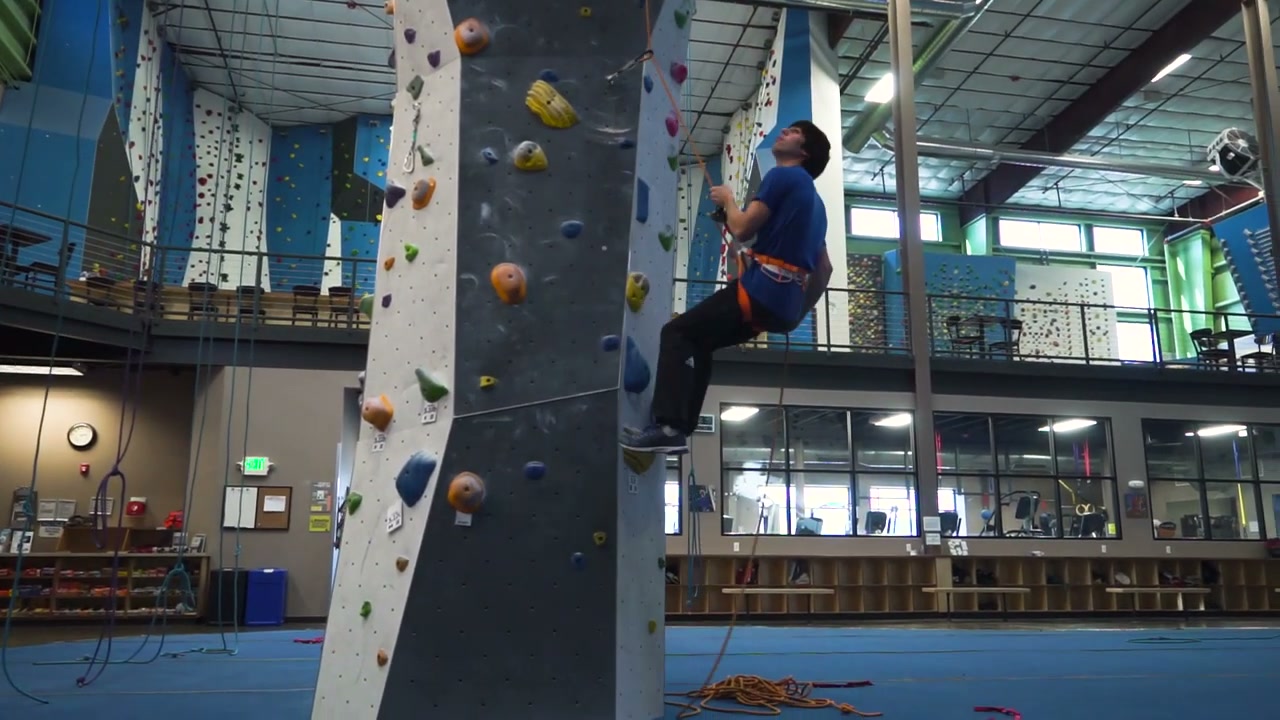
When a ledge or obstacle is in range, fight it. Brace and lock them off short and hard, standing solid and giving no ground (5:35). Sometimes you can reel in some slack first, then fight (5:51). Petzl agrees that where there is a risk of a ground fall or of hitting a ledge, a dynamic belay should not be used.
A soft catch does not come from extra slack. Petzl says three or four metres of slack does not reduce the force of a fall, and when your climber is low it adds to the risk of a ground fall. Climbing magazine calls the idea a common misconception.
Expect to be pulled towards the wall. Petzl says a belayer giving a dynamic catch will be pulled against the wall, so needs a clear area, no knots in the rope and shoes on.
When to ride and when to fight are judgement calls learned through experience (5:56). Petzl’s advice is to practise dynamic belays with an instructor, starting with falls well off the ground. For the theory, our guide to understanding forces in climbing explains fall factors, and why a fall stopped more slowly puts less force on the gear.
How do you take when your climber says “take”?
Tired, a sequence gone wrong or just not feeling it, at some point your leader will want to rest on the rope without sliding down it (6:17). When they call “take” or “tension”, the video’s routine starts (6:26).
- Pull. Reach up high on the rope above your device and reel in any slack (6:33).
- Hop, locking off the rope as you do (6:38).
- Take and sit. As their weight comes on, sit back into your harness on the belay (6:43).
Pull, hop, take and sit, all in a split second (6:50).
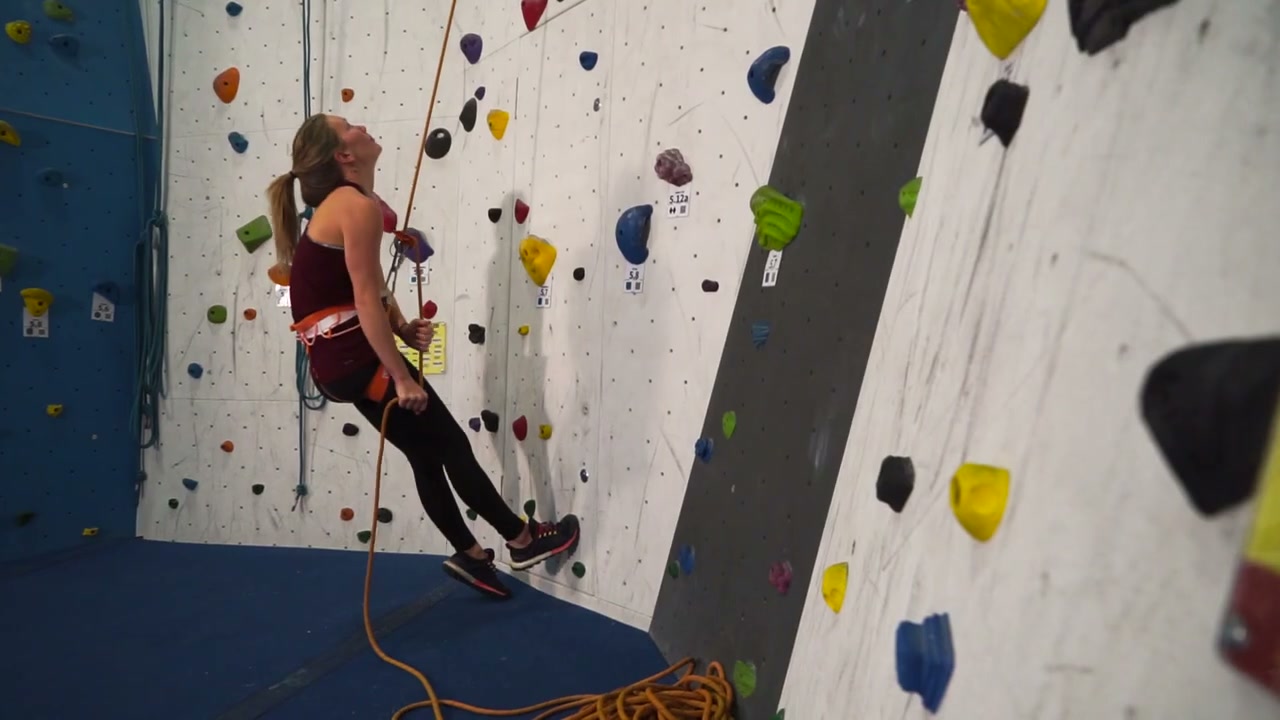
On steep sport routes there is one more trick, the hoist, for a leader who has fallen and wants to get back to their last clip rather than be lowered (6:56). You go up on your toes with the rope tight, they pull up on the rope and let go, and as the rope goes slack your weight sinks and takes it in. Then you reel in as you stand back up, keeping the rope locked off throughout (7:10 to 7:33). Repeat until they are back at their high point. The video admits it is easier watched than described (7:37), so watch it.
How do you lower your climber?
The video does not cover lowering, so this is from Petzl, the German Alpine Club and the BMC. Your climber’s side of it, threading the lower-off at the top, is in our guide to starting sport climbing.
- Once you are lowering, it is all on you. Your climber has no way of controlling the descent, as Petzl puts it, and the responsibility is entirely the belayer’s.
- Your brake hand controls the speed, whatever the device. Lowering technique differs between a tube-style device and a GriGri, Petzl says, but that point is the same for both.
- On a GriGri, open the handle gradually and never let go of the brake side. The handle can help with braking, Petzl’s instructions say, but the speed is set by your brake hand.
- Go slowly. The German Alpine Club’s advice is to feed the rope slowly with your brake hand and not go too fast.
- Keep your attention on your climber all the way down. The BMC’s reminder applies here as much as anywhere. Their life is in your hands.
- The knot in the end of the rope closes the system, as the American Alpine Club puts it. If the rope turns out too short, it is what stops the end running through your device.
Beyond the video
Most belay accidents are the belayer, not the device. Petzl says incorrect belay technique is the primary risk factor in an accident, especially when the belayer is surprised by a fall. The German Alpine Club’s 2024 indoor figures found accidents with every type of device. An assisted braking device does not replace good technique, and Petzl’s instructions say exactly that.
Your wall’s rules come first. Walls set their own rules about who can lead belay. The University of Nottingham’s wall, for one, asks for a competency test before anyone climbs unsupervised, tells you not to lead climb or belay without sufficient experience or training, and does not allow teaching friends to lead belay. The wall in the video has a sign at 2:16 saying you must pass its lead belay safety check before you lead belay. Ask at yours.
Another good video, for slack and rope management
If you want much more on slack, rope stacking and taking in, Hard Is Easy’s 24-minute lead belaying episode goes deep, with good and bad examples at the crag. The series is supported by Mammut. One thing to know before you watch. From 2:15 the presenter keeps his brake hand on the GriGri most of the time, and says at 3:17 that this is his own preference. It is not Petzl’s method, so take your hand position from Petzl and your instructor.
What to practise
With an instructor or on a lead course first. Then, on every route, find the fall line and your spot one step to the side of the first clip before you stack the rope.
Watch your leader the whole way up and have rope ready before they reach for each clip, not after. Take it back in once they have clipped.
Practise the pull, hop, take and sit, and soft catches, with your instructor, starting with falls well off the ground.
Where this fits
Lead belaying sits between top-rope belaying and the rope skills for when something goes wrong. Once it is second nature, the Steve Long films in our Technical section are the next rung. Start with how to tie off a belay plate, because freeing your hands is the first step in dealing with most problems, then lowering a climber off the crag.
Frequently Asked Questions
What is the difference between lead belaying and top-rope belaying?
On a top rope, the rope already runs through an anchor above your climber and you mostly take in. On lead, your climber clips the rope into quickdraws as they go, so you pay out most of the time, take in after high clips, and a fall from above a clip is longer and harder to hold.
How much slack should you give when lead belaying?
Arm lengths, paid out as your leader climbs, and quickly when they move fast. Too little and they fight the rope, or it comes tight as they reach for a clip. Too much and every fall grows longer. Take in once they have clipped, then pay out again as they climb on.
How do you give a soft catch?
When your climber is well up the route and a ground fall is unlikely, give a little in the direction of the pull, often with a step or small jump forward as they fall. When a ledge or the ground is in range, brace and stop them short instead. It is a skill to learn in person, starting with falls well off the ground.
Where should you stand when lead belaying?
Close to the wall, directly below the first clip, then one step to the left or right, so a falling leader cannot land on you. Petzl says few situations need you more than two metres from the wall. Step in when your climber clips, then back again.
Can you keep your thumb on a GriGri’s cam while lead belaying?
Only briefly. Petzl’s instructions allow that quick-slack position for occasional, short-term use, with your hands going straight back to the main belay position. Never keep your thumb on the cam or grip the device with your whole hand, because in a fall you can clench the cam and stop it braking.
Do you need a course to lead belay?
Yes. Learn it in person, from a qualified instructor or on a lead course at a climbing wall, and pass your wall’s lead belay check before you belay anyone unsupervised. Videos and guides like this one go alongside that training, not instead of it.
In short
Lead belaying is positioning, slack and the catch. Stand one step to the side of the first clip, pay out arm lengths and take in after high clips, ride the catch when there is room and fight it when there is not, then lower slowly with your brake hand on the rope.
Learn it in person, follow your device maker’s instructions, and pass your wall’s lead belay check before you belay anyone unsupervised.
Ask any questions in the comments below.