So you lead at the wall, and you have started looking at real rock. The trouble is that nobody at the wall tells you what happens when there are no quickdraws on the bolts and no karabiner waiting at the top.
Here is how to start sport climbing, in short. Sport climbing is lead climbing on outdoor rock that already has bolts drilled into it. You bring your own quickdraws and clip them as you climb, then at the top you thread the rope through the lower-off and get lowered to the ground. To start, go with a more experienced climber or an instructor, pick a friendly crag, climb well below your indoor grade, and learn the lower-off on the ground before you do it at the top of a route.
We will go through the whole day in order, using a video that films every bit of it from the climber’s point of view.
Watch it first
The pick is from JB Mountain Skills. It is one complete sport climb, a grade 5 at a roadside limestone crag in North Wales.
Most videos on this topic are a list of tips. This one is the real thing, start to finish, with a camera on the climber and the real calls shouted down to a belayer. It is long and chatty in places, but it is the only one we found that shows the part beginners worry about most, the top of the route, as it actually happens.
The video is sponsored by Insta360, who supplied the camera it was filmed on (0:51, with a sponsor segment from 19:31 to 20:41). The camera is not climbing kit and none of the teaching depends on it. The description carries no links for the climbing kit, only the camera offer and the channel’s own T-shirts. We have left out the brand names of the kit it uses.
Setting up is from 1:30, the buddy check from 4:26, the climb from 6:21, the lower-off from 11:56, lowering from 17:05, and the kit list from 20:43.
What is sport climbing?
As the BMC describes it, sport climbing is climbing on routes protected by bolts drilled into the rock in advance. The leader climbs on a single rope and clips quickdraws to the bolts on the way up. At the top there is a lower-off, usually two bolts joined by a chain or rings, and the climber gets lowered back down from it.
Compared with trad climbing, where you place your own protection as you go, you carry less kit and generally have more protection. In the UK most sport climbing is on inland limestone, and it uses French grades, the same system as most climbing walls.
Are you ready to sport climb outside?
Sport climbing means leading. Nobody puts the rope up for you. So before your first day on rock, you want these sorted at the wall.
- Leading indoors, clipping your own quickdraws without a fuss.
- A partner who can lead belay, paying out quickly while you clip and watching closely while you are near the ground.
- Being comfortable falling on lead. The BMC says bolts outside are nearly always further apart than at the wall, so falls are likely to be longer. A few practice lead falls at the wall first make that less of a shock.
Then go with someone who knows. The BMC’s advice is to head out with a more experienced climber or an instructor to start with, and many people book an instructor for their first outdoor session.
This guide and the video are not a substitute for proper instruction. They show you what happens on a sport climbing day so you know what to expect. The skills themselves, especially the lower-off, are learned in person.
How to start sport climbing, step by step
The video’s day breaks into five stages.
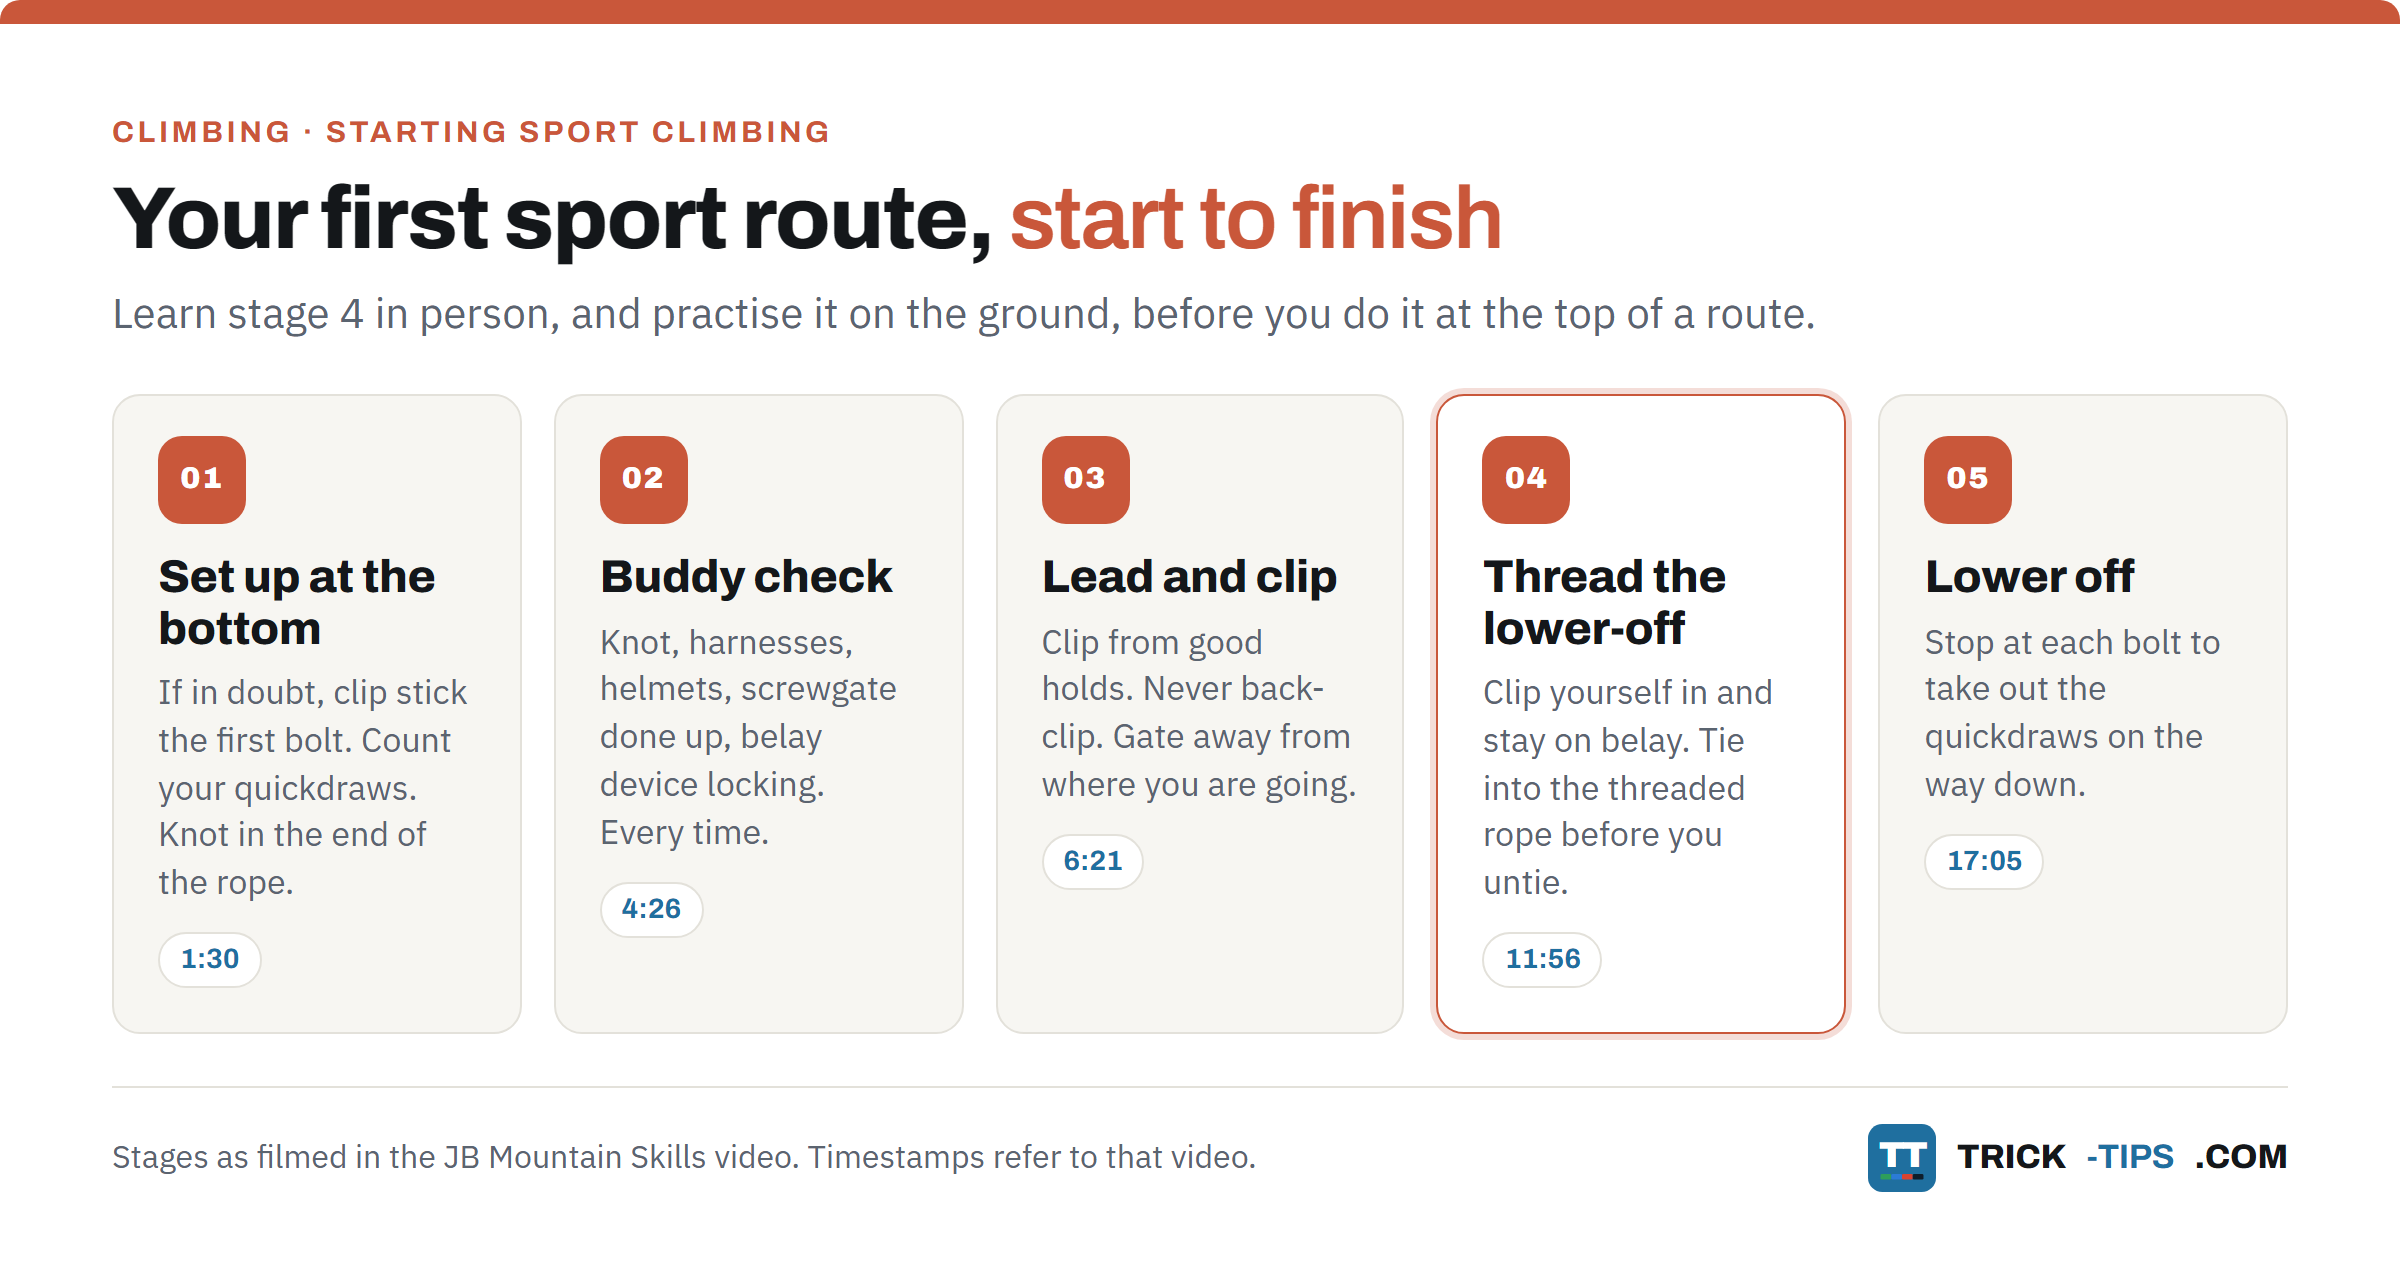
- Set up at the bottom (1:30). If in doubt, clip the first bolt with a clip stick. Count your quickdraws, and put a knot in the end of the rope.
- Buddy check (4:26). Knot, harnesses, helmets, screwgate done up and belay device locking. Every time.
- Lead and clip (6:21). Clip from good holds, never back-clip, and keep the gate facing away from where you are going.
- Thread the lower-off (11:56). Clip yourself in, stay on belay, and tie into the threaded rope before you untie the old knot.
- Lower and take out the quickdraws (17:05). Stop at each bolt to unclip on the way down.
First, though, you need the kit, a crag and a route.
What kit do you need for sport climbing?
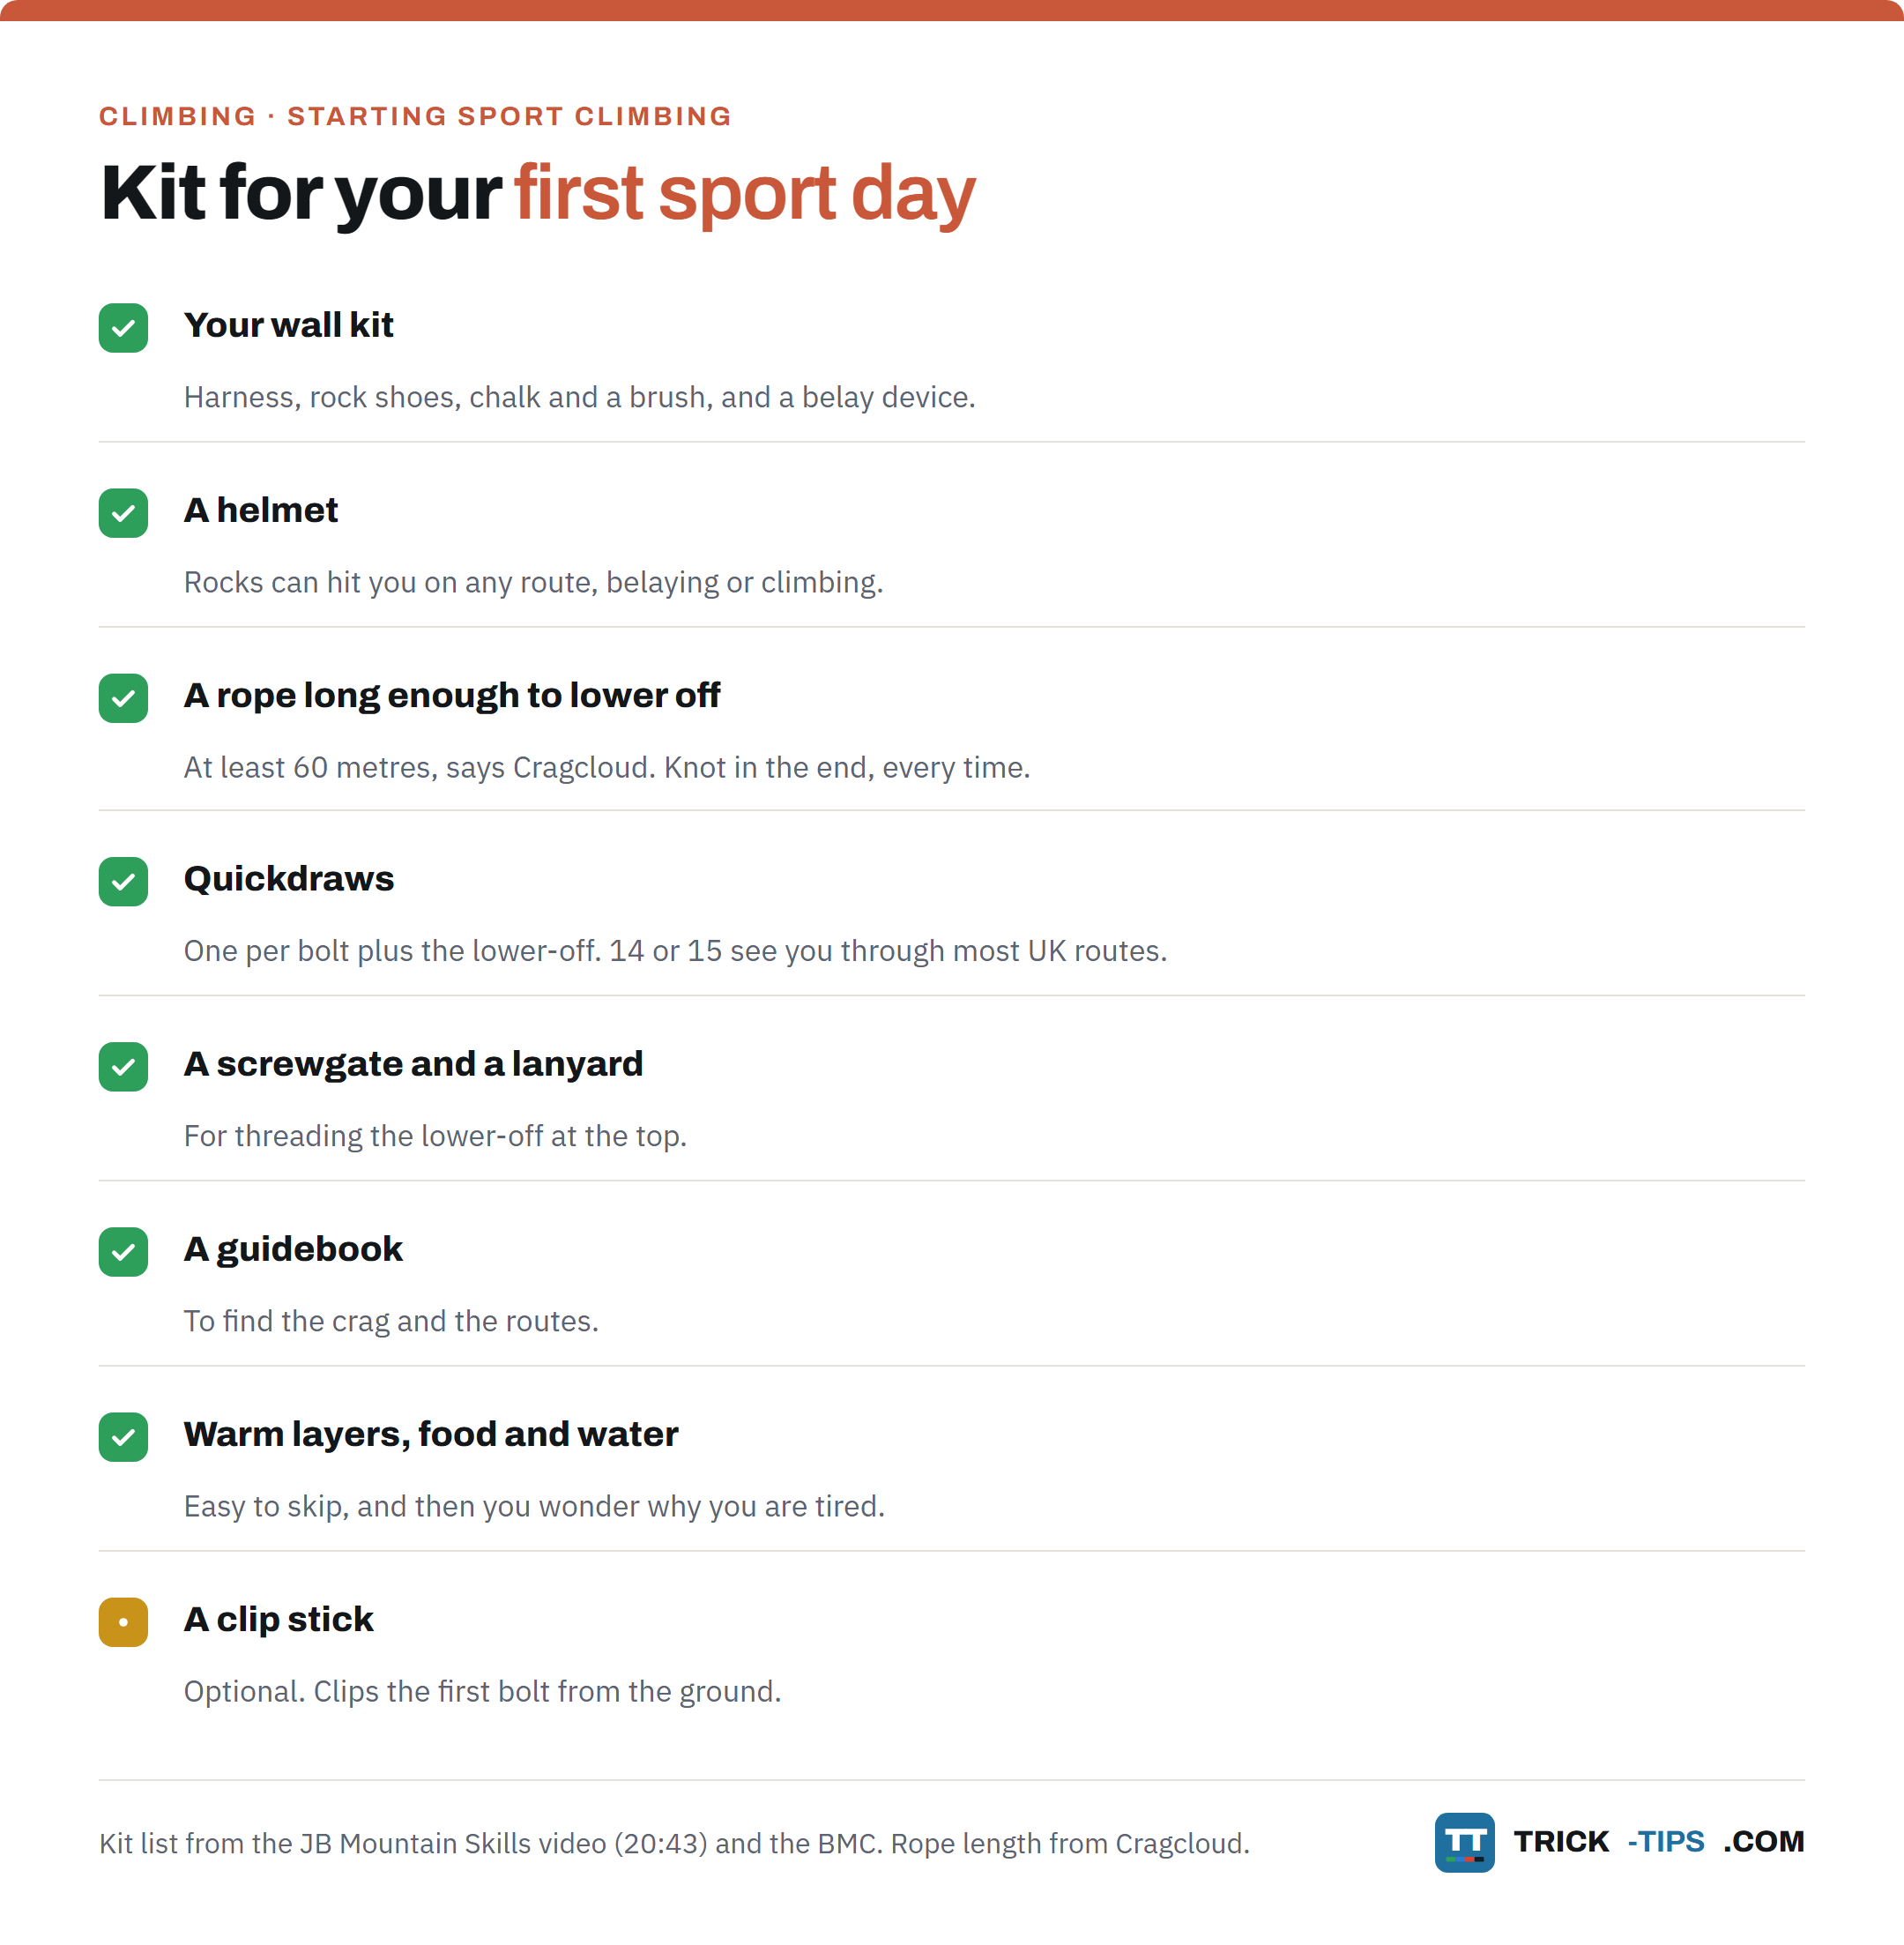
Your wall kit, plus what the wall normally provides. The BMC adds quickdraws, a few spare karabiners and slings, and a rope. The video’s kit list is from 20:43.
- A helmet. The video’s climber now wears one on every route, because rocks can hit you on any route, belaying or climbing (21:12). The BMC says to wear one at crags with loose rock. See our BMC helmet guide post.
- A rope long enough to lower off. Cragcloud’s video recommends at least 60 metres, or even 70, because outdoor routes are often longer (4:01). Our guide to climbing ropes explains the types.
- Quickdraws. The video counts eight for its route including the lower-off (2:58) and carries ten of various lengths (4:45). It reckons 14 or 15 will see you through most UK routes (22:36).
- A screwgate and a lanyard for the lower-off (22:51). The video prefers a lanyard, an adjustable tether for clipping yourself to the anchor (23:00). The BMC says a quickdraw from your belay loop, or a sling larks-footed onto it, does the same job, and our slings and webbing guide covers slings.
- A harness that fits, is comfortable and has enough gear loops. It does not need to be expensive (23:23). Our harness guide has the fit check.
- Rock shoes that fit. Try them on (23:47). See how to choose climbing shoes.
- Chalk, and a brush to clean the holds afterwards (24:01).
- A belay device. The video uses an assisted braking device and sees no reason not to on a sport route (25:29).
- A guidebook to find the crag and the routes (25:48).
- Warm layers, food and water. It is easy not to eat and drink enough, then wonder why you are tired (26:04).
The one optional extra is a clip stick, a pole that clips the first bolt from the ground.
How do you choose a crag and a route?
Start with a friendly crag. The BMC’s advice is a crag with plenty of single-pitch routes, and the easiest routes available for your first leads.
A local guidebook is how you find them. It shows which route is which on a topo, a drawing of the crag with each route marked, and the BMC suggests taking time to match the topo to the rock. Cragcloud starts online with crowd-sourced sites such as UKClimbing, then buys the guidebook because the websites are often not enough (6:48).
The BMC also publishes a list of beginner-friendly sport crags in Britain. Castle Inn Quarry, the crag in the video, is on it, with more than a dozen routes below grade 5.
Drop your grade. The BMC’s instructor says to drop it significantly for your first outdoor climbs, and Cragcloud says to start a few grades below your indoor redpoint and build up (2:41). The BMC adds that a French grade takes in a route’s length as well as its moves, so a long, sustained 6a is likely to be harder than a short one.
Check access before you go. The BMC says you generally do not need permission unless the guidebook says so, but to check its Regional Access Database first, because many crags have arrangements for parking, the approach and dogs. On its beginner list, parts of one crag are closed from 1 March to 30 June for nesting birds.
How is climbing on rock different from the wall?
Your indoor skills carry over, as the BMC says. What changes is everything around them.
| At the wall | On a sport crag | |
|---|---|---|
| Holds | Coloured, so you can see the route | Rock, and the holds tend to look the same |
| Quickdraws | Already on the bolts | You bring your own |
| Bolts | Close together | Nearly always further apart, so falls are longer |
| At the top | A karabiner to clip | A lower-off you thread yourself |
| Grades | French grades | The same grades, but drop a few for your first routes |
| The ground | A flat floor | Ledges, uneven ground, and loose rock at some crags |
Table: The main differences, from the BMC and the Cragcloud video.
The first thing you notice, as Cragcloud says at 1:06, is that you cannot climb as hard as you do indoors. On easier routes, up to about French 6a, so many holds look alike that you burn energy searching for better ones (1:34).
So read the route, and keep reading it. At 8:29 the video calls it climbing 101. Every time you spot a foothold, put your foot on it, stand up, and read the next bit.
The second thing is in your head. Outdoor climbing is a mental game, as Cragcloud puts it at 2:23, and falling on rock feels scarier, because bolts further apart mean longer falls (2:33).
If a hold looks a bit stuck on, tap it and listen before you trust it (10:56). The movement you learned indoors still works, so the body positions in our guide to flagging come with you.
What do you do before you leave the ground?
This is the video from 1:30 to 6:19.
Clip the first bolt from the ground. The video clips the first bolt with a clip stick (1:32), and the advice at 1:41 is simple. If in doubt, clip stick it. It pre-clips the second bolt too (2:20), because fumbling that clip and falling would mean hitting the ledge, if not the floor (2:33). The BMC agrees a clip stick is worth considering if the first bolts seem a bit high.
That is the one to remember. Low down is where a fall is more likely to hit the floor, as the video says at 7:16, which is why the belayer watches so closely there.
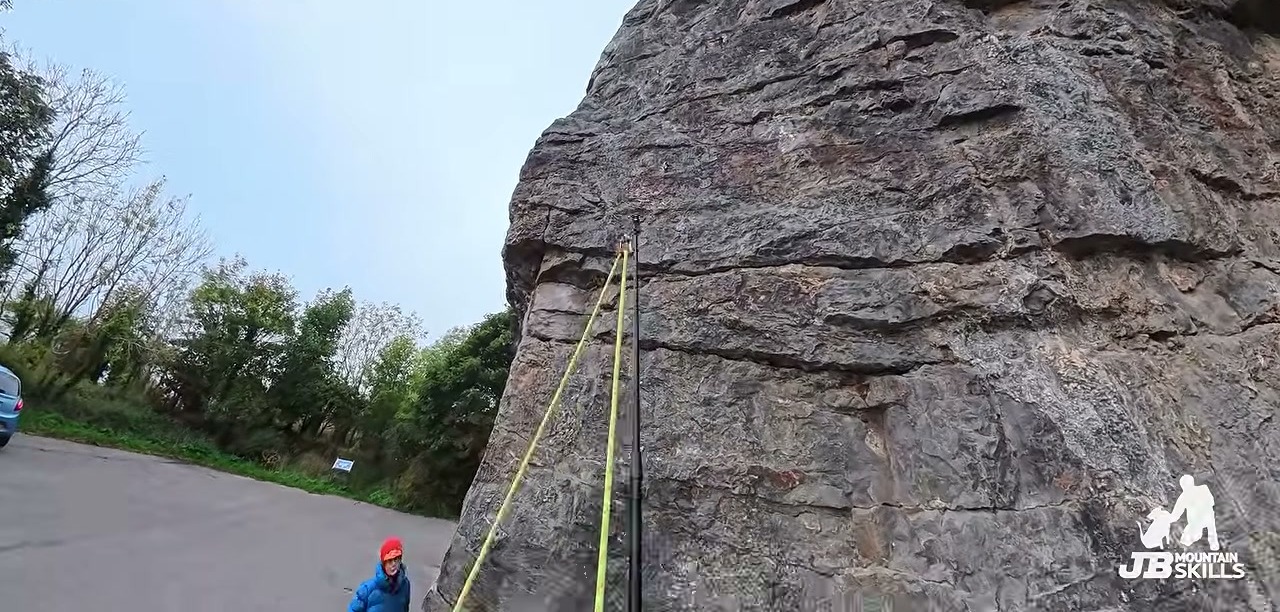
Count your quickdraws against the bolts, plus the lower-off (2:58), and clean your shoes (3:43).
Buddy check, every time. The video is blunt at 4:29. Experienced climber or new climber, buddy check every time you climb. At 5:13 the belayer squeezes the screwgate to check it is done up, then pulls the rope to check the assisted braking device locks, which it only does when it is loaded the right way round (5:18). The climber’s knot gets checked, both helmets are on, and both harnesses are done up (5:27).
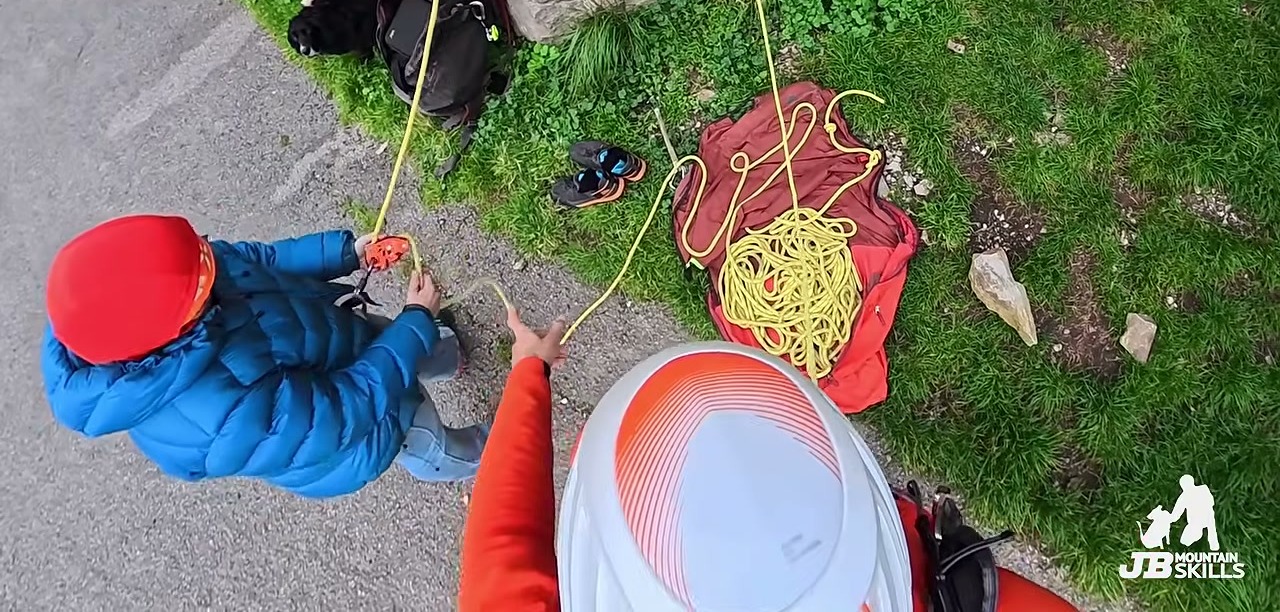
Close the system. The last part of the buddy check, at 5:56, is the far end of the rope. It is tied to the rope bag, so the climber cannot be lowered past it. Later the advice is simply to tie a knot in the end of the rope, every time (22:09), because lowering someone off the end could mean a twisted ankle or a lot worse. The BMC says the same, and the American Alpine Club’s accident reports include exactly that accident.
Have the lower-off kit on you. The lanyard and a screwgate go on the back of the harness before you set off (4:48 to 5:03).
How do you clip on lead?
The climb starts at 6:21, and the video talks through every clip.
Clip from a good position. The clips are made from good holds or a ledge where the climber feels stable (7:00, 7:47). Being able to let go does not mean you have to, because everyone can have a little wobble (7:52).
Your belayer pays out as you clip (7:09). Lead belaying is a skill in its own right, and your belayer is half of this.
Never back-clip. At 1:57 the video makes sure the rope is not back-clipped. Petzl’s guidance is that the rope runs through the karabiner from the rock side out towards you, and that clipped wrongly, the rope can unclip itself in a fall.
Keep the gate facing away from where you are going. At 7:58 the climber thinks about which way the route goes before clipping, so that in a fall the rope runs over the back bar of the karabiner, not over the gate. At 11:17 the climber is slightly to the right of the bolt, so the gate goes on the other side. Petzl’s rule is the same. The gate faces away from your direction of travel.
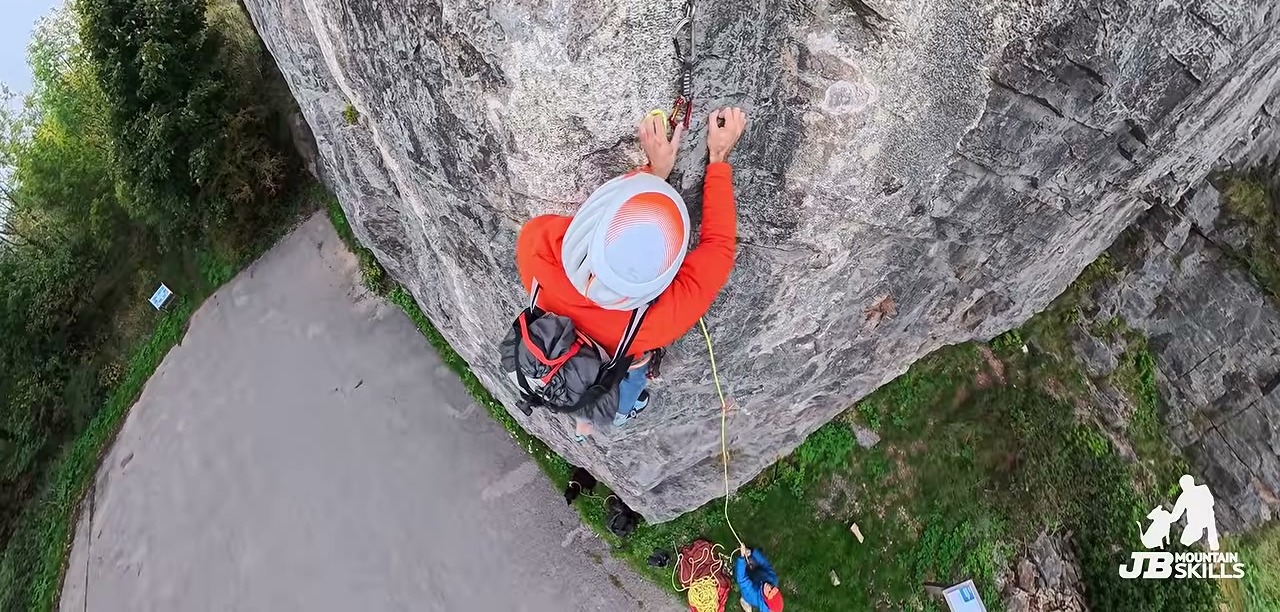
Use longer quickdraws on a wandering route. The video’s route goes straight up, so nothing needs extending (9:13). Cragcloud says to carry a mix of lengths, because routes do not always go in a straight line and you want to avoid rope drag (5:46).
How do you lower off a sport route?
This is the part from 11:56, and it is the part to learn in person.
If your partner is leading the route next, lower off on your quickdraws and leave them in (12:13). If they want to top rope it, that works through your quickdraws too, with a longer one in the lower-off so the rope does not pinch (12:28).
To take your quickdraws back, you thread the rope through the lower-off itself. The video shows one common way (it says at 26:39 there are others), and at no point is the climber taken off belay.
- Clip the lower-off. A quickdraw into each bolt and the rope clipped in (12:01), so a slip now goes nowhere far.
- Clip yourself to the anchor and sit into it. The lanyard goes into a bolt, from a good ledge, still on belay (12:47 to 13:16). The rings you are about to thread hang free.
- Call down “in direct” (13:25). The words matter less than both of you knowing them in advance (13:30). The belayer gives slack but keeps you on belay (13:46), because if a mix-up took you off belay and you leaned back later, bad things would happen (13:50).
- Thread a loop of rope through both rings (14:02 to 14:24), and pull plenty through.
- Tie a figure of eight on that loop, and clip it to your belay loop with a screwgate, done up (14:30 to 15:00).
- Only then untie your original knot (15:08). At 15:03 the climber is attached by three things, the lanyard, the new knot and the old knot, and only needs two.
- Call “take in”, check, then tell the belayer you are on them (15:57 to 16:13). With the rope tight, the climber can see it running through the rings to the new knot.
- Take out the two quickdraws, check again, then unclip the lanyard (16:25 to 16:58).
- Clip a quickdraw from your belay loop to the rope running down to the bolts (17:05). It keeps you in line as you are lowered, so you are not fighting a swing at every bolt. The video says you will not always need it.
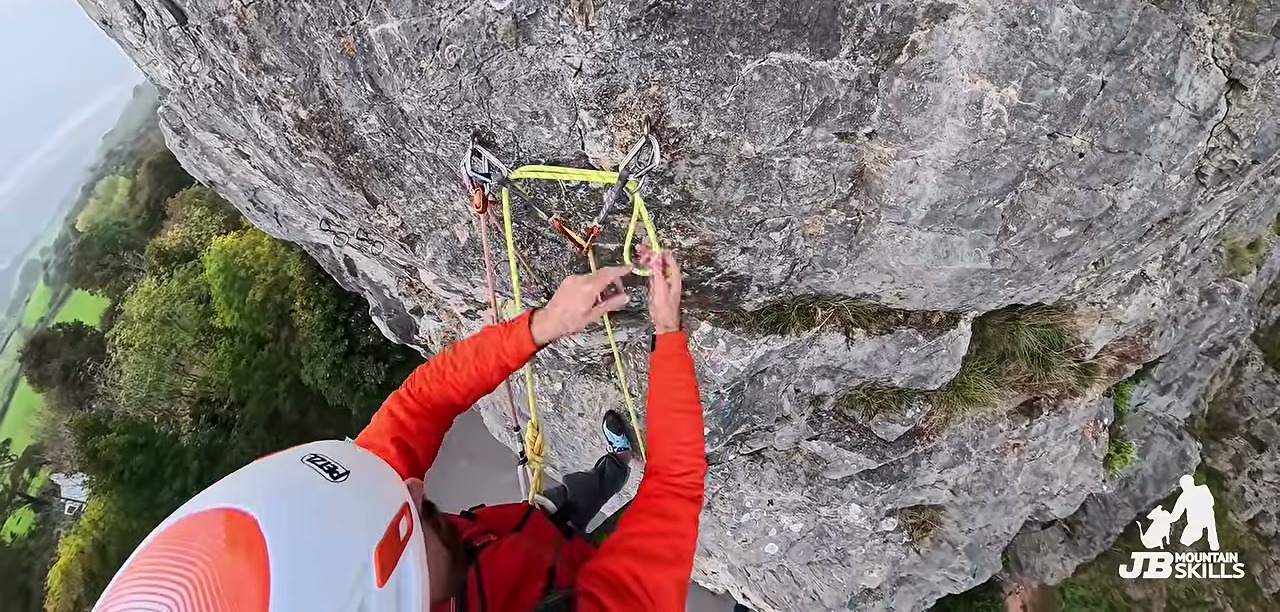
Then call “lower”. Tell your belayer to stop at each bolt while you unclip (17:43), and watch your hand if you hold the rope for balance, because it can pinch (18:17). At the last bolt, take the in-line quickdraw off first (the video calls it the tram line), or you pull your belayer across when you unclip (18:54).
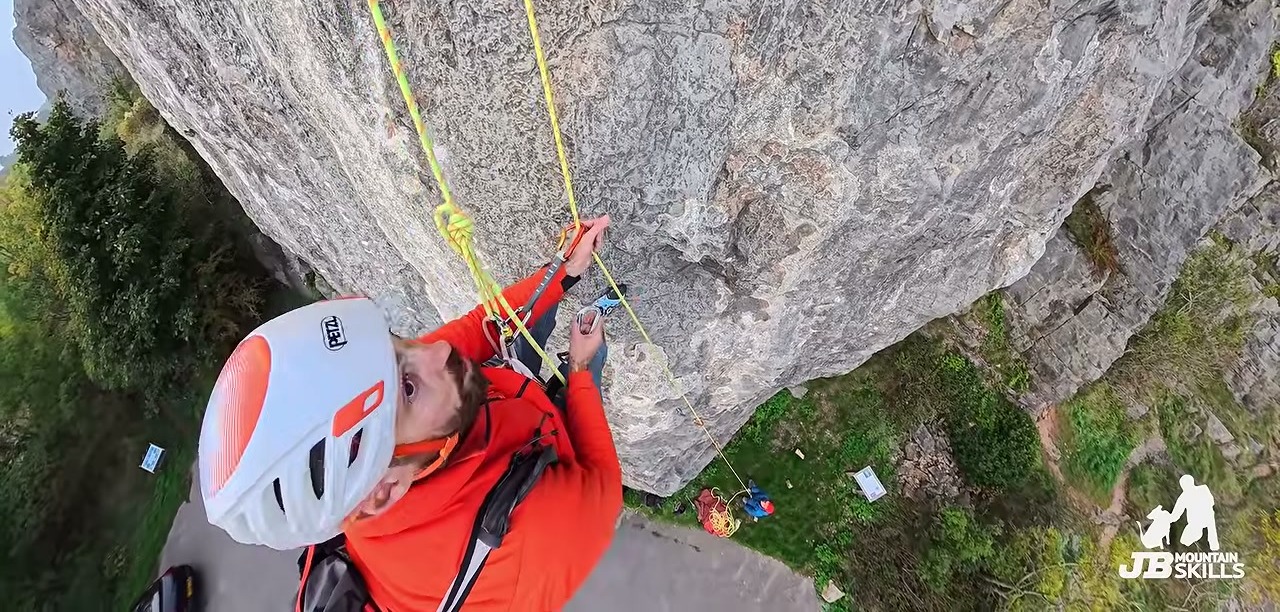
Learn the lower-off on the ground first
The BMC calls re-threading a lower-off probably the most hazardous part of sport climbing, because the leader has to untie and retie, and it says a fall from the top of a sport route is likely to be fatal. Practise threading a lower-off on the ground, as the BMC recommends, before you do it at the top of a route.
The BMC’s rules for any lower-off are these.
- Always lower off from two independent bolts. Thread both if they are not linked, or the link looks suspect.
- Never lower off with the rope threaded through a hanger. The sharp edges can cut the rope.
- If a chain and ring join the bolts, lower off the ring. It reduces wear on the anchor and the rope.
- If the lower-off looks incomplete, damaged or corroded, be ready to leave your own karabiner or maillon behind rather than trust it.
This is one method, shown so you know what to expect. It is not a substitute for being taught by a qualified instructor or an experienced climber, in person.
What is the etiquette at a sport crag?
Most of it is leaving the rock as good as you found it.
- Clean shoes, and start off a mat (3:43, 6:23). Dirty soles are less grippy, and they rub mud and grit into the rock, which polishes it faster for everyone.
- Brush your chalk off afterwards (24:05). Not enough people brush routes, the video says at 9:33, and brushing helps with polish and grip. Tick marks come off too (24:17).
- Do not hog a route. The BMC says hogging routes on a busy crag is not acceptable behaviour.
- Keep calls short and clear (13:38). The video’s route is short, but on a sea cliff you could be a long way up with a lot of noise.
Beyond the video
Two things the video does not cover, each checked against more than one source.
- Nobody is formally responsible for the bolts. The BMC says local climbers often place, check and replace bolts and lower-offs, but no one is formally responsible for fixed gear, and its instructor guide says it is up to you to check they are safe. That is why the lower-off rules above say to be ready to leave your own karabiner behind.
- Agree the plan before you leave the ground. The American Alpine Institute says to tell your belayer your plan for the top while you are still on the ground, that the belayer should keep you on belay the whole time, and that miscommunication around cleaning anchors causes accidents every year. The American Alpine Club makes the same point, that going on and off belay at the top is where errors get their chance.
What to practise
Before your first day out, practise threading a lower-off on the ground until it is boring, and agree your calls with your partner.
On the day, pick a few routes well below your indoor grade. Buddy check every time, clip from good holds, and read the rock before you commit to it. Then lower off the way you practised.
Once the first few routes feel normal, the next step is more mileage, bringing your grade back up slowly.
Another good video from Cragcloud
For the jump from wall to crag in eight minutes, Cragcloud’s tips for starting outdoor climbing is a good companion, from why rock feels harder (0:50) to your first grades (2:41). It names the products it likes, so take the brand picks as one climber’s taste.
Frequently Asked Questions
What is sport climbing?
Sport climbing is lead climbing on rock routes that already have bolts drilled into them. You clip your own quickdraws to the bolts as you climb, then thread the lower-off at the top and get lowered back down. It uses the same French grades as most climbing walls.
Do I need to lead climb indoors before I go sport climbing outside?
In practice, yes, because sport climbing means leading and clipping the bolts yourself, and your partner needs to be able to lead belay. If you do not lead yet, you can still top rope a sport route through quickdraws an experienced leader has left in. For your first days outside, the BMC recommends going with a more experienced climber or an instructor.
How many quickdraws do I need for sport climbing?
One for every bolt on the route plus the lower-off, with a few spare. JB Mountain Skills reckons 14 or 15 will see you through most UK sport routes, and the guidebook gives you an idea for longer ones. Count the bolts before you set off.
Is sport climbing safe for beginners?
Bolts generally give it more protection than trad climbing, but it is not risk-free. Falls are longer than at the wall, a fall low down can hit a ledge or the ground, and the BMC calls the lower-off the most hazardous part. Buddy check every time, tie a knot in the end of the rope, wear a helmet, and learn the lower-off in person.
What grade should I climb on my first day outside?
Well below your indoor grade. The BMC says to drop your grade significantly for your first outdoor climbs, and Cragcloud suggests starting a few grades below your indoor redpoint. Outdoor holds are harder to read, so the same grade feels harder on rock.
How do you lower off a sport climb?
You clip yourself to the anchor and stay on belay, thread a loop of rope through the lower-off rings, tie into it with a figure of eight and a screwgate, then untie your original knot, check everything and get lowered. The BMC calls this the most hazardous part of sport climbing, so learn it from an instructor and practise it on the ground first.
In short
Sport climbing is leading on bolted rock, and the day runs in five stages. Set up, buddy check, lead and clip, thread the lower-off, then lower and take out the quickdraws.
Go with someone experienced for your first days, pick routes well below your indoor grade, put a knot in the end of the rope every time, and practise the lower-off on the ground before you do it for real.
Ask any questions in the comments below.