
So it is your first time skiing, and the bit nobody tells you is how much happens before you even slide. Boots that feel like buckets, skis that will not stay together, a lift you have never ridden, and a hill that looks a lot steeper from the top.
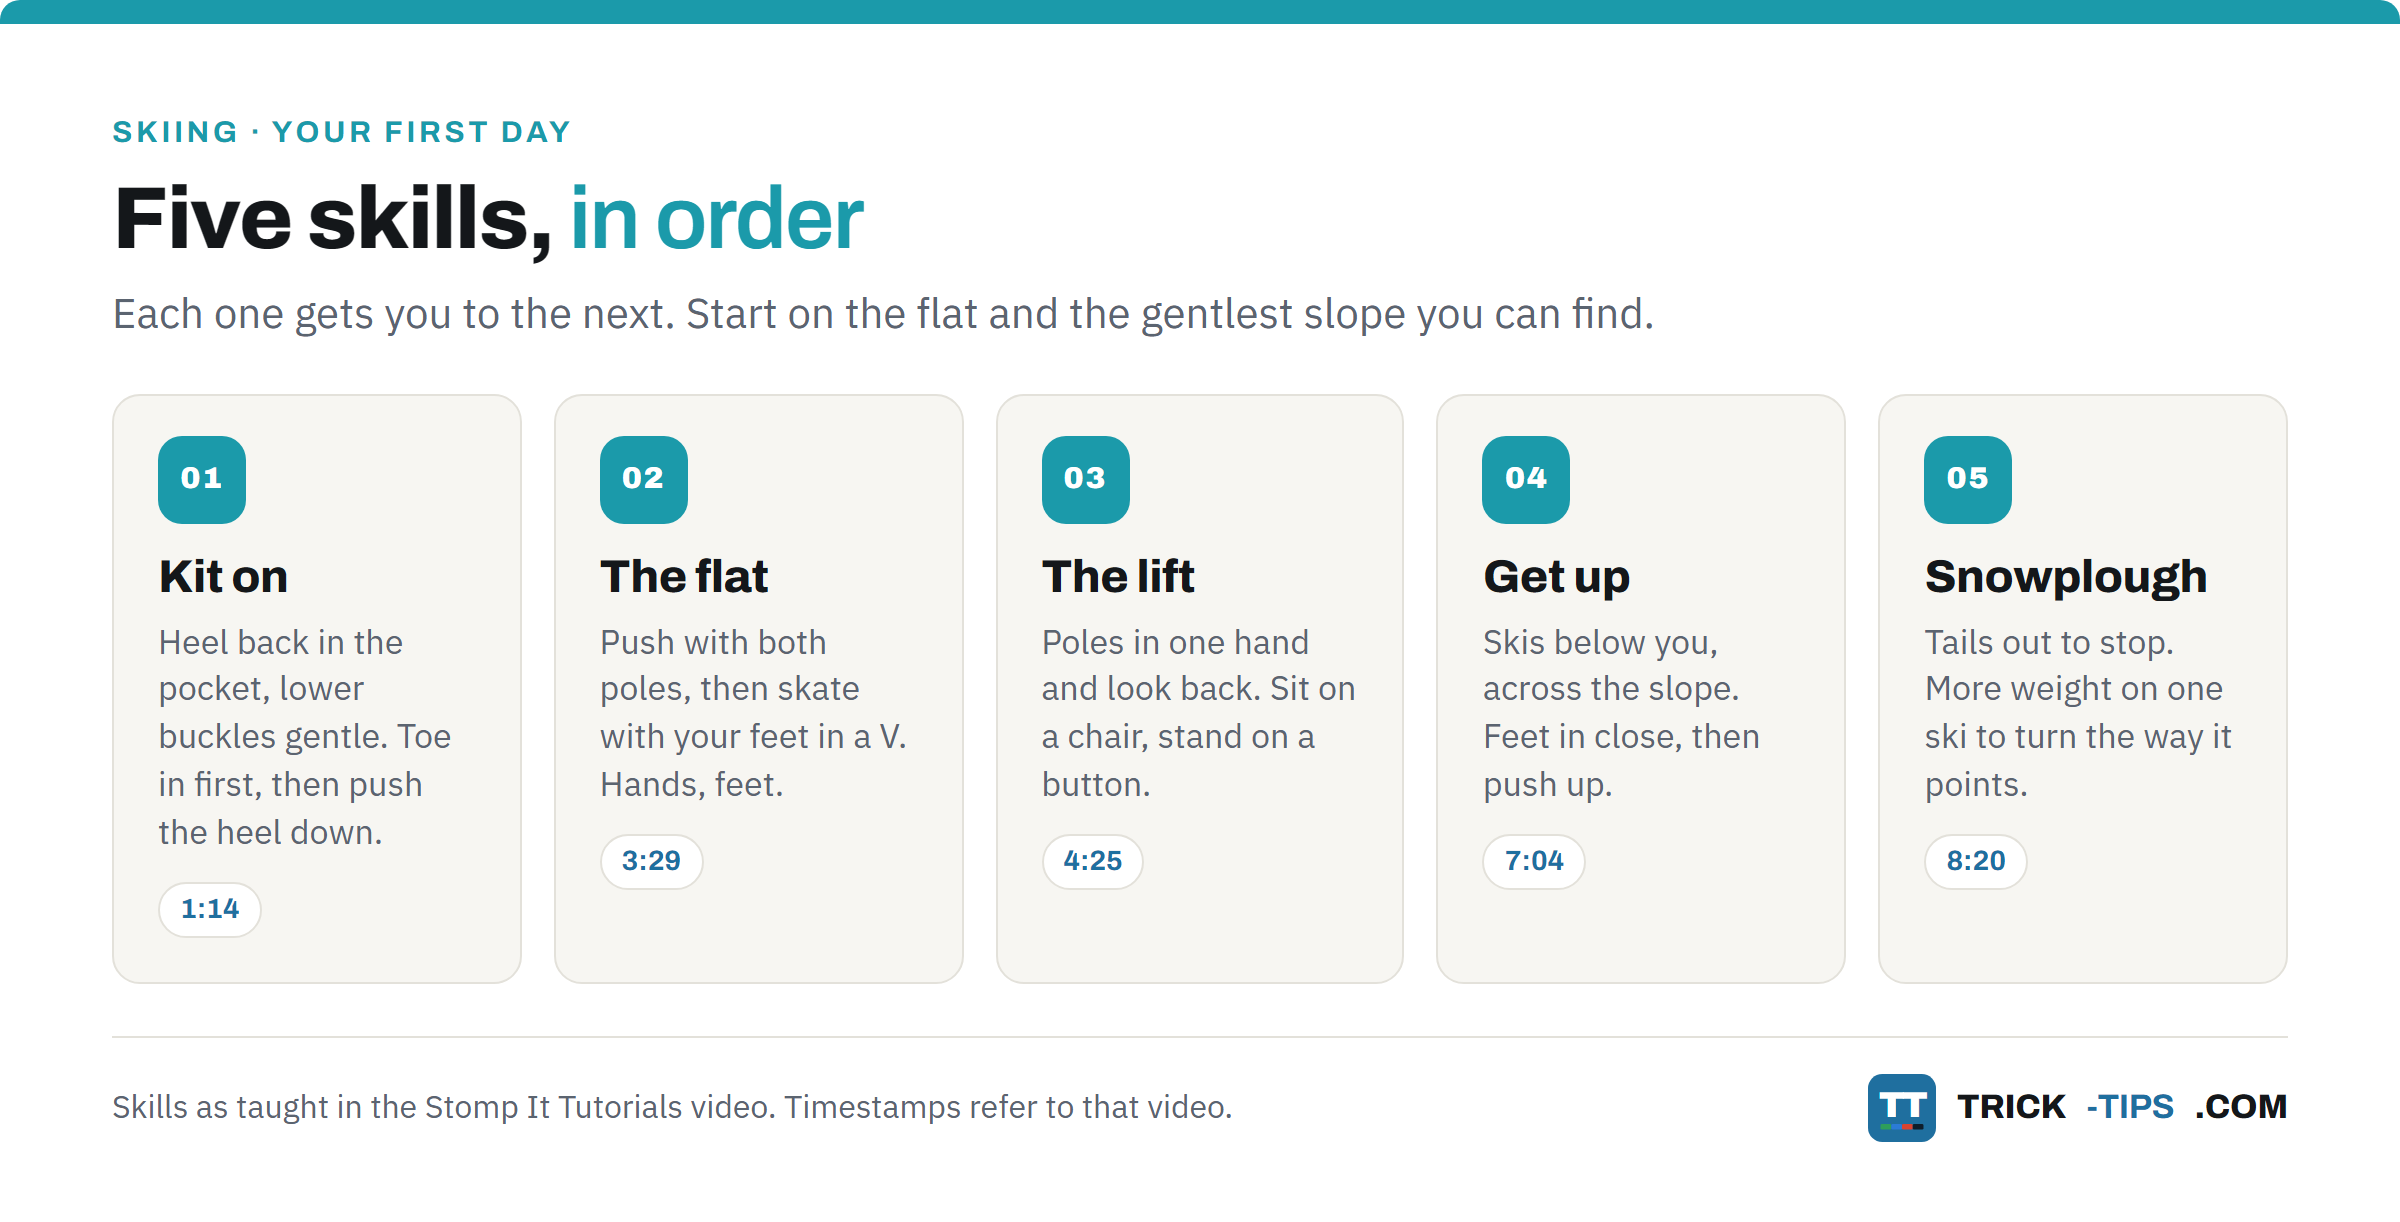
Here is the short answer. Your first day is about five things, in this order. Getting your kit on properly, moving about on the flat, riding the lift, getting up when you fall, and the snowplough, which is how you stop and how you make your first turns. Get those and you can get yourself down a green run.
We will go through each one with the video, then cover what the video leaves out, like how to fall and what to tell the hire shop.
Watch it first
The pick is Stomp It Tutorials, with Jens Nyström presenting. He made it, as he says at the start, as the video he wishes he had seen before his own first day, when he went out alone and found it traumatic. It walks through ten skills on real snow, from putting your boots on to your first turns, in the order you meet them on the day.
Nothing else we watched covered the whole day. Robin Barnes of the PSIA Alpine Team, in a film made with the retailer REI, teaches the snowplough better than anyone (we use those cues below), but that film starts with your skis already on. Others stopped before the snowplough, or rushed straight to parallel turns.
Jens is upfront that a video is no substitute for a ski instructor (0:26). We agree. If you can book a lesson for your first morning, do. This is for the people who cannot, and for anyone who wants to know what is coming.
Stomp It runs paid ski camps, and near the end (17:06) it plugs its own beginner pack of trick tips. None of the teaching depends on either.
The video’s own chapter list is slightly out, so here are the real times. Slope map 0:37, boots and bindings 1:14, moving on the flat 3:29, lifts 4:25, putting skis on and walking uphill 6:05, getting up after a fall 7:04, and the snowplough from 8:20. The last three skills, from 11:33, are for later, and we come back to them at the end.
First time skiing? Start with the slope map
Before you go anywhere, get a slope map (0:37). You want the easiest runs, and the colour that means easiest depends on where you are.
As Jens explains, green is the easiest in North America and some parts of Europe, while in other European countries the easiest runs are blue. So look for green first, then blue. Better still is a short slope next to a magic carpet, the conveyor belt lift for beginners (1:01). That is where your first day should start.
The map also shows what kind of lift serves each run, so you know whether a chairlift or a button lift is coming.
How do you put ski boots on?
Ski boots have a reputation for being uncomfortable, and a lot of that is how they go on. Jens shows the method from 1:14.
- Warm boots are easier. It helps if they are warm when you put them on, because cold boots are stiff (1:24).
- Open everything. Undo all the buckles, bend the shell out and pull the tongue up.
- Toes down, heel back. Push your foot in with the toes pointing straight down, then bang your heel on the ground so it slides back into the heel pocket (1:35).
- Top buckle and strap. Do up the top buckle and the strap until it feels nice and tight (1:38).
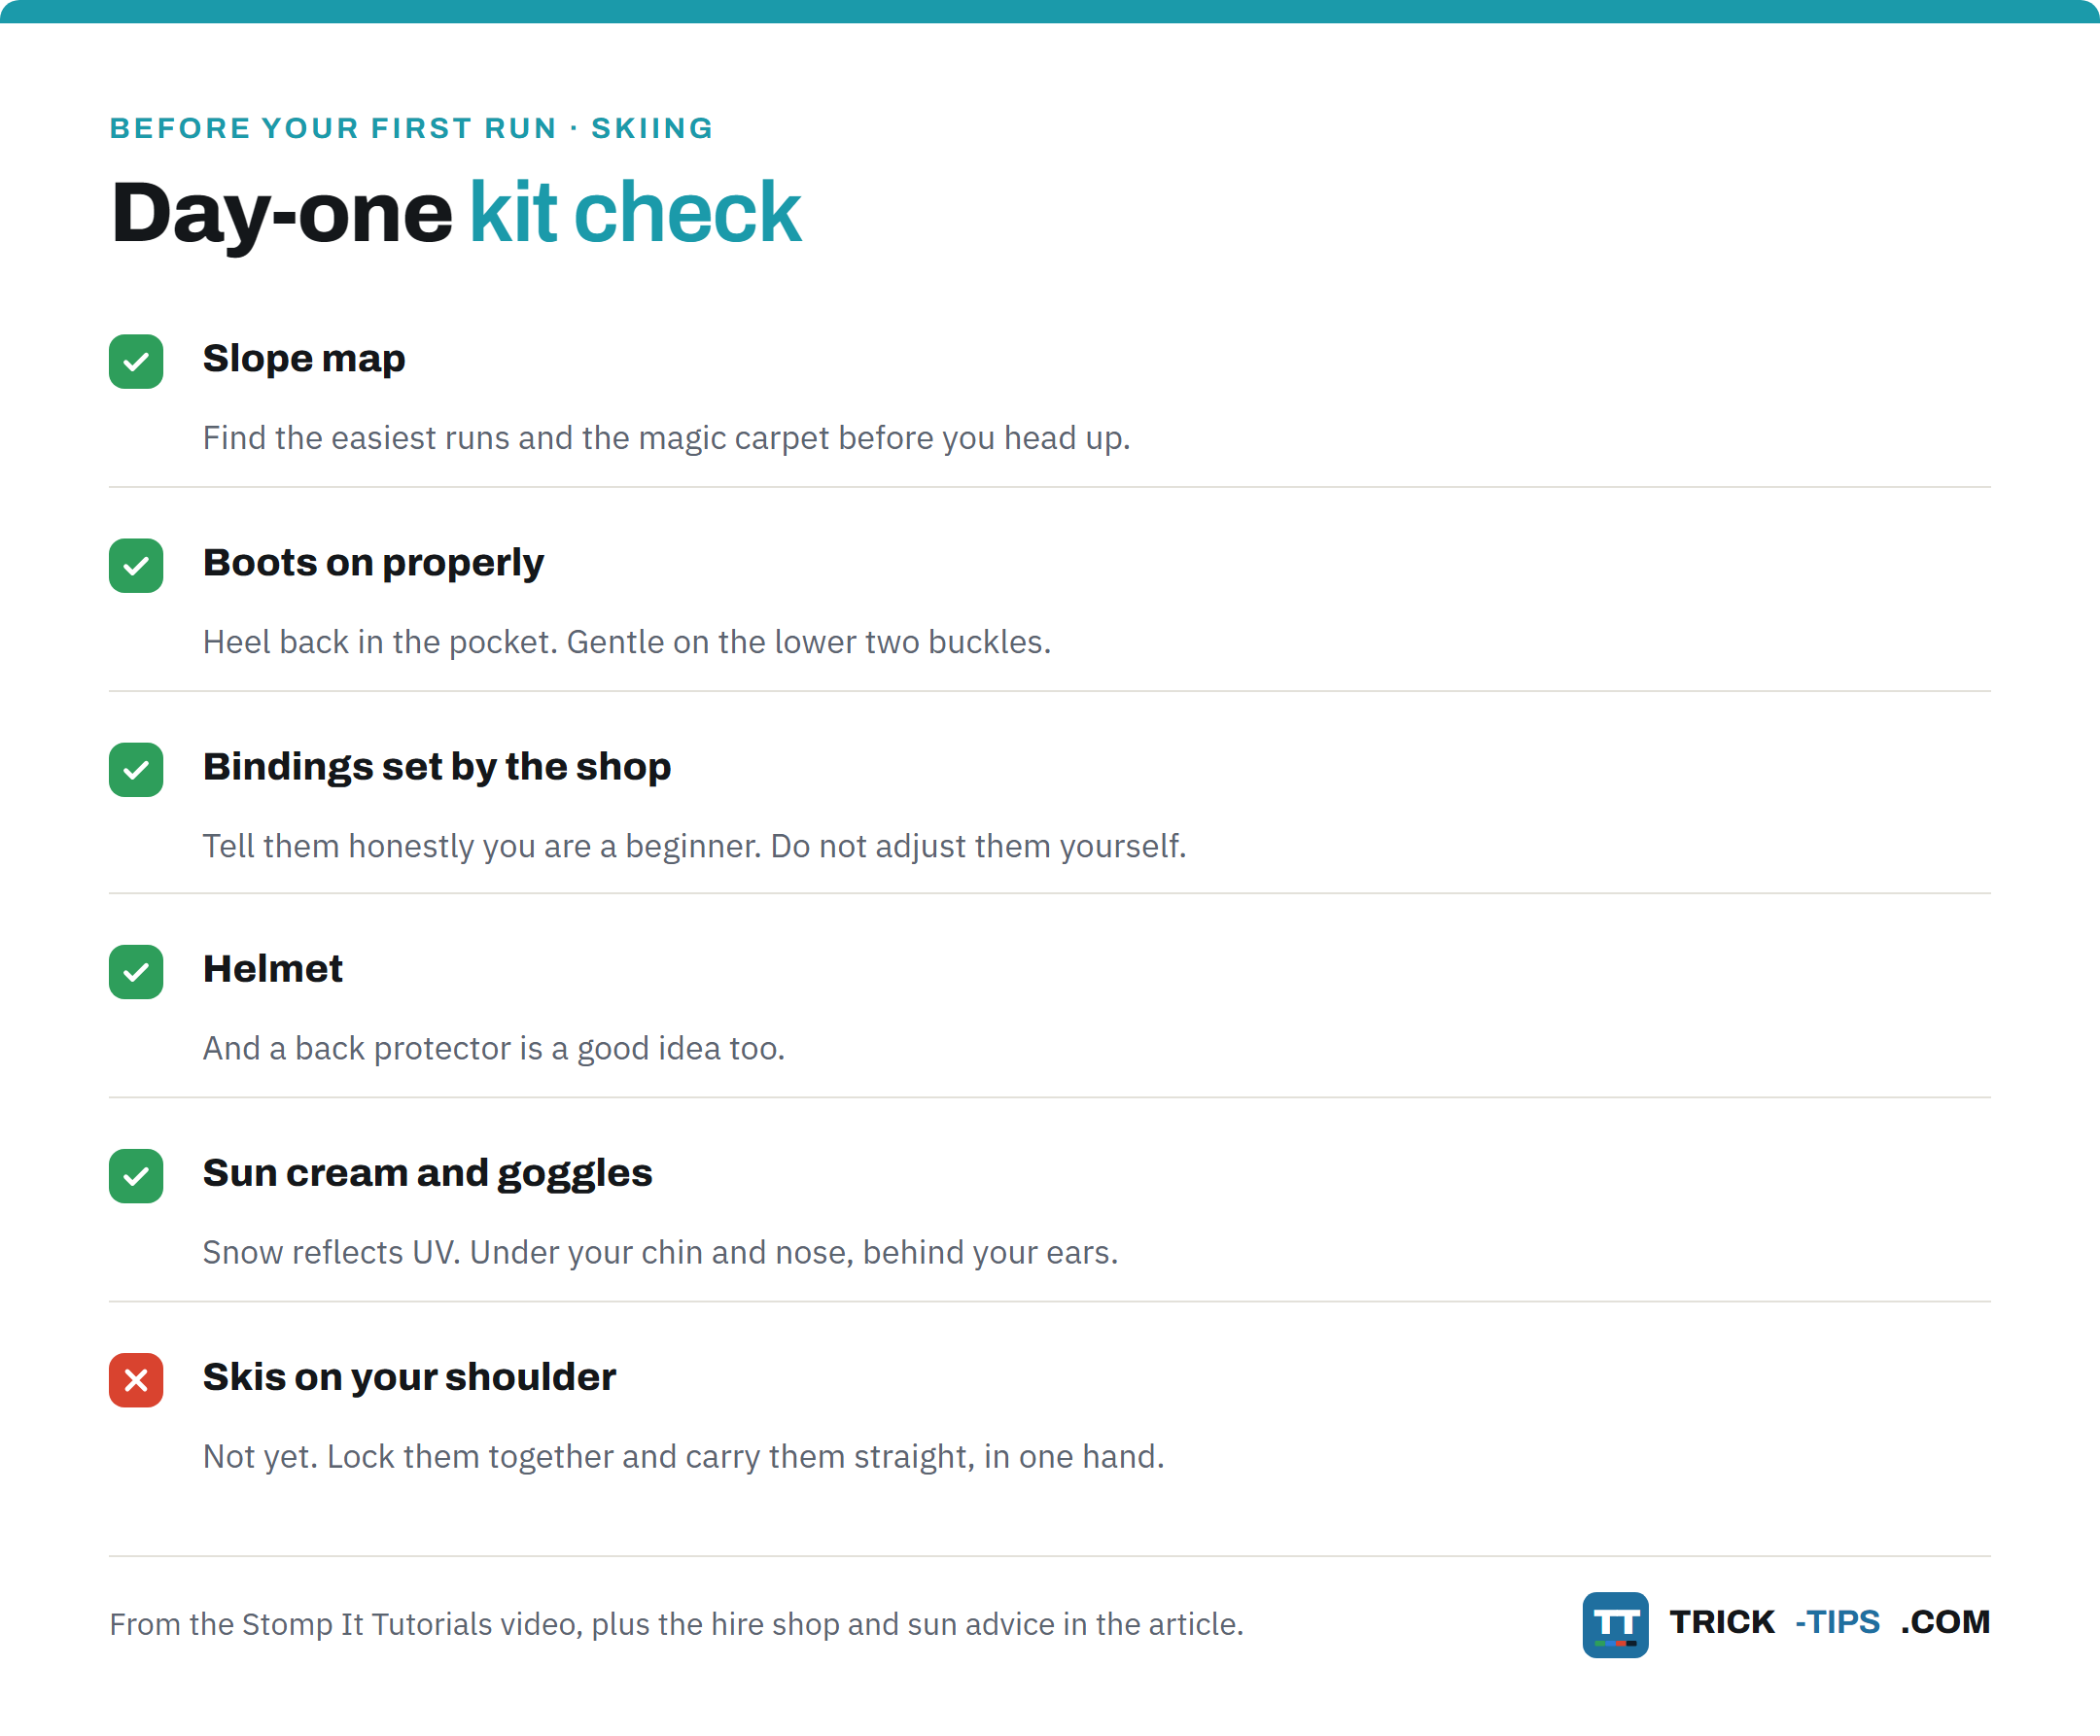
- Go gently on the lower two buckles. If you do them too tight you press the arch of your foot down, and that causes pain and cold feet (1:51).
So tighter is not warmer, at least on the bottom two.
How do you carry skis and click into the bindings?
From 1:59 he shows how the ski brakes lock the two skis together, so you can carry both in one hand. Carry them straight, and your poles too (2:23). Carry them any other way at first and, as he puts it, you will stab people in the legs. He also warns against the shoulder carry at the start (2:46), because it can be quite dangerous.
Then the bindings (2:51). The toe piece releases sideways and the heel piece releases upwards. Before you step in, make sure there is no snow stuck under your boot.
To click in, use your poles for balance, put your toe in first, line your heel up with the heel piece, and push down (3:06). To get out, you can press the back of the binding with a pole. Jens admits he never does that and just kicks it with his other boot, using both poles for balance (3:23).
He also says a helmet, and a back protector, are a good idea (3:33).
How do you get about on the flat?
There is a lot of flat ground at a ski resort, between the hire shop, the lift and the bottom of the slope.
First, the poles. Put the strap on first and then take hold of the grip, the way he shows at 3:40, so you can push down with a lot of force. Pushing with both poles is the easiest way to move forwards, but it is not very powerful.
So from 3:56 he adds skating. Put your feet in a V, tips apart. Push with the poles, then push out with one foot, lifting it quite high. His cue is “hands, feet” (4:20). Poles, then feet, and repeat.
How do you ride a chairlift and a button lift?
Lifts are the bit most first-timers worry about, so watch what other people are doing first. As Jens says at 4:25, it gives you an idea of how quick you have to be.
The chairlift
From 4:36 he rides one from start to finish.
- Wait for the gate, then push yourself forward gently. Poles in one hand.
- Look over your shoulder for the chair coming, grab it and sit down (4:51).
- Pull the safety bar down and put your feet on the footrest (4:56).
- At the top, poles in one hand again, feet off the footrest, and lift the bar slowly. Lean back so you do not fall off (5:10).
- The ramp off the top runs downhill, so get into your snowplough, ride off to the side and stop (5:18). We cover the snowplough below.
The button lift
From 5:33. A button lift is a pole with a disc on the end that pulls you up the slope while you stand on your skis.
- Both poles in one hand.
- Point your skis in the direction of the lift track (5:45).
- Look back to where the button is coming from, reach out and grab it, and put it between your legs (5:48).
- Cruise off gently and look where you are going.
- At the top, let go of the pole and ride off to the side, out of the way (6:02).
A T-bar works the same way, except you can hold the side of the bar too.
How do you put skis on, and walk uphill, on a slope?
Sooner or later you will be clicking in on a slope rather than on the flat. From 6:05, put your skis across the slope, at 90 degrees to the way it falls, so they cannot run away.
Then put the lower ski on first (6:17). Once it is on, you can dig its edge into the snow, and that makes it much easier to get the top one on (6:23).
To walk uphill, go sideways (6:34). Tip your skis on to their uphill edges, using your knees and hips a little, so they grip the snow. Then take small steps sideways up the hill. Keep your poles in, so if you start to slide forwards or backwards you can stop yourself (6:55).
Robin Barnes adds a useful check in the REI film. As you sidestep, you should see thin lines in the snow from your edges (3:32). That tells you the skis are on their edges and not flat. She also warns that the tendency is to walk up too high (5:12). Take small steps, and only go as high as you are happy to come down from.
How do you get up after a fall?
You will fall on your first day. Everyone does. Jens fakes one at 7:04 and lands the way most beginners land, head down the slope with the skis crossed.
- Uncross your skis. Stretch your legs out and do a bit of a split to get them apart (7:13).
- Get your skis below you, across the slope. Swing round until your skis are downhill of you and lying across the hill, not pointing down it (7:25).
- Feet in close. Pull your feet right up to your body (7:32).
- Push up. Use your fist or hand on the snow, or your poles. He holds the top of the poles with one hand and lower down with the other, then pushes himself up (7:47).
It takes a bit of muscle, as he says, so do not be surprised if it takes a couple of goes.
If a ski came off in the fall, the toe piece has usually let go and the heel piece has stayed down (8:01). You cannot step back in like that. Push the heel piece down with your hand or your other boot until it opens, then click in as before (8:12). And if you are on a slope, lower ski first.
How to ski for beginners: the snowplough
This is the skill that turns all of the above into skiing. The snowplough is how you stop, and it is how you make your first turns.
Stop with a snowplough
From 8:20. Push the tails of your skis out and keep the tips close together, but not touching. Leave a little gap, or the tips cross and get stuck (8:29).
To stop, slide a little and then press the skis out wider (8:35). It is the simplest way of braking there is.
Robin Barnes, in the REI film, gives the best way to think about it. The snowplough (the film calls it a wedge) is a triangle. The bigger the triangle, the slower you go (1:48). A small one lets you glide in control, and a big one stops you, which Robin calls a braking wedge (2:28). Practise both, and everything in between.
Get your stance right
From 9:09. Be centred, so you can feel the fronts of your boots on your shins. Rest on them a little. Do not lean right forward, and absolutely do not lean back. Keep your arms out in front where you can see them.
Robin’s version, at 0:58 in the REI film, is shins tilted forward and arms forward and out to the side, the way you would carry them walking across a log over a stream.
Turn with a snowplough
Now the clever bit. In a snowplough, each ski is pointing a different way. Standing evenly, they cancel each other out and you go straight (8:52).
Put more weight on one ski and you turn the way that ski is pointing (9:02). So to turn left, put more weight on your right ski, and to turn right, more on your left. That is the outside ski of the turn. Jens admits it is confusing at first (9:59).
- One turn at a time. Turn until you are going slightly back up the hill, and let the slope slow you down (9:45). Then try the other way. Practise each on its own (10:10).
- Then link them. More weight on one ski, then the other, so you snake down the hill (10:16). Do it for several runs until it feels comfortable (10:37).
Robin teaches the same turn with a different cue. You steer the triangle by twisting your legs, the way you would steer a bicycle, with only a teeny bit more weight on the outside ski (5:51 to 6:33), and without big movements of your body from side to side. If the weight cue is not working for you, try this one.
Two more cues from the REI film are worth taking with you. Start with a gentle change of direction, not a big turn (6:58). And when you link turns, take a moment going straight in a neutral stance between them, without hurrying or making the turns sharp (7:34). To slow down, carry the turn further round up the hill (8:39) rather than making a bigger triangle.
When the snowplough turns feel easy, Jens shows a first step towards parallel at 10:41. At the end of each turn, bring the inside ski in alongside the other one for a moment. If it feels stuck, push that knee out and the ski slides in more easily (11:13). He is honest that it is quite difficult and needs a bit more speed, so leave it until your snowplough turns feel easy.
Common mistakes on your first day
Doing the lower buckles up tight. It crushes the arch of your foot and gives you pain and cold feet (1:51). Gentle on the bottom two.
Carrying skis on your shoulder. Lock them together and carry them straight, in one hand (2:23, 2:46).
Letting the tips touch in a snowplough. They cross and you stop dead. Keep a small gap (8:29).
Leaning back. Jens says absolutely not (9:13). Feel the fronts of your boots.
Turning before you can stop. Both videos teach the braking snowplough before the turns. Learn them in that order.
Rushing the turns. Robin’s point in the REI film (7:47). Not in a hurry, not sharp, and stay in the triangle.
Walking up too high. Only climb as far as you are happy to snowplough down from (REI, 5:12).
What comes after your first day?
The last three skills in the video are not first-day skills, and Jens more or less says so.
Side slipping (11:33) is sliding sideways down a slope with the skis across it. It is how you get down a section that is steeper than you are happy with, and he says it lets you brake much harder than a snowplough. Skidded parallel turns (13:44) are where the skis stay together through the turn. And jumps (15:34), which he introduces by admitting that some people say it is too early.
Once your snowplough turns are confident, come back to the video for these. After parallel turns comes carving, where the skis stop skidding, and our guide to how to carve on skis is the rung above that.
Beyond the video
A few things the video does not cover that are worth knowing before you go.
Learn how to fall. You are going to, so do it on your side, in towards the hill, rather than forwards or head-first down it. A Canadian Ski Instructors’ Alliance instructor puts it as falling to your side and slightly back, so you go into the hill and not down it.
Tell the hire shop you are a beginner. Your bindings are set to release at a certain force, worked out from your weight, height, age, boot sole length and the kind of skier you are. A cautious skier on gentle terrain is set so the binding lets go more easily. So be honest, and let the shop set and test them. Do not adjust them yourself.
Do not sit down on a button lift. It is the most common mistake on drag lifts. The button is there to pull you along while you stand, and it cannot take your weight. If you do come off, get out of the lift track straight away, crawling to the side if you have to, because the people behind you cannot steer round you.
Sun cream and goggles, even when it is cold. Fresh snow can reflect as much as 80 per cent of the sun’s UV, so it reaches you from below as well as above. Put sun cream on all the skin that shows, including under your chin, under the tip of your nose and behind your ears, and wear goggles or wraparound sunglasses that block UV.
What to practise
On the flat, before you go near a slope. Click in and out, toe first, until you can do it without looking. Push with both poles, then skate, hands then feet.
On the gentlest slope you can find, ideally by the magic carpet. Sidestep a few metres up, snowplough down and stop. Do it with a small triangle and then a big one, until you can stop where you choose.
Then one turn at a time, each way, finishing back up the hill. Only link them when both single turns feel easy.
Before you go
Before your first run, read our guide to ski slope etiquette. It covers who has priority, where to stop and how to join a run, which matters as soon as you leave the nursery slope.
Still deciding between the two sports? Our skiing vs snowboarding guide compares them for first-timers.
And for what to wear under it all, our guide to whether you need expensive winter gear goes through what each layer is actually for.
Frequently Asked Questions
What should I learn on my first day skiing?
How to put your boots and skis on, move about on the flat, ride the beginner lift, get up after a fall, and use the snowplough to stop and to turn. That is enough to get you down an easy green run. Side slipping, parallel turns and jumps come later.
How do you stop on skis as a beginner?
With a snowplough. Push the tails of your skis out and keep the tips close together, with a small gap so they do not cross, then press the skis out wider to brake. The bigger the triangle your skis make, the slower you go.
How do you turn on skis for the first time?
Get into a snowplough, then put more weight on one ski and you will turn the way that ski is pointing. So more weight on your right ski turns you left, and more on your left ski turns you right. Practise one turn at a time, finishing back up the hill, before you link them.
How do you get up after falling on skis?
Uncross your skis, swing them round so they are below you and lying across the slope, and pull your feet in close to your body. Then push yourself up with your hand or your poles. If a ski has come off, push its heel piece down to open it, then put the lower ski on first.
Should I take a lesson on my first day skiing?
Yes, if you can. Even the video we recommend says it is no substitute for a ski instructor. A video is the next best thing for knowing what is coming, and for practising what you were taught.
Which runs should a beginner ski first?
The easiest ones on the slope map, ideally a short slope next to a magic carpet lift. In North America and some parts of Europe the easiest runs are green, and in other European countries they are blue, so look for green first, then blue.
In short
Your first time skiing is five skills in order. Kit on properly, get about on the flat, ride the lift, get up when you fall, and stop and turn with a snowplough.
Spend your first hours on the flat and the gentlest slope you can find. Stop with a big triangle, glide with a small one, and do one turn at a time before you link them.
Ask any questions in the comments below.


