New board, bindings in a bag, and a first day on the snow coming up. Or you have been riding on whatever the hire shop set up and something never quite felt right. Either way, this is the one to read first.
Here is the short answer. Setting up bindings comes down to two numbers: how far apart your feet are, and what angle each binding sits at. For width, measure your lower leg, or jump off the sofa and land in a snowboard stance, and use that. For angles, a common first setup is +12 on the front foot and -9 on the back, with both feet turned slightly out. Then centre your boots on the bindings, tighten every screw properly, and check your straps before you leave the house.
We have picked a six-minute video from Search of Snowboarding that covers the two numbers better than anything else we watched, plus a second one from the same channel for the fine-tuning. What follows is the breakdown, with timestamps.
Why this video
Plenty of setup videos are really about one brand’s bindings. This one works for any board and any binding, and Search of Snowboarding explains why each setting matters, not just where to put the screws.
It gives you three ways to find your width, a clear explanation of how angles are numbered, a first-time setup and one for each riding style, then walks through actually mounting the bindings without stripping anything. It is also the most watched setup video we found, by some distance.
Two others are worth a look. Burton’s setup video with Mark Sollors is the best we found on working out whether you ride regular or goofy, and is ideal if you are on Burton’s EST or Re:Flex bindings. SnowboardProCamp’s five setup tips is the quick version, and suggests a centred setup if you do not yet know your front foot.
First, regular or goofy?
Before any of the numbers, you need to know which foot goes at the front. Regular is left foot forward. Goofy is right foot forward.
The Burton video has a nice way to find out at 1:40 of that video. Put some socks on, take a short run, and slide across a smooth floor. Whichever foot you put forward to slide is very likely your front foot.
If you are still not sure, SnowboardProCamp’s suggestion is to set up a centred stance with the same angle on both feet (+15 and -15), so you can try both ways round on the day.
Stance width: how far apart
The video frames width nicely at 0:44. Think of the most athletic stance you could stand in, the way you might stand to hit a ball. Too narrow and you have no power and no balance. Too wide and you lose the movement in your hips (0:57).
There are three ways to find your number.
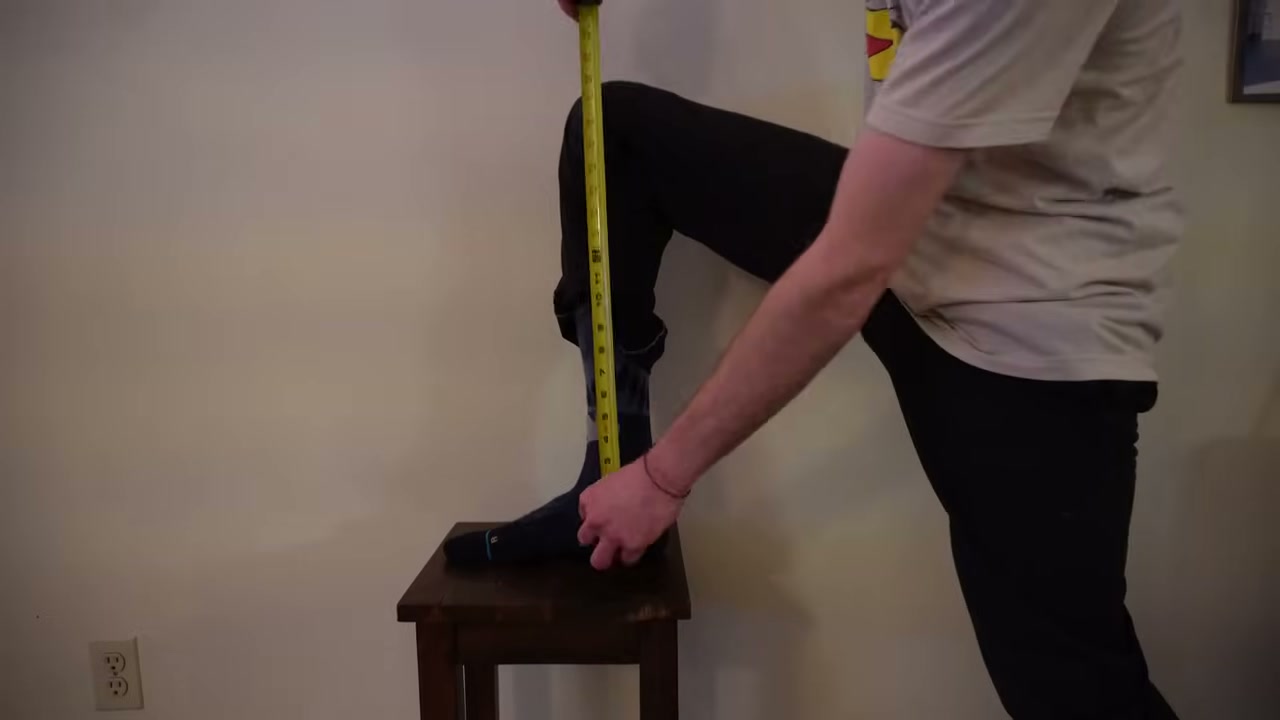
- Measure your lower leg (1:18). Plant your bare foot on the floor and measure from the floor up to the top of your bent knee. For the presenter that is exactly 22 inches, which is exactly the stance he rides.
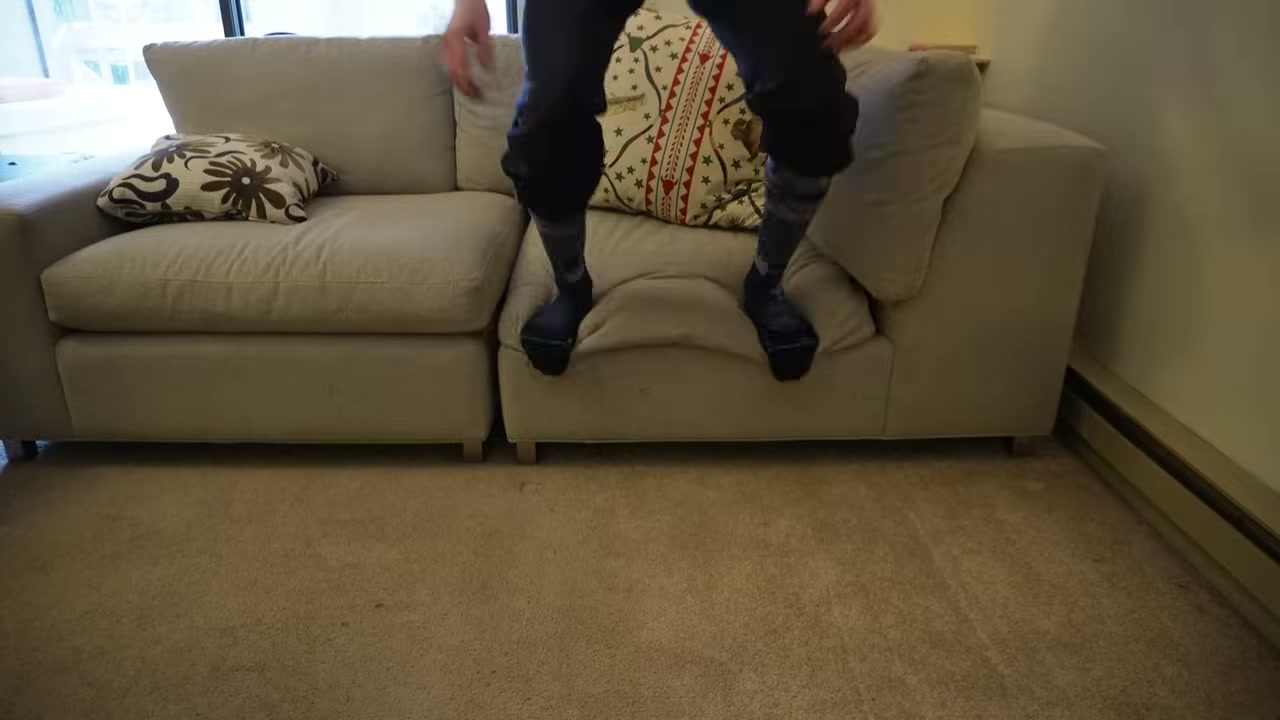
- Jump off the sofa (1:30). Jump off and land in a snowboard stance, then get someone to measure between the centres of your feet. That gives you a width you can comfortably land in.
- Use the reference stance on your board (1:43). Most boards mark a recommended width between the inserts. It is a handy starting point, but the video does not fully recommend relying on it, because references vary a lot between brands even for the same size of board.
The advice at 2:02 is that the lower leg measurement gives the best idea, or you can average all three.
Binding angles: which way your feet point
Look at your bindings or the disc in the middle of each one and you will see markings. Each mark is 3 degrees (2:21), so angles only come in multiples of three.
A binding turned towards the nose is a positive angle, and one turned towards the tail is negative (2:47). The front foot is always said first, so “+15 -15” means the front foot is 15 degrees towards the nose and the back foot 15 degrees towards the tail.
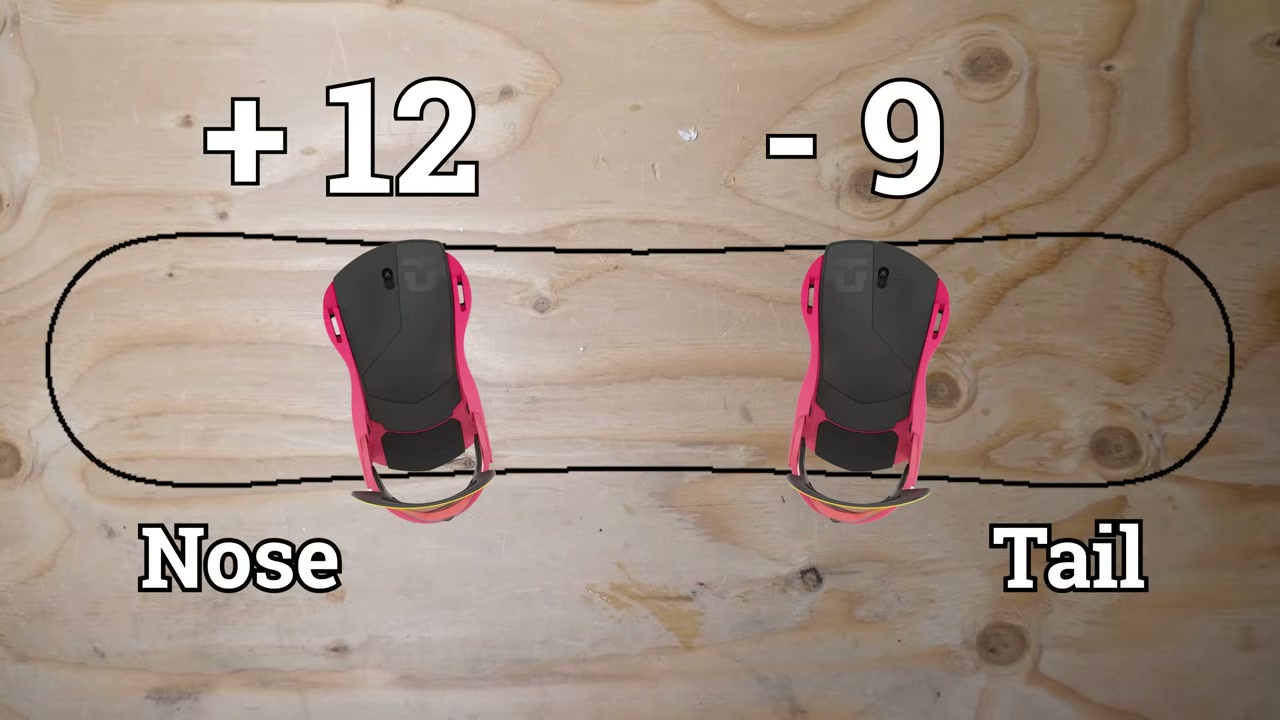
Here are the setups the video suggests from 3:21.
| Setup | Front | Back | What it is for | In the video |
|---|---|---|---|---|
| First time | +12 | -9 | A comfortable starting point, feet turned slightly out | 3:23 |
| Freestyle | +15 | -15 | Symmetrical, so riding forwards and switch feel the same | 3:42 |
| Powder | +15 | 0 | More drive from the back foot in deep snow | 3:50 |
| Carving | +18 | +6 | Both feet forward for turning on the piste | 4:03 |
If this is your first time, do not overthink it. As the video says at 3:09, it is easy to change and you will tweak it as you ride.
Mounting the bindings
Now the numbers go onto the board.
- Find the inserts for your width (4:18). Use a tape measure, and always line up the width from the inner set of holes out so your stance stays centred on the board. Width is measured from the centre of each binding.
- Mark them with a pen (4:47), so you are not guessing once the bindings are on.
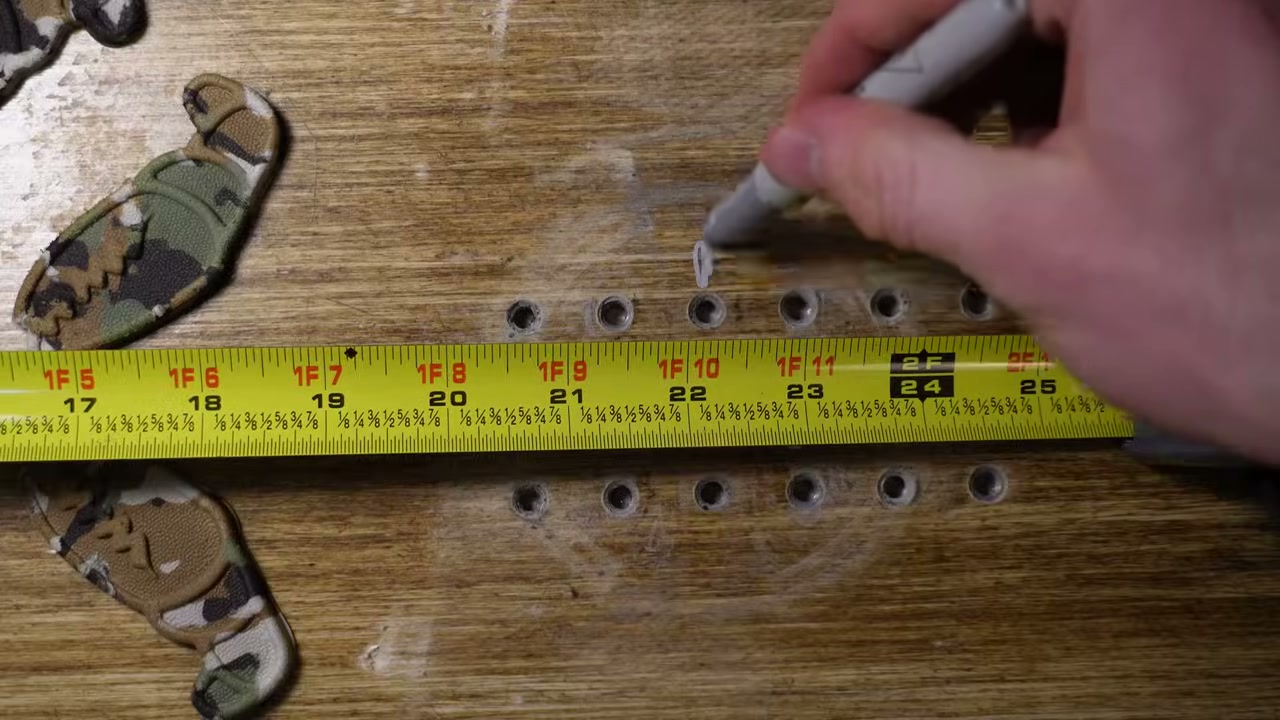
- Set the disc to your angle, lining it up with the number you chose (5:20).
- Put all four screws in loosely first, then tighten each one as far as you can (5:26).
- Use a number 3 screwdriver, not a drill (5:35). The wrong screwdriver strips the screws, and a drill can force them too far.
If your board has Burton’s channel instead of four-hole inserts, only use the short black screws that come for the channel (5:53). The longer silver ones can push through into the base.
Fine-tuning: boots, straps and forward lean
Once the bindings are on, the same channel’s second video covers the adjustments most people skip.
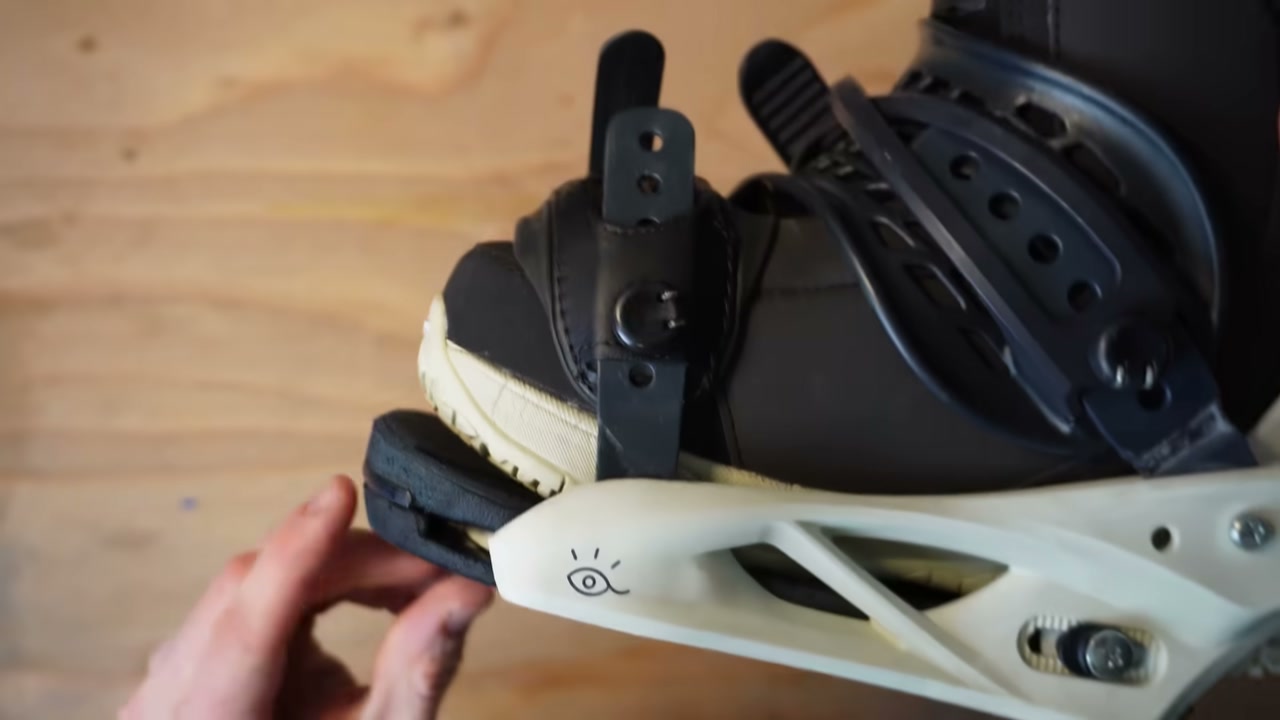
- Centre your boot on the binding (1:37). You want roughly the same amount of toe and heel hanging over the footbed, with the tip of the toe just overhanging (2:03). If you get toe or heel drag in turns, the video shows how to shift the binding across the width of the board to fix it (4:20).
- Set the straps so they sit centred on your boot when fully ratcheted (2:40). If the ratchet is nearly at the end of its ladder, shorten the strap.
- Forward lean is the angle of the highback behind your calf (0:19). More lean bends your knees more, which makes it easier to start a turn and stay on your edge. If you have always ridden with none, he suggests starting at two or three notches, the same on both bindings (1:18).
Common mistakes
Going too wide or too narrow. Too narrow costs you power and balance, too wide locks up your hips. Measure rather than guess.
Trusting the reference stance blindly. It is a starting point, and it varies between brands.
A drill or the wrong screwdriver. Stripped screws are a day ruined. Hand tighten with a number 3, all four screws in before any are fully tight.
Boots not centred. Roughly equal toe and heel over the footbed is the aim, with the tip of the toe just overhanging.
Leaving the straps as they came. Fit them to your boots at home, not in the car park.
Before you ride
Stand on the board in your boots on the carpet and check it feels balanced and comfortable, then check every screw is fully tight. Setting up at home, as SnowboardProCamp says, saves you having to do it on the mountain.
What to learn next
With the board set up, the next rungs are all on the snow.
- How to ride a button lift, because you will need to get up the hill.
- How to warm up for a day of snowboarding.
- How to ollie on a snowboard, the first trick on the ladder.
Frequently Asked Questions
What angles should I set my snowboard bindings at as a beginner?
A common first setup is +12 on the front binding and -9 on the back, with both feet turned slightly outwards. Search of Snowboarding suggests exactly that for a first setup. You can adjust in 3 degree steps as you find out what feels comfortable.
How wide should my snowboard stance be?
Measure your lower leg from the floor to the top of your bent knee, or jump off a sofa, land in a snowboard stance and measure between the centres of your feet. Use that as your width between binding centres. The reference stance marked on your board is a starting point, but it varies between brands.
How do I know if I am regular or goofy?
Regular is left foot forward, goofy is right foot forward. One test is to run in socks and slide across a smooth floor. The foot you put forward is probably your front foot. If you are not sure, set both bindings at the same angle so you can try both ways.
What does a positive or negative binding angle mean?
Positive means the binding is turned towards the nose of the board, negative means turned towards the tail. The front binding is quoted first, so “+15 -15” is a symmetrical stance with both feet turned out.
Can I use a drill to mount my snowboard bindings?
Search of Snowboarding says not to, because a drill can force the screws too far. Use a number 3 screwdriver, put all four screws in loosely first, then tighten each one fully by hand.
What does forward lean do on snowboard bindings?
Forward lean angles the highback behind your calf. More lean bends your knees more, which makes it easier to start turns and hold an edge. If you have never used it, try two or three notches, the same on both bindings.
In short
Two numbers: width from your lower leg, angles starting around +12 and -9. Mark the inserts, hand tighten every screw, centre your boots and fit the straps at home.
Tonight, do the lower leg measurement and the sofa jump, and compare them with the reference stance on your board. Then set it up and stand on it on the carpet before your first day.
Ask any questions in the comments below.