So your board feels slow. You are unstrapping halfway along a traverse while everyone else glides past, and the shop wants twenty-odd quid to sort it out.
Here is the short answer. Hot waxing a board at home takes about forty minutes, most of which is waiting for it to cool. You clean the base, drip wax onto it off a hot iron, spread the wax with the iron, let it cool, scrape almost all of it back off, and then brush it. The scraping and brushing are not optional tidying up. They are the steps that make the wax work.
The two ways people actually damage a board doing this are leaving the iron sitting still in one place and using a metal scraper. Both are easy to avoid once you know.
Watch it first
evo is the pick here, and their video is five and a half minutes, chaptered, and gets from an unwaxed board to a finished one without missing a step out.
Worth being straight about one thing. evo is a shop, and the video finishes by inviting you to come and talk to them about kit. What it does not do is push a particular brand of wax at you or hand you a discount code, which is more than can be said for a lot of the waxing videos on YouTube. The method in it is the standard one, and the chapter list means you can jump back to the bit you are stuck on while your iron is heating up.
If you want to skip around, the workspace and tools are at 0:37, choosing a wax at 1:10, irons at 1:47, cleaning the base at 2:25, dripping and ironing at 2:48, scraping at 3:32, and brushing at 4:07.
What you need
The list is short. Wax, an iron, a scraper, one or more brushes and a clean cloth.
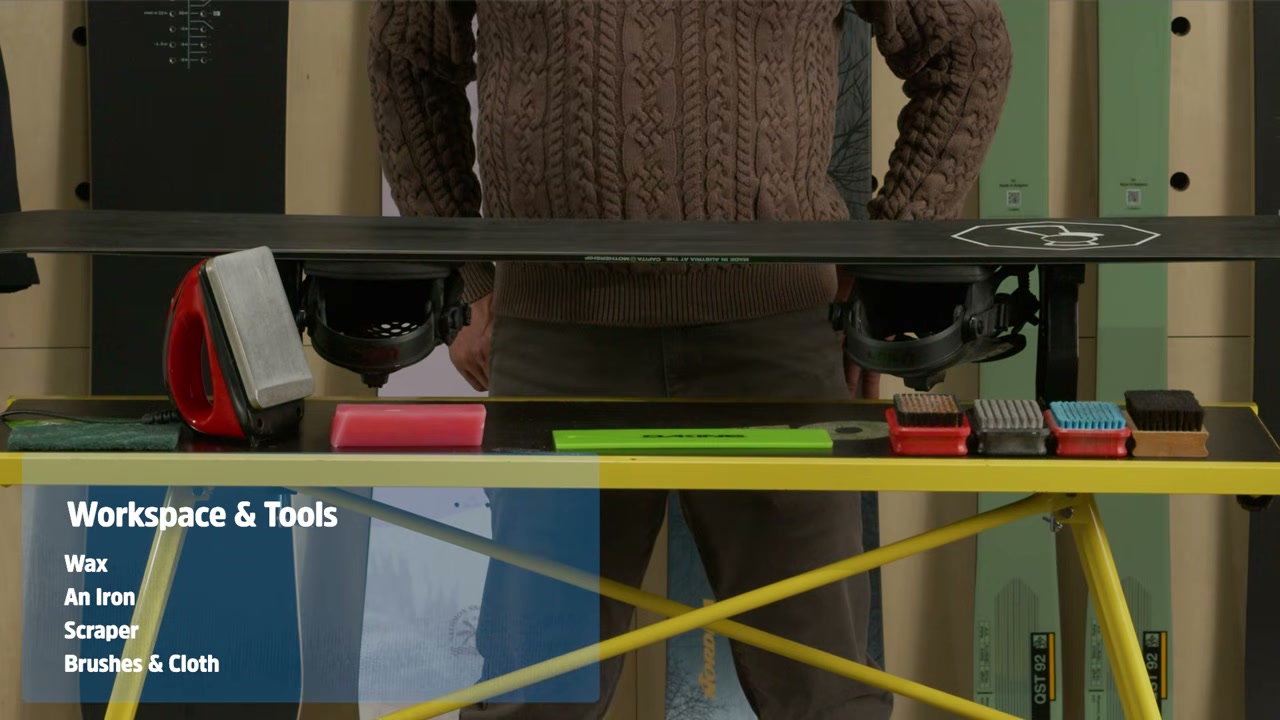
The iron is the bit worth thinking about. A wax-specific iron is calibrated in degrees rather than fabric settings and holds its temperature more accurately, which matters because the whole job is about not overheating the base. If you plan to do this more than once a season, get one.
You can use a clothes iron. Two things to know before you do. It will never go near clothes again, and you want it set somewhere at the low end of wool.
There is a simple test for whether the temperature is right, and it beats guessing. If the wax smokes when it touches the iron, the iron is too hot. If it is not melting and dripping steadily, it is too cool.
Where to do it
Not on a nice carpet, and not on hardwood. You are going to drip.
A workbench or a garage is ideal. What you actually need is something that supports the board solidly under the nose and the tail, and enough room to work the whole length of it. A snowboard-specific vice is the proper answer. Two sawhorses set apart on the garage floor will do the job.
You may need to take the bindings off to get the board to sit flat on a bench. Annoying, but it is five minutes and it makes everything else easier.
Which wax
Two decisions, and neither is difficult.
All-temperature or temperature-specific. All-temperature wax covers a wide range and is the sensible choice if you are travelling or you do not know what the snow is going to do. Temperature-specific waxes work across a narrower band, so you have to pick the right one for the conditions, but they are faster when you get it right.
Cheap or expensive. The pricier grades are aimed at racing. For starting out, the lower-cost waxes are a good bet.
If you are reading this in the UK in September with a trip booked and no idea what you will find, all-temperature at the cheap end is the answer.
The five steps
1. Clean the base
Do any tuning first. That means edge sharpening, bevelling and any belt or stone grinding, all before wax goes anywhere near it.
Then wipe the base down with a clean cloth to get rid of debris. A Scotchbrite pad works too. If it is properly dirty or oily, rubbing alcohol or a base cleaner on the cloth will shift it.
Then let it dry completely. Wax onto a damp base is wasted wax.
If your board is heading for rails and boxes, this is also the moment to sort the edges, because detuning is tuning work and belongs before the wax, not after it.
2. Drip the wax on
Preheat the iron to around 260°F, which is about 127°C, or whatever the wax packet says, and give it a few minutes to settle.
Hold the bar of wax against the iron over the board so it drips onto the base. Run a line down the length of it.
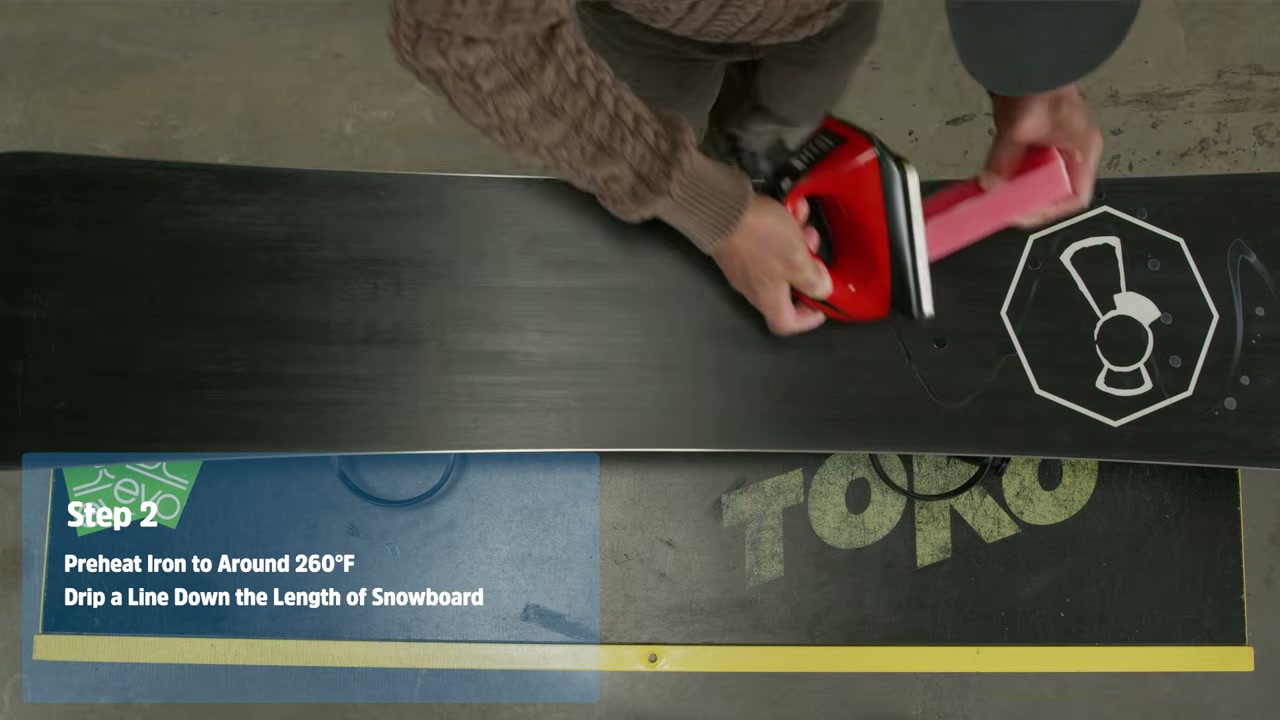
Use the least wax you can get away with while still covering the whole base. Almost all of it is coming off again in step four, so every extra drip is just more scraping. Getting a feel for how much is enough takes a few goes.
3. Iron it in
Now spread the wax evenly across the base with the iron.
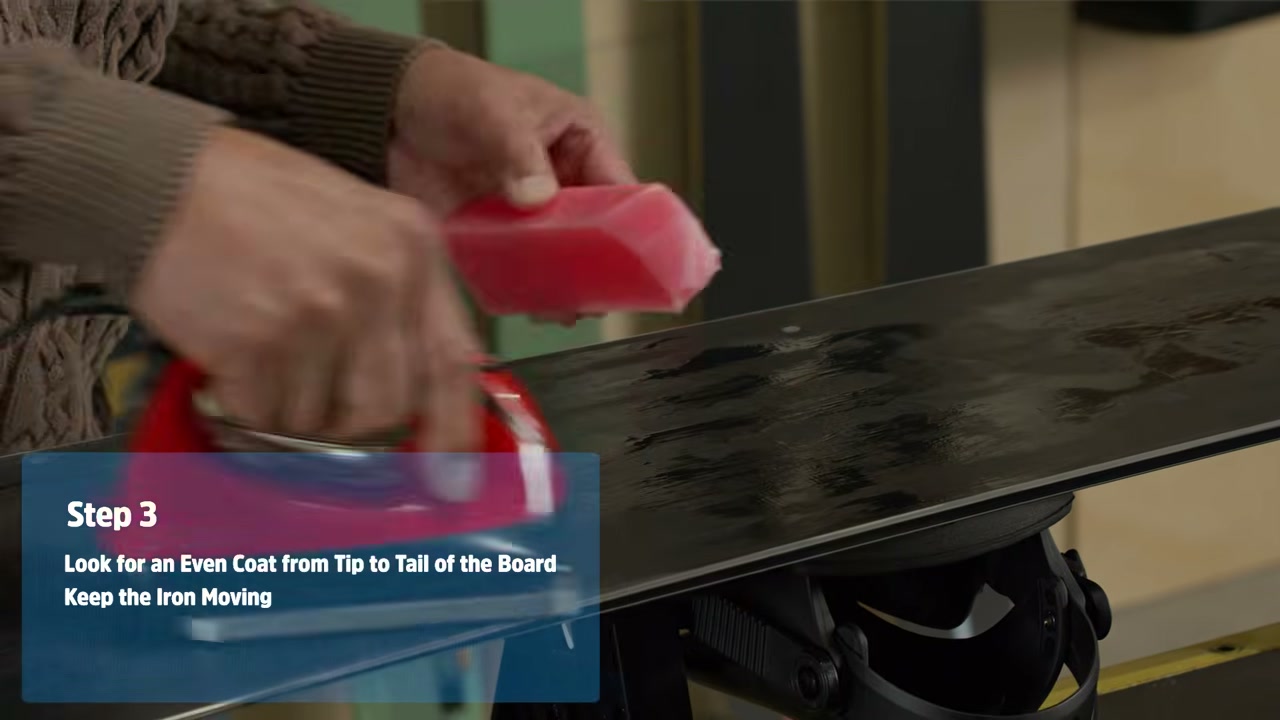
Here is the rule that protects your board. Do not let the iron sit still in one spot, and be especially careful over the inserts, the threaded holes your bindings bolt into. A good pace is two to three inches of travel per second, which is roughly five to eight centimetres.
Make a second pass to be sure you have got the whole base, and touch up any bare patches.
Then leave it alone. Twenty to thirty minutes, until the board is cool to the touch. This is the boring bit and it is also the bit people skip.
4. Scrape it off
Yes, off. Nearly all of it.
Use a plastic scraper, not a metal one. A metal scraper can gouge the base, and a gouged base is a repair job rather than a waxing job. Plastic scrapers do need sharpening now and then so they stay square and cut cleanly through the wax rather than skidding over it.
Work tip to tail, holding the scraper at about 45 degrees.
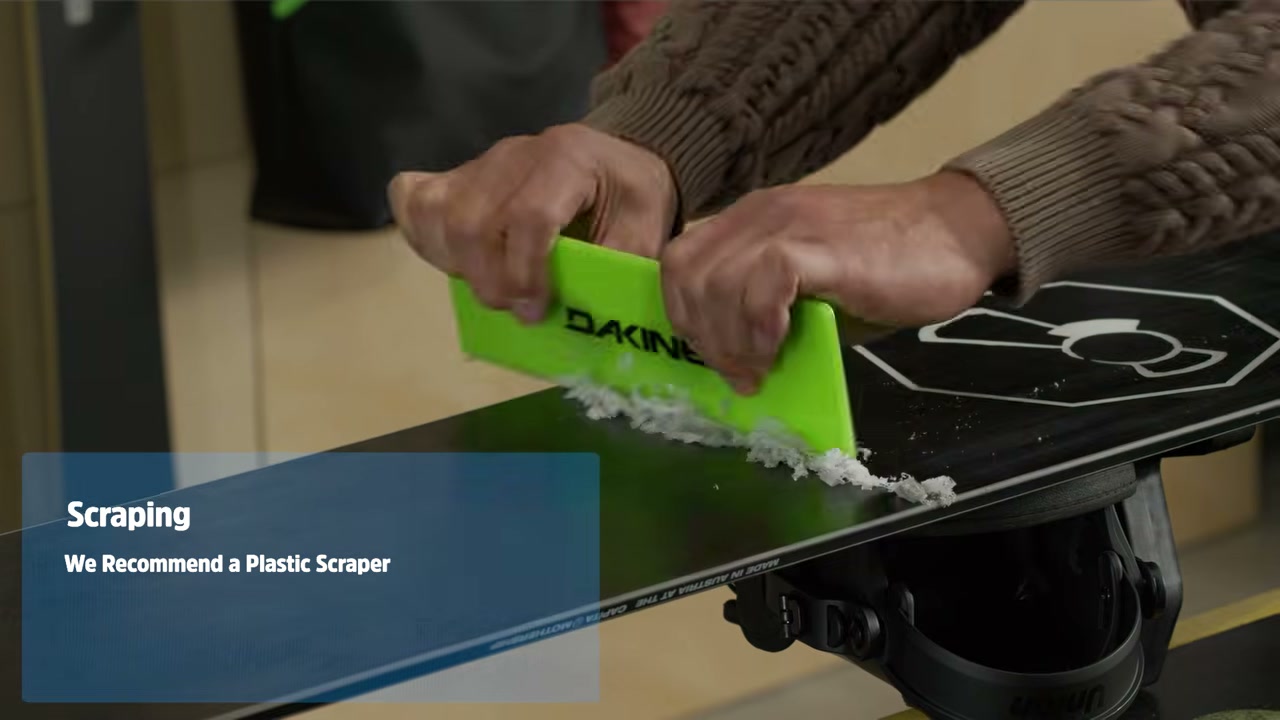
Keep going until you can see the texture of the base showing through. Only the thinnest film should be left.
This is where most people stop too early. Under-scraping is the single most common mistake, and it is the reason a freshly waxed board can still feel slow. What you are after is not a coating of wax sitting on the base. It is the thinnest possible film with the base’s own texture visible through it.
Do the side edges as well, but use the narrow end of the scraper rather than the long edge that sits against your base.
5. Brush it
The last step, and the one most home waxers have never done.
Brushing is what exposes the structure of the base, the fine texture ground into it at the factory, so the board runs on that rather than on a film of wax.
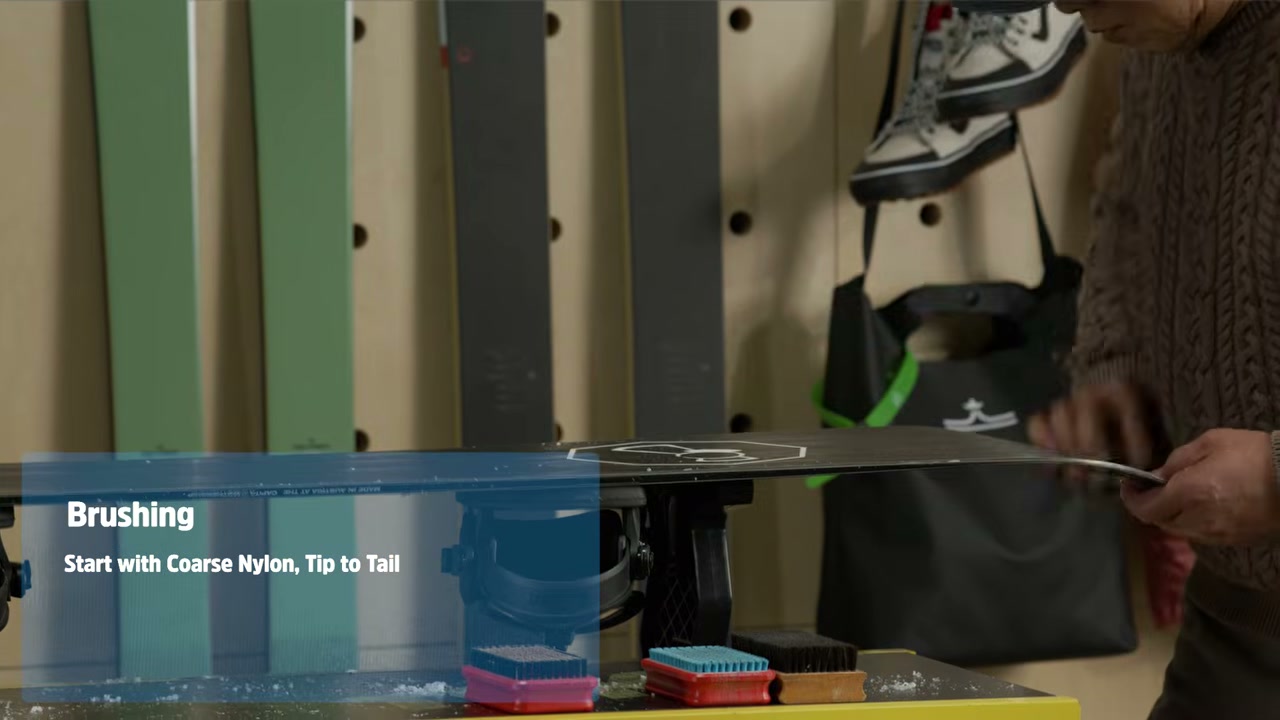
The three brush types are brass, nylon and horsehair, and you go coarse to fine. Brass is used before waxing, to open the structure up. Coarse nylon comes straight after scraping. Fine nylon or horsehair go last.
Which one you finish with depends on the snow. The colder the snow, the finer the brush. Coarse nylon is fine for wet spring conditions, fine nylon for midwinter, and horsehair is usually the pick for cold powder.
Start with the coarse nylon, tip to tail, in strokes of roughly six to ten inches, or fifteen to twenty-five centimetres.
You should see small white flecks lifting off as you brush. That is wax coming out. If you are not seeing them, you are not brushing hard enough.
You cannot really over-brush. Five minutes is a good target. You are done when the base looks uniformly shiny, almost oily, and you can see its texture.
So how often should I be doing this?
The honest answer from the video is that you cannot really wax too much, and that doing it regularly is the habit to get into rather than a number to hit.
The practical version is the symptom. If you are struggling to hold your own across the flats, or you are having to unstrap to finish a traverse that used to be fine, your board wants wax.
The video also makes the point that wax protects the base from abrasion, so this is maintenance as much as it is performance.
Where this sits in your setup
Waxing is one of three jobs that make a board ready before the season starts, and they go in order.
Tune the edges first, including detuning the tip and tail if you are riding rails and boxes. Wax second, because wax goes on after tuning. And set your bindings up last, or take them off and put them back, since you may have had them off for the waxing anyway.
Get all three done in an evening in the garage and the first day of the trip is about riding rather than faffing.
Frequently Asked Questions
How do you wax a snowboard at home?
Clean the base with a cloth, preheat a waxing iron to around 260°F or 127°C, drip wax onto the base off the iron, spread it with the iron while keeping the iron moving, let the board cool for 20 to 30 minutes, scrape nearly all the wax off with a plastic scraper, then brush the base tip to tail until it looks uniformly shiny.
Can you use a normal clothes iron to wax a snowboard?
You can, with two caveats. You will not be able to use it on clothes afterwards, and you need it set at the low end of the wool setting. A wax-specific iron is calibrated in degrees and holds temperature more accurately, which is why it is worth buying if you will wax more than once a season.
How hot should the iron be for waxing a snowboard?
Around 260°F, which is about 127°C, or whatever the wax packet recommends. The quick check is that wax smoking on contact means the iron is too hot, and wax that will not melt and drip steadily means it is too cool.
Why do you scrape all the wax off a snowboard?
Because what you want is the thinnest possible film, not a coating sitting on top of the base. Scrape until the texture of the base shows through. Under-scraping is the most common mistake people make.
Do you need to brush a snowboard after waxing?
It is the step that exposes the base structure, so the board runs on its own texture rather than on a film of wax. Go coarse to fine, tip to tail, for about five minutes, and finish with a finer brush the colder the snow is.
Can you wax a snowboard too often?
The video’s answer is that you cannot really wax too much. Wax protects the base from abrasion as well as making the board faster, so regular waxing is maintenance rather than indulgence.
In short
Clean it, drip it, iron it while keeping the iron moving, cool it, scrape it back to almost nothing, then brush it until it shines.
The two mistakes worth avoiding are parking the iron in one place and reaching for a metal scraper. The mistake worth fixing is stopping scraping too soon, because that is the one quietly costing you speed.
Do one board this week rather than the night before you fly. The first one always takes longer than you think, and it is a much nicer job when there is no rush.
Ask any questions in the comments below.