So you have hit a rock, and now there is a gouge in the bottom of your board. The good news is you can usually fix it yourself.
Here is how to repair a snowboard base, in short. Light scratches can be filled with wax, but a proper gouge needs P-Tex, a stick of base plastic that you light, drip into the damage and then cut back flush. You clean the gouge, drip the P-Tex in a layer at a time until it stands proud of the base, let it cool, then file and scrape it flat and wax the board. Most of the time is spent waiting for it to cool.
Two things before you start. You are working with a naked flame, burning plastic and a solvent cleaner, so the safety points below come first. And some damage is a shop job, not a kitchen-table one. We will cover how to tell the difference.
Watch it first
The pick is from Whitelines, the UK snowboard magazine. The whole job, from a ragged gouge to a flush base ready for wax, is in just over two minutes, filmed close up on a real board with nothing skipped. It also shows the bits that trip people up, like catching the first drips off the board and stubbing the stick out when the flame goes out.
The video sells nothing. No brand of P-Tex is pushed and there is no discount code. What it does not cover is ventilation, or when to give up and take the board to a shop, so we have added both from other sources.
If you want to jump around, trimming the gouge is at 0:25, cleaning at 0:30, lighting the P-Tex at 0:38, dripping it in at 1:02, building up layers at 1:21, cutting and filing at 1:40, scraping at 1:56 and the wax at 2:10.
Fire and fumes come first
Burning P-Tex gives off fumes, so work somewhere well ventilated. Next Adventure’s repair video puts a well-ventilated area on its kit list (0:57). Burton’s maintenance guide says P-Tex fumes are toxic and recommends a ventilated space, a respirator and gloves, and Start Haus, a ski shop, says the same in its video description. A garage with the door open beats the kitchen.
Let the base cleaner dry completely before you light anything. Burton says the area should be completely dry before you go on, and iFixit’s guide allows 20 minutes to an hour. Rubbing alcohol, which some guides use instead of base cleaner, is a highly flammable liquid, and its vapour can catch from a flame.
Molten P-Tex is very hot. As the Whitelines video says at 0:51, be very careful not to let it land on your hand. Burton warns that it can cause severe burns on bare skin.
Catch the drips. Keep a scrap of wood or a metal scraper next to the board to take the first drips, and to stub the stick out on when you need to (0:57 and 1:16). Work on a solid surface you do not mind getting dripped on, with the board held still.
Can you fix it yourself, or does it need a shop?
Most gouges are a home job. The video sets out the easy case at the start (0:06 to 0:23). If you ride off-piste at all, sooner or later you will hit a rock. Superficial scratches can be filled with wax, and deeper gouges need P-Tex. It is easiest when the damage is away from the edge and the area you are filling is black.
So what makes it a shop job? Burton lists large gouges, core shots, the base coming away from the core, and blown-out edges as work for a shop. Next Adventure says the same about an extra-large gouge or one along the metal edge (2:25).
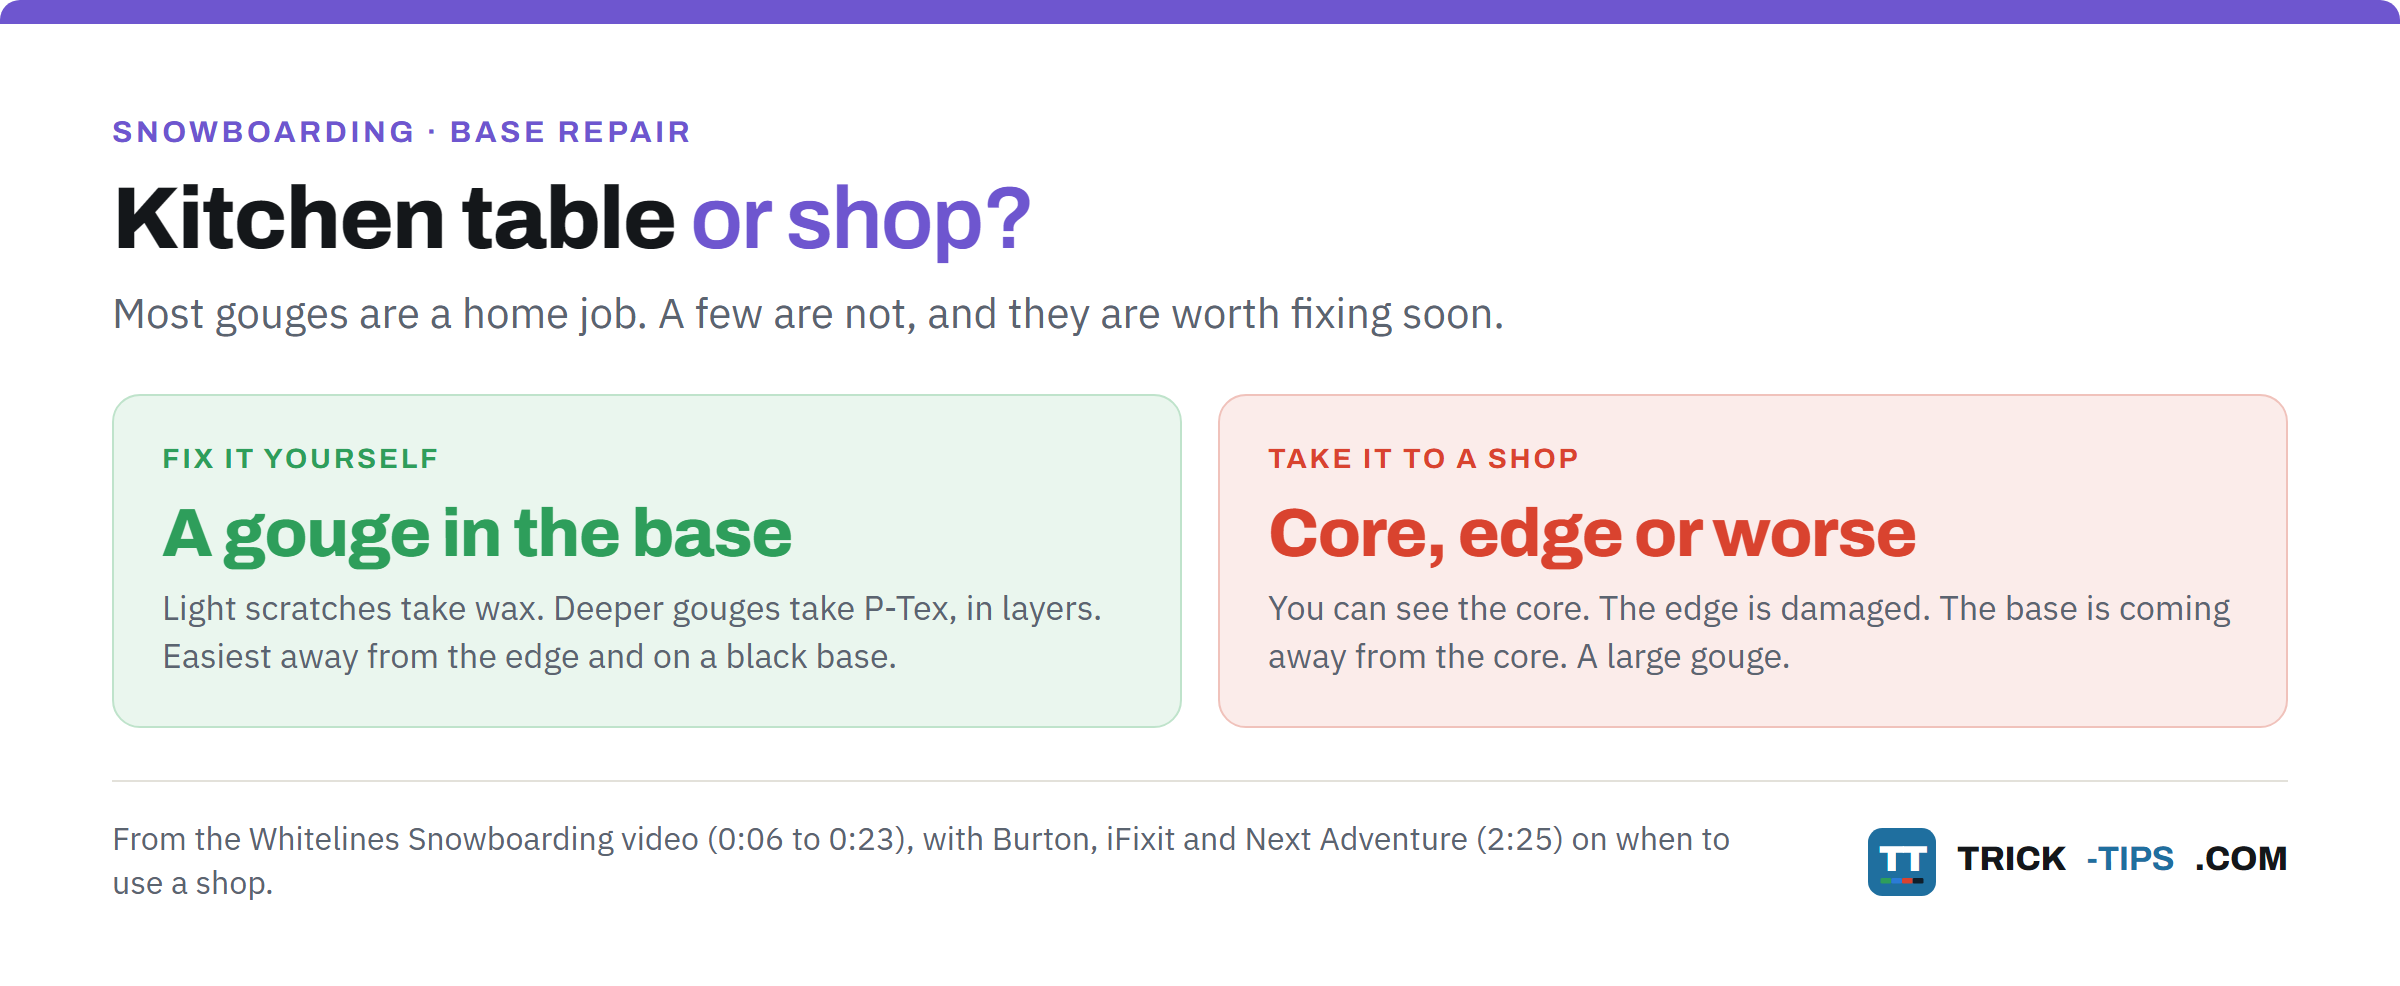
A core shot is a gouge deep enough to go through the base to the core underneath. Guides do not agree on these. Next Adventure says you can fix most core shots at home (0:40), while Burton and iFixit both say a gouge that exposes the core should go to a shop. Either way, do not leave it. As Next Adventure explains at 0:23, a core shot lets water soak into the inner layers, and that can make them separate.
Burton and iFixit’s advice is the safer one to follow. If you can see the core at the bottom of the gouge, let a shop look at it. If the board has had a lot of gouges filled already, or the damage is somewhere a repair will not fix, our guide to when to replace snowboard gear walks through the repair-or-replace call.
What you need to repair a snowboard base
Everything here is in the video, apart from the wax and the sandpaper.
- A sharp knife for trimming the gouge and the excess.
- Base cleaner, a scourer and a cloth.
- An everyday wax candle, for a steady flame.
- A P-Tex stick. Black for a black base. For a coloured or clear base, clear P-Tex is the usual pick (more on that below).
- A scrap of wood or a metal scraper to catch drips.
- A bastard file, which is a coarse file.
- A metal scraper, or a sharp-edged plastic one.
- Wax and a waxing iron for the last step.
- Optional, sandpaper of around 120 to 150 grit, see Beyond the video.
How to P-Tex a snowboard, step by step
The video runs through the whole repair from 0:25. We have grouped it into five steps.
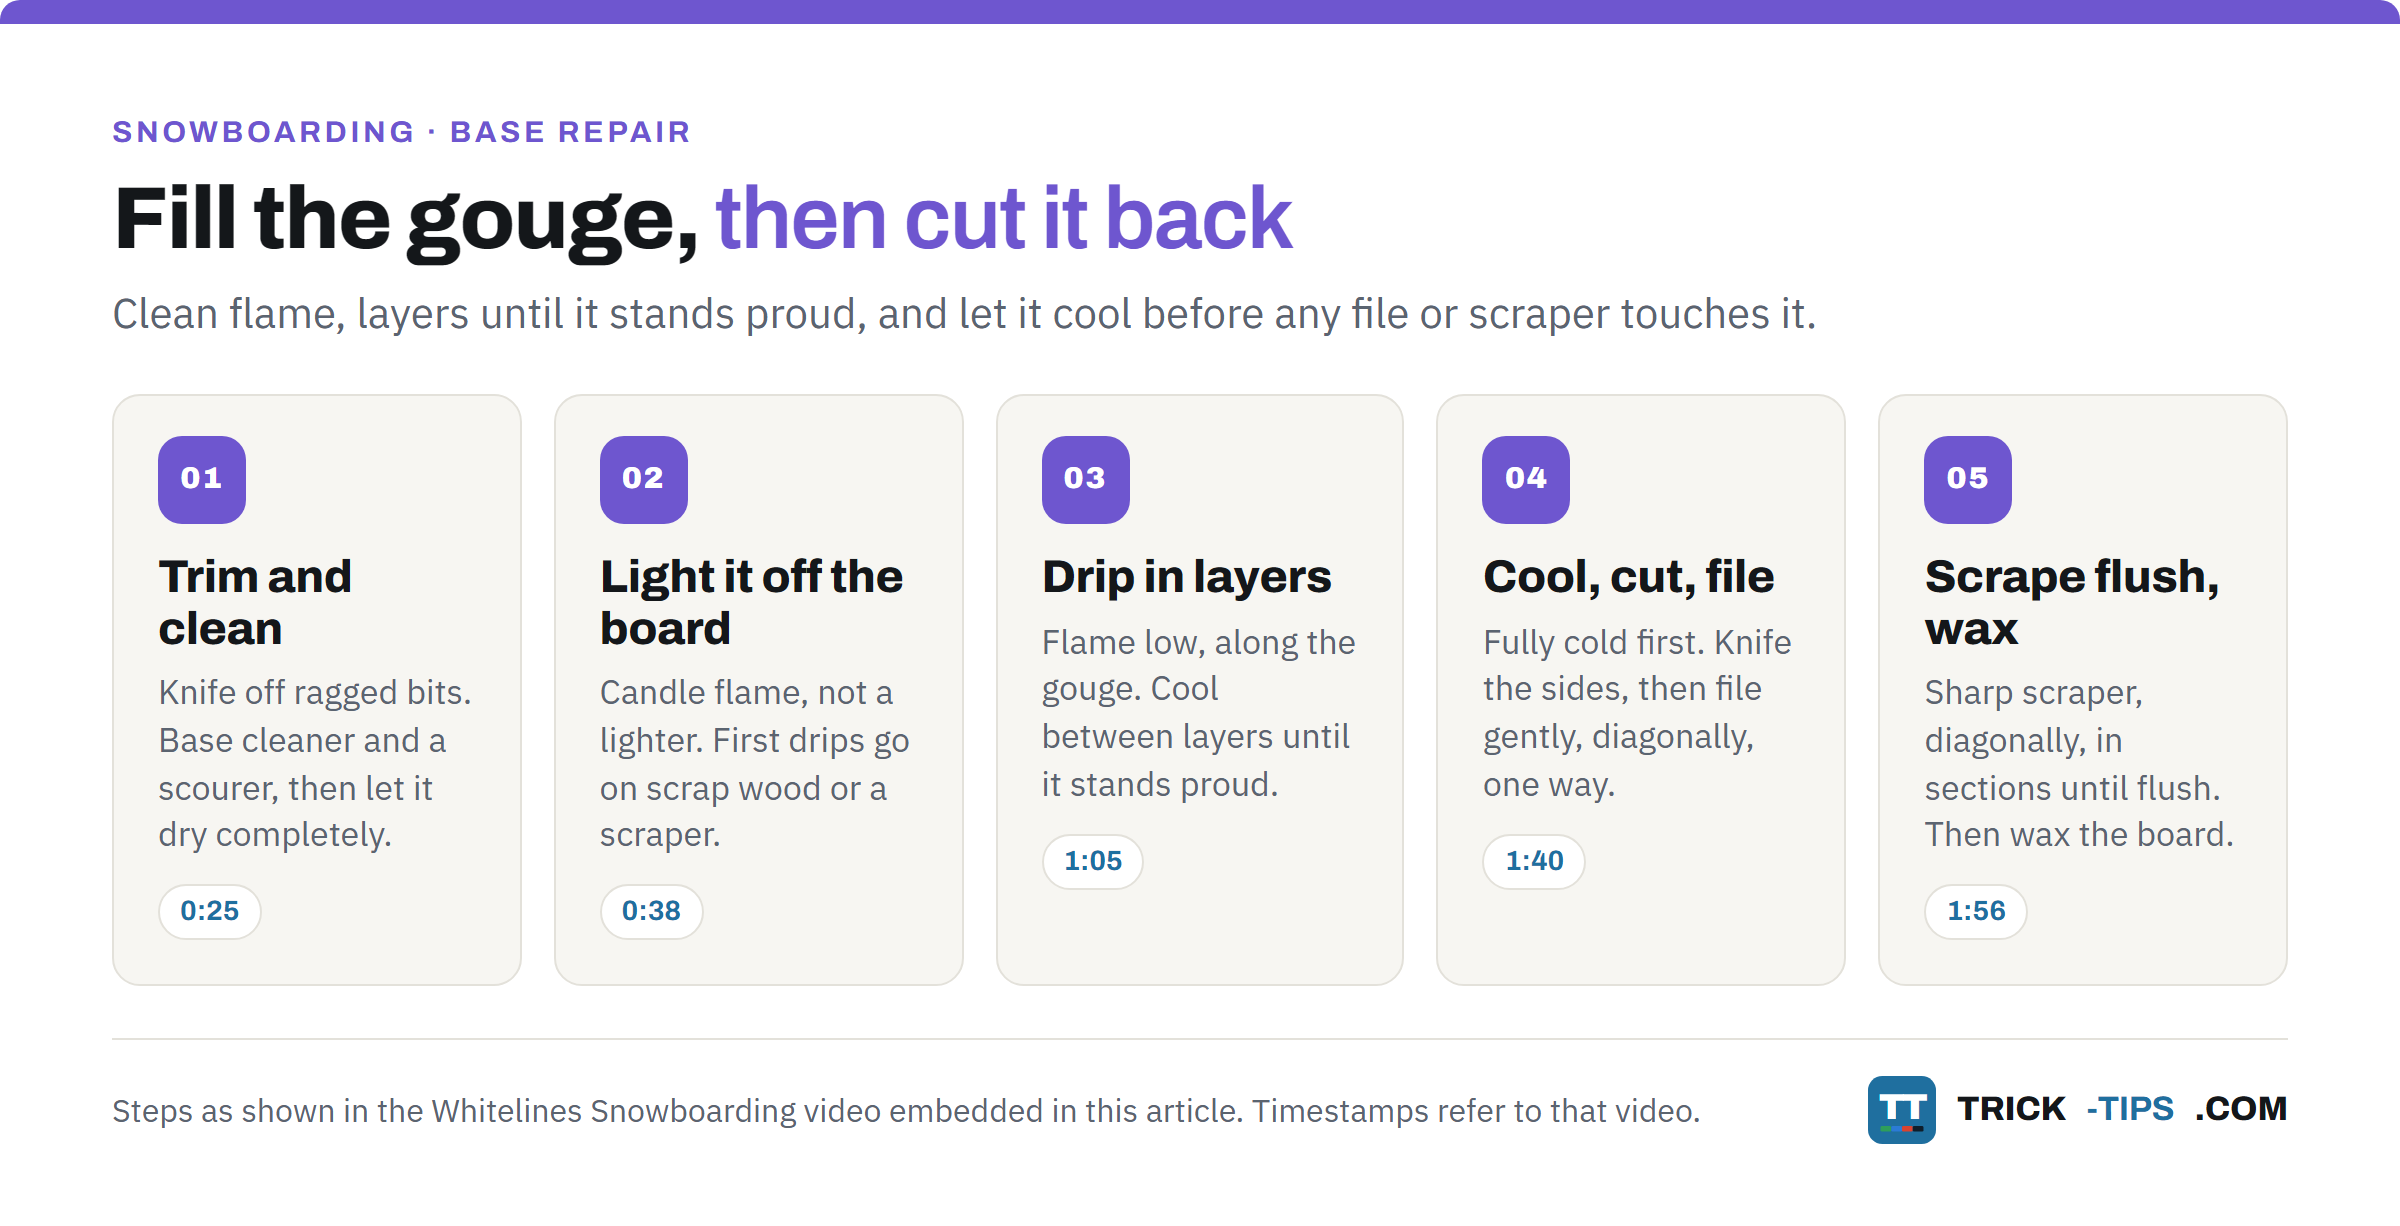
1. Trim and clean the gouge
If there are any ragged bits of base hanging off, take a sharp knife and carefully tidy the edges of the gouge (0:25). As Start Haus puts it in their longer video (1:43), anything loose makes the repair more likely to fall out.
Then clean the area with base cleaner and a scourer, and wipe it dry with a cloth (0:30). Let it dry completely before the candle comes out.
2. Light the P-Tex off the board
Light an everyday wax candle and put it nearby (0:38). The video’s point is that a steady flame is much easier to work with than a lighter (0:44). P-Tex can be slow to light, as Next Adventure says (1:13), and a candle gives it as long as it needs.
Hold the end of the stick in the candle flame until it glows blue and then catches (0:46). Do this over your scrap wood or metal scraper, not over the board, and let the first drips land there (0:57).
Why waste the first drips? Start Haus shows it well in their longer video (3:52 to 4:16). Straight after lighting, the stick drips with a lot of black soot, and once that burns off the drips come out much cleaner. Those first sooty drips are the ones you do not want in your base.
3. Drip it in, in layers, until it stands proud
Once the P-Tex is melting, move it over the gouge and run it along the length, letting the drips fill the space (1:05). Keep it moving rather than piling it up in one spot.
Keep the flame low, close to the board (1:12). If it goes out, stub the end on your scrap wood or scraper and relight it (1:16).
After one or two passes, put the stick out and let that layer cool for a while (1:21). The deeper the gouge, the more layers it takes (1:28). Keep going until the damage is completely filled and the new P-Tex is standing proud of the base (1:33). Burton’s guide asks for the same thing, a slightly raised area, and iFixit adds that P-Tex shrinks as it cools, so overfill.
Why keep the flame low?
The video’s reason is carbon (1:12). A tall, yellow, sooty flame puts black carbon into the molten P-Tex. Burton and iFixit both say carbon in the repair stops it bonding properly to the base, and Start Haus says a repair full of carbon is much more likely to rip out, either when you scrape it or when you ride (6:28). So a small, clean flame held low is what makes the repair last.
4. Let it cool, then cut and file it back
Leave the board to cool completely (1:40). Do not rush this. evo’s repair guide waits until the area is cool to the touch, which it puts at around half an hour.
Then take your knife and cut the excess off the sides of the repair (1:40). Next, run the bastard file diagonally across the repair (1:45). Go gently and patiently, always in the same direction, so you do not rip the filling back out (1:50).
5. Scrape it flush, then wax
When the repair is almost flat, switch to a metal scraper or a sharp-edged plastic one and run it diagonally across the repair (1:56). Work in sections until all the excess is gone and the repair is completely flush with the base (2:02 to 2:07).
This is one place where a metal scraper is normal. Our waxing guide says plastic only, because there you are taking wax off a base you do not want to mark. Here you are cutting P-Tex back, and the video, evo’s guide and Start Haus all use a sharp metal scraper for it. Start Haus adds a useful trick at 5:14. Scraping from outside the repair into it can make the P-Tex peel and lift, so start in the middle and scrape outwards, or angle the scraper back and forth.
Then the last step, which the video ends on (2:10). Wax the board. Burton recommends a hot wax after a repair to protect it, and our guide to waxing a snowboard at home takes you through it.
Common mistakes
Lighting up too soon after cleaning. Wet cleaner and a naked flame do not mix. Let it dry completely first.
Dripping the first, sootiest drips into the gouge. Catch them on the scrap wood or scraper (0:57).
Holding the stick high with a big flame. Keep it low to the board to keep the carbon out (1:12).
Stopping when it looks level. Fill until the P-Tex stands proud of the base (1:37), then cut it back.
Filing or scraping before it is cold. The video leaves the board to cool completely first (1:40).
Filing hard or back and forth. Gently, diagonally and in one direction, or the filling can rip out (1:45 to 1:54).
Skipping the wax. The repair is not finished until the board is waxed (2:10).
Beyond the video
A few things the Whitelines video does not cover, each backed by more than one source.
Rough up the gouge before you fill it. Start Haus scores the inside of the gouge with 120-grit sandpaper before filling (0:26 and 1:19), and iFixit’s guide uses 150-grit for the same job. Start Haus’s reason is that it gives the P-Tex something to grip. Brush or blow the dust out afterwards, then clean.
Match the stick to your base. The video works on a black base and says that is the easy case (0:21). Next Adventure points out that P-Tex comes clear or in colours to match your base (0:43), and evo warns that soot from a burning stick can show in the repair if you use any colour other than black. On a coloured or clear base, clear is the usual choice, and a clean, low flame matters even more.
A candle is not the only way. You can almost never keep all the carbon out with a flame, as Start Haus says at 2:56, which is why they recommend a heated tool or a P-Tex gun over a drip stick. evo’s guide says the same, that a P-Tex gun or a base repair iron gives a cleaner, longer-lasting repair than a burning stick. If your drip repairs keep falling out, carbon is one likely reason, and a shop with those tools can do it for you.
Two more good tutorials
If you want more depth on the carbon problem, Start Haus‘s longer video is the one. It is a ski, not a snowboard, and it is thirteen minutes long, but the drip repair from 0:23 to 6:38 is the clearest look at a sooty flame against a clean one we found. It goes on to a torch-heated iron and a repair gun. Start Haus is a shop, and the description links to the tools on their store.
For a quick second take, Next Adventure‘s three-minute video covers the same drip method on a snowboard, and it is the one that says plainly when to take the board to a shop instead (2:25). It is also a shop channel, and it ends by inviting you to visit.
What to practise
If your board has more than one gouge, start with the shallowest one away from the edge. That is the easy case the video describes, and it is the place to get a feel for lighting the stick and keeping a clean flame.
Light it over the scrap, watch the first drips go from sooty to clean, then bring it to the board. Two passes, let it cool, and repeat until it stands proud. Then be patient. Cool, cut, file, scrape, wax.
Before you go
If the base has been filled a few times already, or the damage is at the edge or through the core, read when to replace snowboard gear before you spend an evening on it. And if it is time for a new board, our guide to choosing a snowboard is the place to start.
Frequently Asked Questions
Can I repair a snowboard base myself?
Yes, for most gouges. Shallow scratches can be filled with wax, and deeper gouges can be filled at home with a P-Tex stick, a candle, a knife, a file and a scraper. It is easiest when the gouge is away from the edge and on a black base. Large gouges, core shots, edge damage and a base coming away from the board are jobs for a shop.
Do I need P-Tex or just wax for a scratch?
Superficial scratches can be filled with wax, as the Whitelines video says. A deeper gouge that leaves a real hole in the base needs P-Tex, built up in layers until it stands proud and then scraped flush.
Can you light P-Tex with a lighter?
You can, but a candle is easier. The Whitelines video recommends an everyday wax candle because it gives a steady flame, and you hold the stick in it until it glows blue and catches. Light it over a scrap of wood or a metal scraper, not over the board.
Are P-Tex fumes toxic?
Yes. Burton says P-Tex fumes are toxic and recommends working in a well-ventilated area, with a respirator and gloves. Start Haus and Next Adventure also tell you to ventilate. Do it in a garage with the door open or outside, never in a closed room.
Why does my P-Tex repair keep falling out?
Usually carbon or a rushed finish. A big yellow flame puts soot into the P-Tex and stops it bonding, so keep the flame small and low and catch the first sooty drips off the board. Clean and dry the gouge first, let the repair cool completely, and file and scrape gently so you do not rip it out. If it still will not hold, a shop can fill it with a P-Tex gun or repair iron.
Do I need to wax after a base repair?
Yes. The Whitelines video finishes with waxing the board, and Burton recommends a hot wax after a repair to protect it. It is the last step of the job, not an optional extra.
In short
A gouge in your base is an evening’s job. Clean it, drip P-Tex in layers from a low, clean flame until it stands proud, let it cool, then file and scrape it flush and wax the board.
Do it somewhere ventilated, let the cleaner dry before you light anything, and catch the first drips off the board. If the damage goes through to the core or into the edge, take it to a shop.
Ask any questions in the comments below.